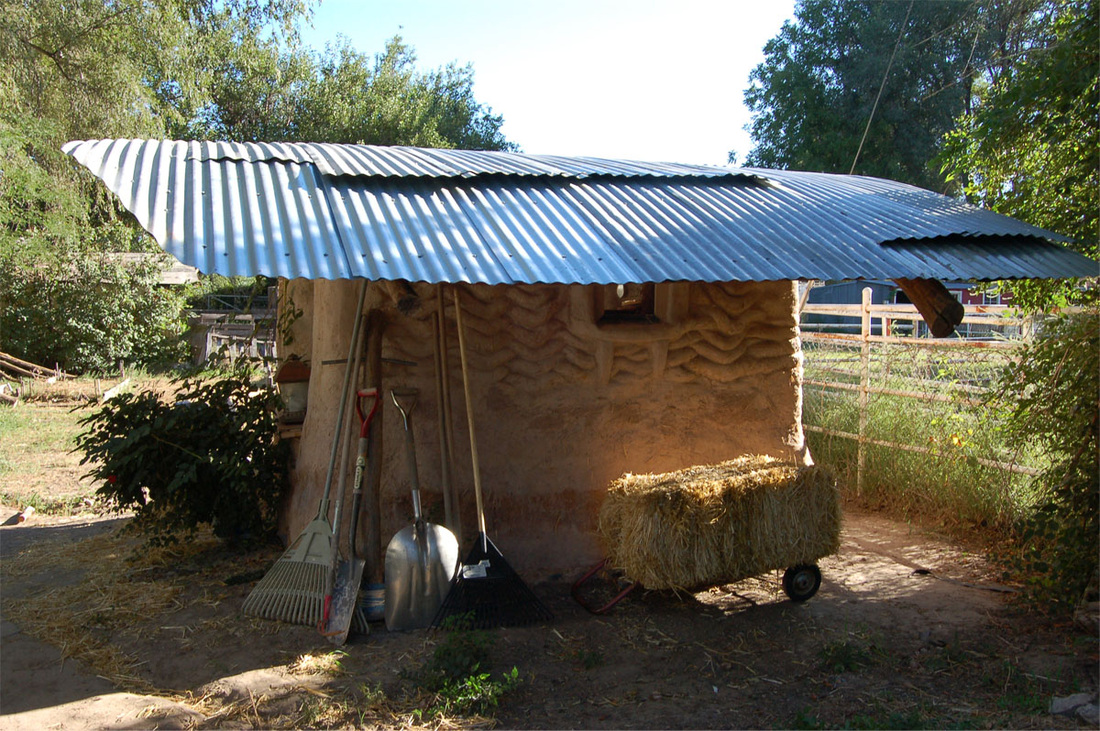
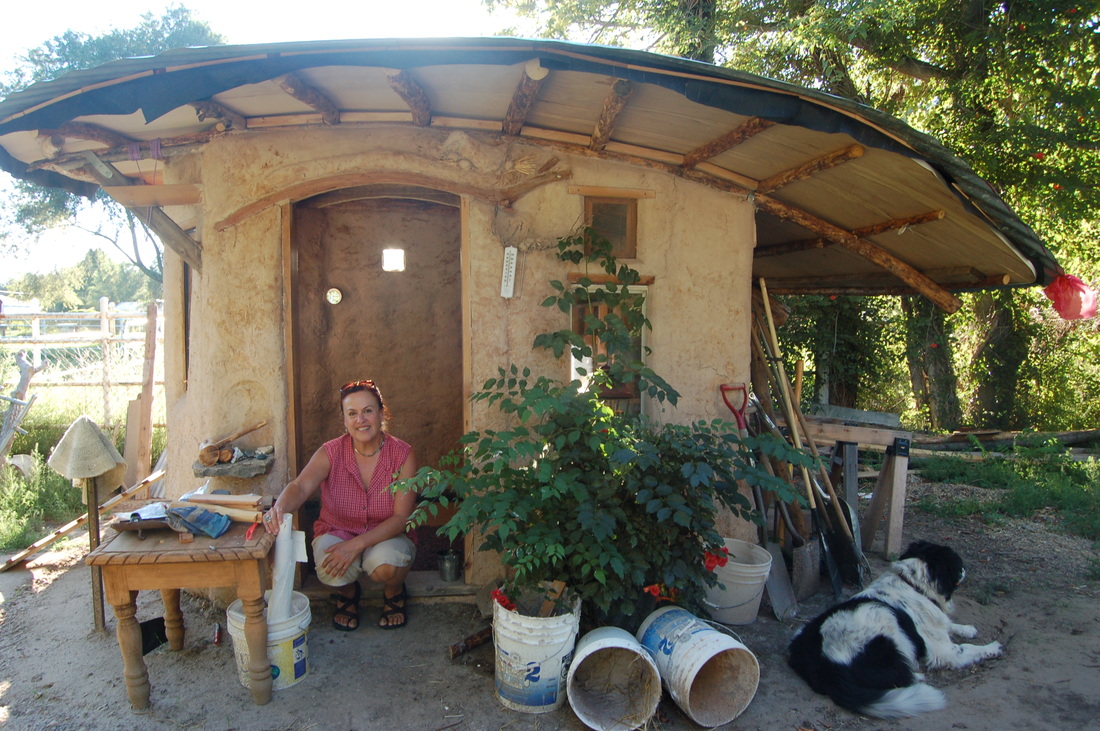
COB CHICKEN COOP
Three months, $112 cost before roof sheathing, and all the trash fit in a five gallon bucket....
HOW THE COOP BEGAN WITH AN IDEA
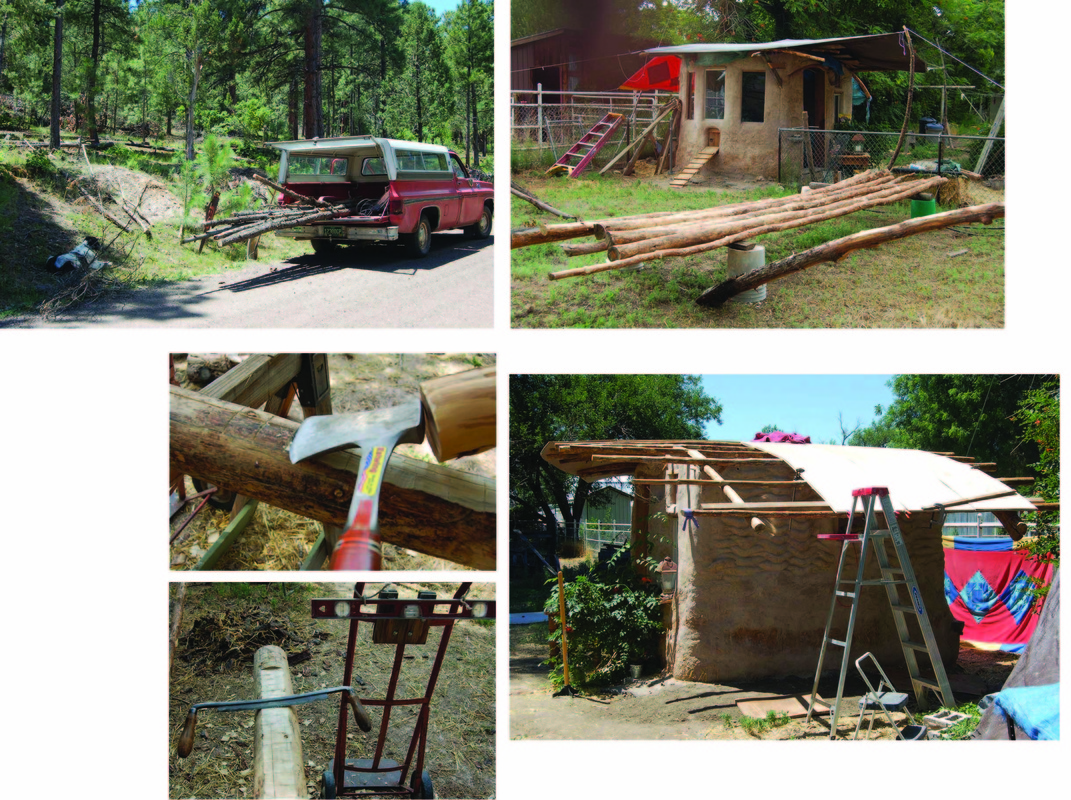
I had a big pile of soil from having dug a 2' deep foundation for the cob wall in front of my house. I kept thinking maybe you could build on top of a pile and not need to dig a deep foundation. A chicken coop seemed like a good experiment for this idea. Some friends had come help dig irrigation trenches (I have "ditch" water, an irrigation system set up by the Spaniards) and they decided to come help the next weekend with the chicken coop. The foundation is "urbanite" (broken sidewalk) with a sand/clay mortar. Lisa and the boys ended up helping most of the summer. We had a blast! The following spring when Lisa and Levi asked their boys "what was the funnest thing they could do for spring break", they said, "Go to Maya's!"
Overview
This cob technique is "pajareque". The walls can be thinner than a traditional cob wall because you make coils out of the cob and weave them between vertical poles. The vertical poles in the walls were splashboard trim torn out in my bathroom remodel. Much of the wood was from fire mitigation on my rural land...except the door frame which was heavy planks from a waterbed labelled "free" in front of my neighbor's whicht appeared the day I needed it.
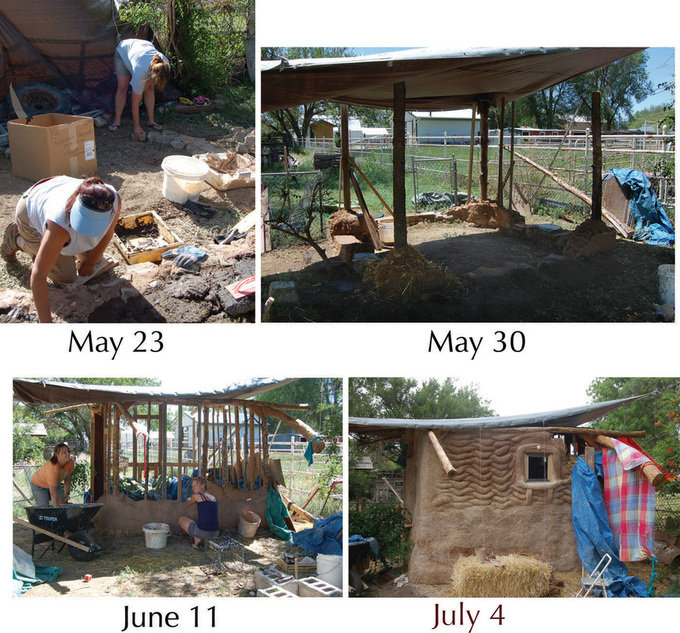
May 23: Foundation laid and soil built up around the outside using recycled asphalt and dirt
May 30: Main roof supports are embedded in cob in the corners.
June 11: The walls rise and little posts are embedded vertically.
July 4: The walls are completed around two sides and this third side is almost done.

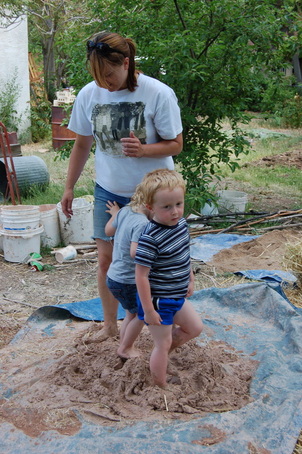
It is said cob is the perfect material for "children and old women". As you see, Carson, age three, would jump in and help at will, cobbing, or using the smaller draw knife. Truth be told, the foundation and roof take planning and skill, but can be done by "old women" with persistence and maybe a little help.
Stomping cob:
Lisa, Carson and cousin Reygan stomping cob. I hauled 90 buckets of reclaim from the university pottery studio. Cob rule: always more sand than clay. We averaged seven shovels of sand to five shovels of clay. Sprinkle with straw, stomp, flip edges of tarp, add more straw, flip again, repeat until your feet don't squish into it. Divide into lumps (cobs) or corbels (long coils) and put under a tarp until you're ready to build on the wall later in the day.
The first corner
Notice nails in the timbers and wood for the cob to grip. Fabric, straw and tarps keep cob moist from one day to the next. This is the corner we started on working counterclockwise around the building. But ss I started cobbing from the first corner going left, I realized I would want to securely complete the last wall by attaching it to this first timber at the beginning; so I left portions of the vertical timber exposed to link the final wall to it coming finally from the right.
South side for solar gain
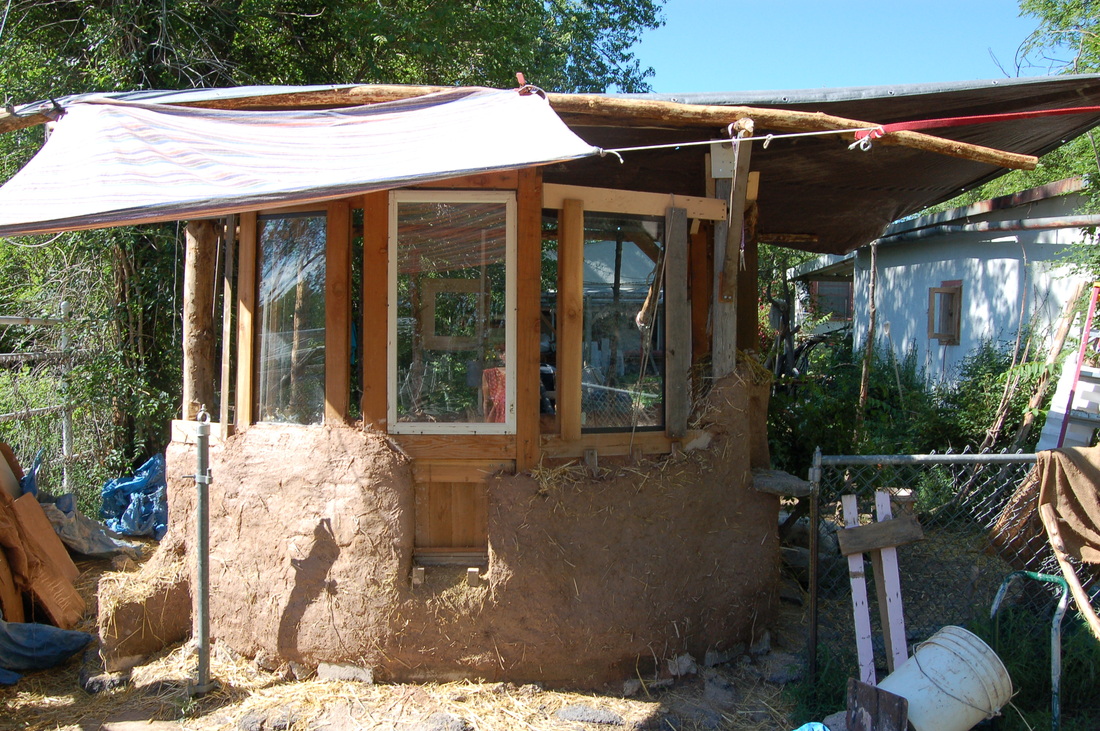
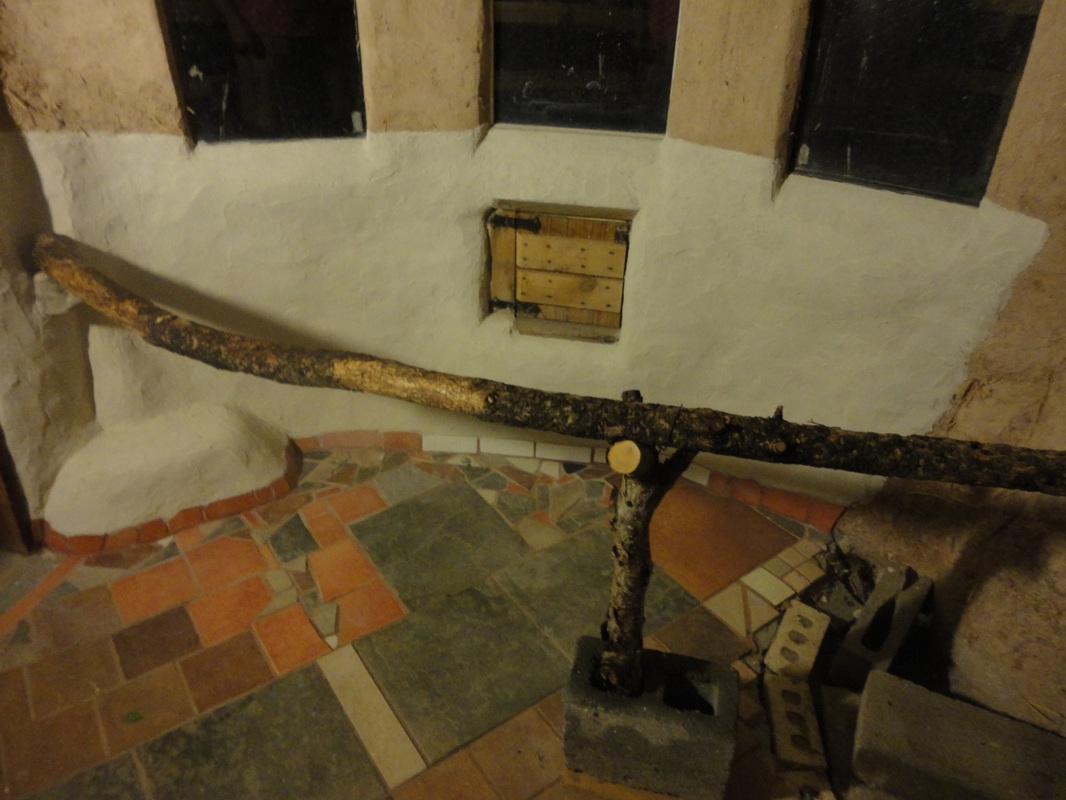
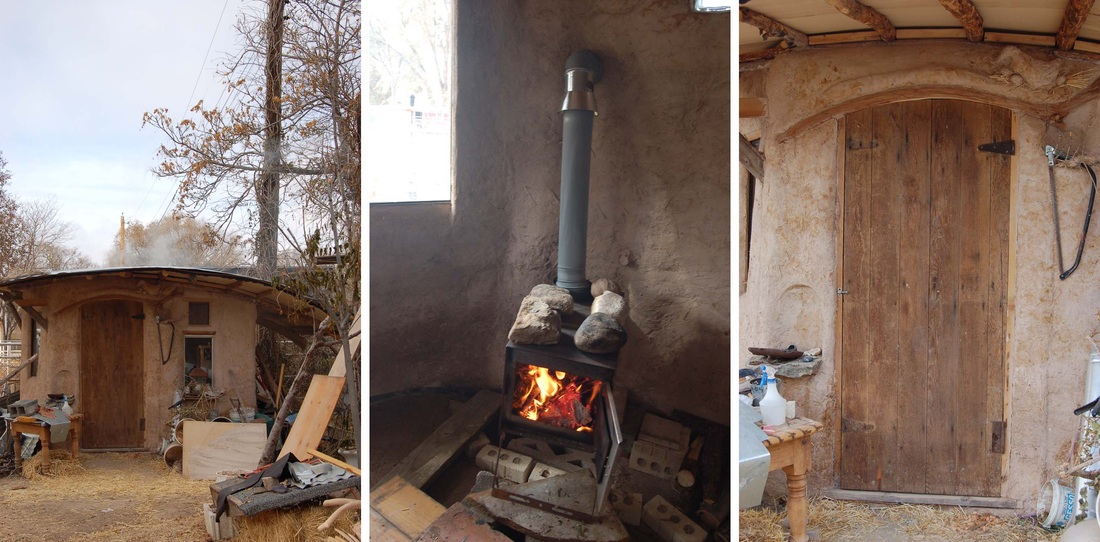
Door
The door frame was made from waterbed frame marked "free" in front of my neighbor's the day we needed it. Stone from the land for a niche by the door. I use it now to keep cracked corn on to give the chickens in the morning.

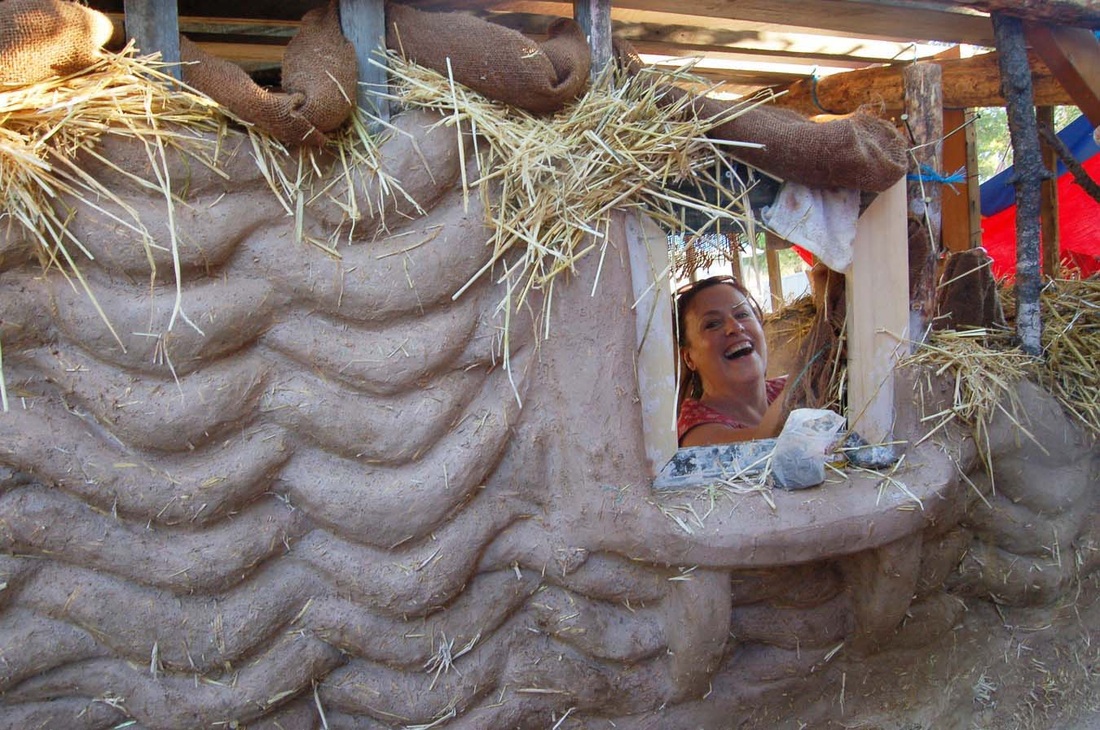
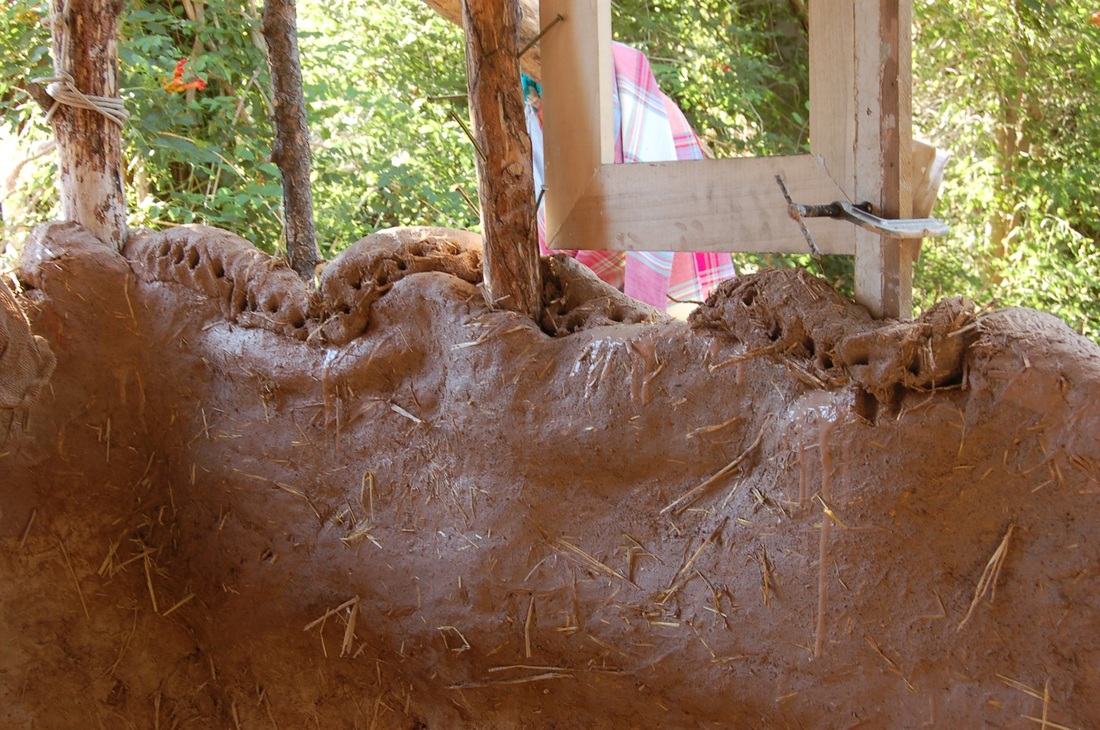
PAJAREQUE!!! Corbels are long cobs used in pajarque and structurally in arches, etc.
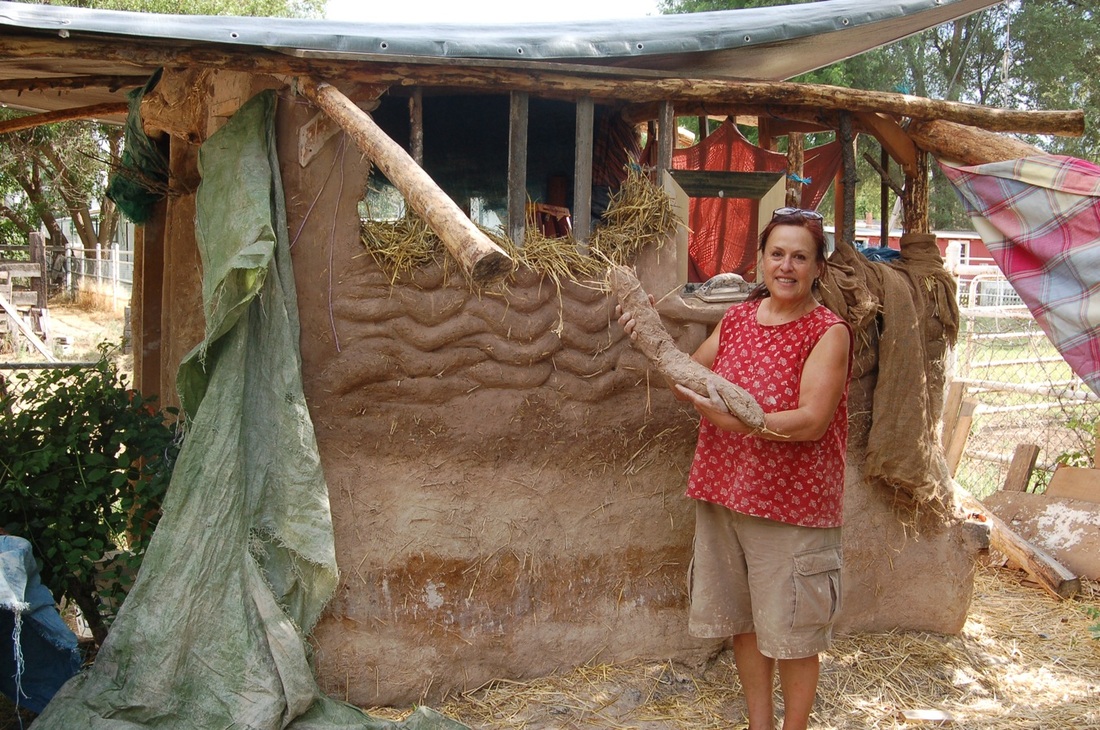
Long straw is rolled into a cob to make a long skinny cob. It has been said cob building is like making a giant coil pot.

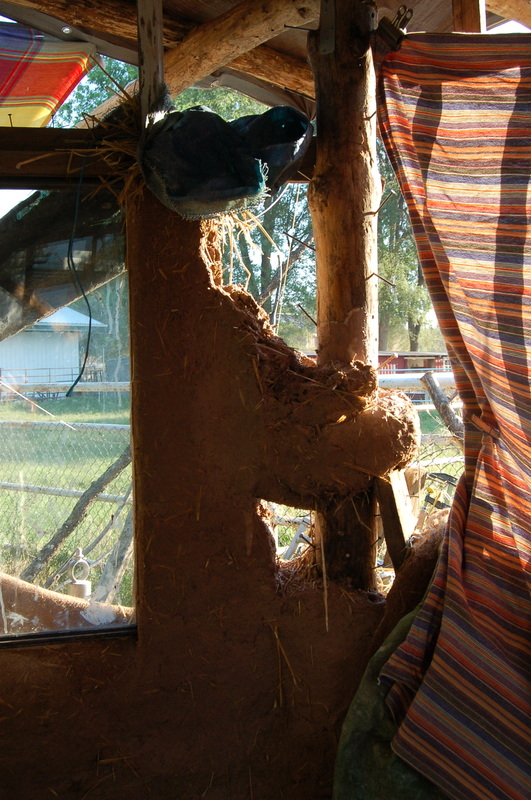
The windowframe was just a picture frame clamped to poles with cob sculpted around it. Butresses give the ledge some support. Straw and burlap keep the cob moist.
"If your process is beautiful, so will be your product." Michael Smith, one of the things he's learned from Ianto over the years.
We had no idea the pajareque would look like this. I'd photographed some slides at a conference, but our corbels (long coil cobs) were quite thick.
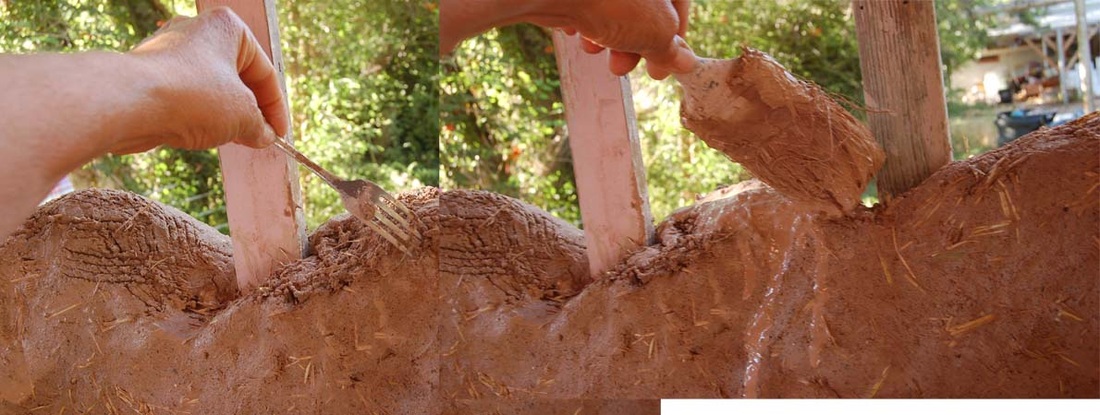
Pajareque! In dry weather, we found that before putting new cob on, it's good to score (left) and slip (right) with clay slurry like you do pottery. A fork works good to score. Then use your thumb or a stick to poke new layer into the old. Smooth as much or as little as you like. We smoothed the walls completely on the inside and left corbels showing on the outside above snowblow level.
Shelter
There is nothing to compare to the feeling of open air becoming filled with earthen enveloping walls, something of substance that shelters you. And w
Natural Building sites are safe for children and minstrels.
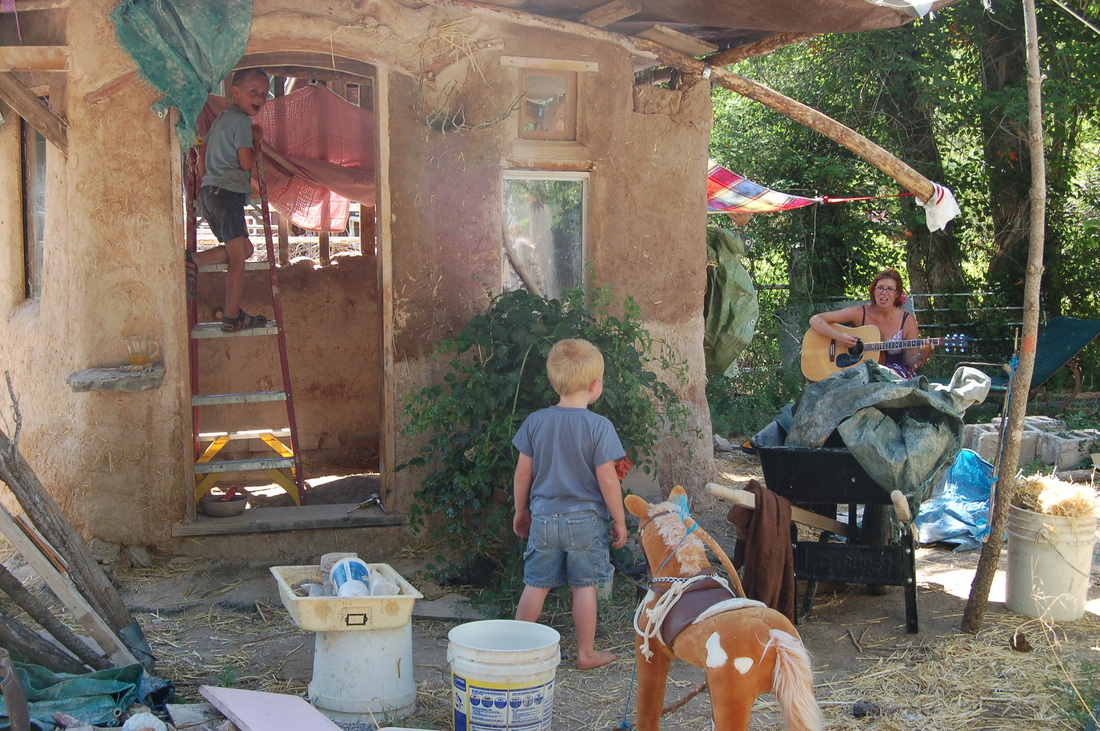
Ezra on ladder, Carson by horsie, Xanthe Alexis crooning to the cobbers.
Roof
The rafters were hauled from the land having been thinned in fire mitigation. Hand tools were used to level the top to accept sheathing. I glued three layers of 5 mm plywood to accomodate the roof curvature. Tin applied last was recycled.
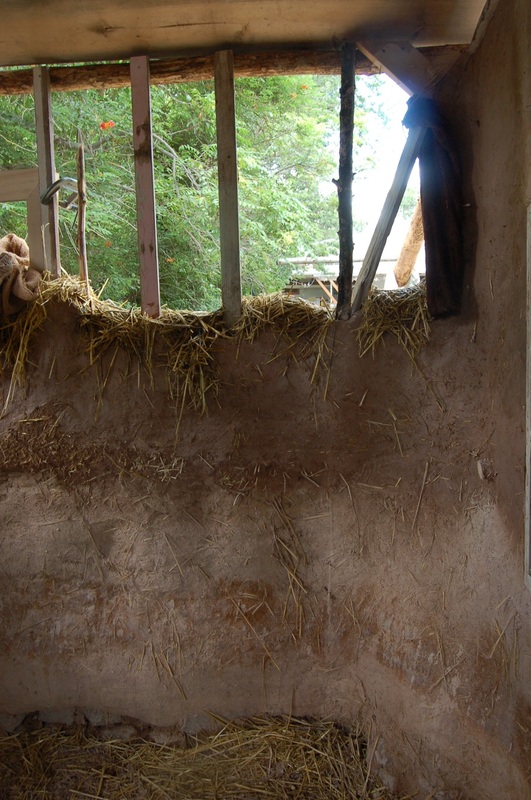
Balecob

Half a straw bale cut lengthwise insulates the north side of the building. Spray wall and bales with water, paint with clay slurry, then put bale in place. Nests go in front and cob with earthen plaster finishes the wall.
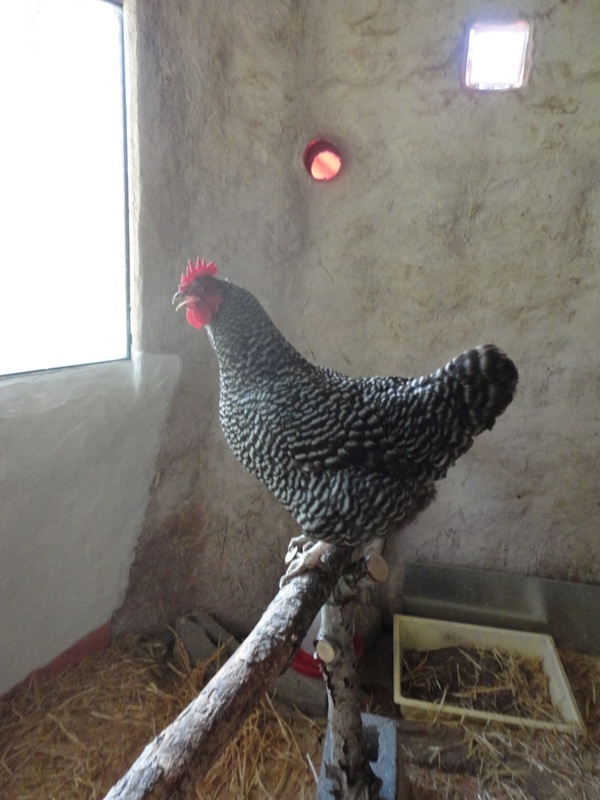
Chicken door, tile floor, chicken roost
Cobarista (me) with her coop on her birthday :-)
Keeping the inside warm in November so I could finish the adobe and tile floor.
Got a call in the fall that friends of friends had to get rid of their chickens and did I want them? Yes! Six residents in the coop now. Oh, and so far, 18 people have said the equivalent of "Chickens! I want to live here!"