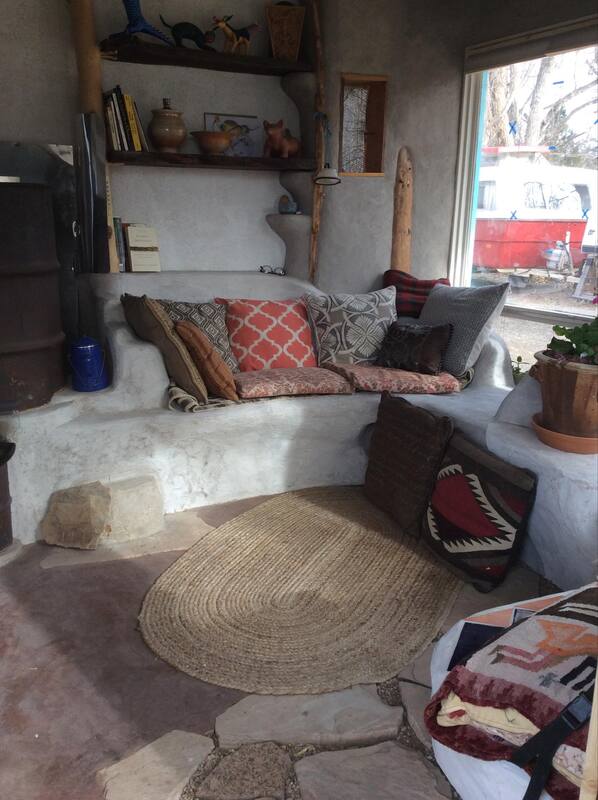
Rocket mass heater in greenhouse/solarium
I have a lot of interior work to finish in the "ATV Shed" and I want to start on that in April when nights are above freezing. And, I want to put seedlings in the greenhouse solarium in April, so I'm aiming to finish a rocket stove this month.
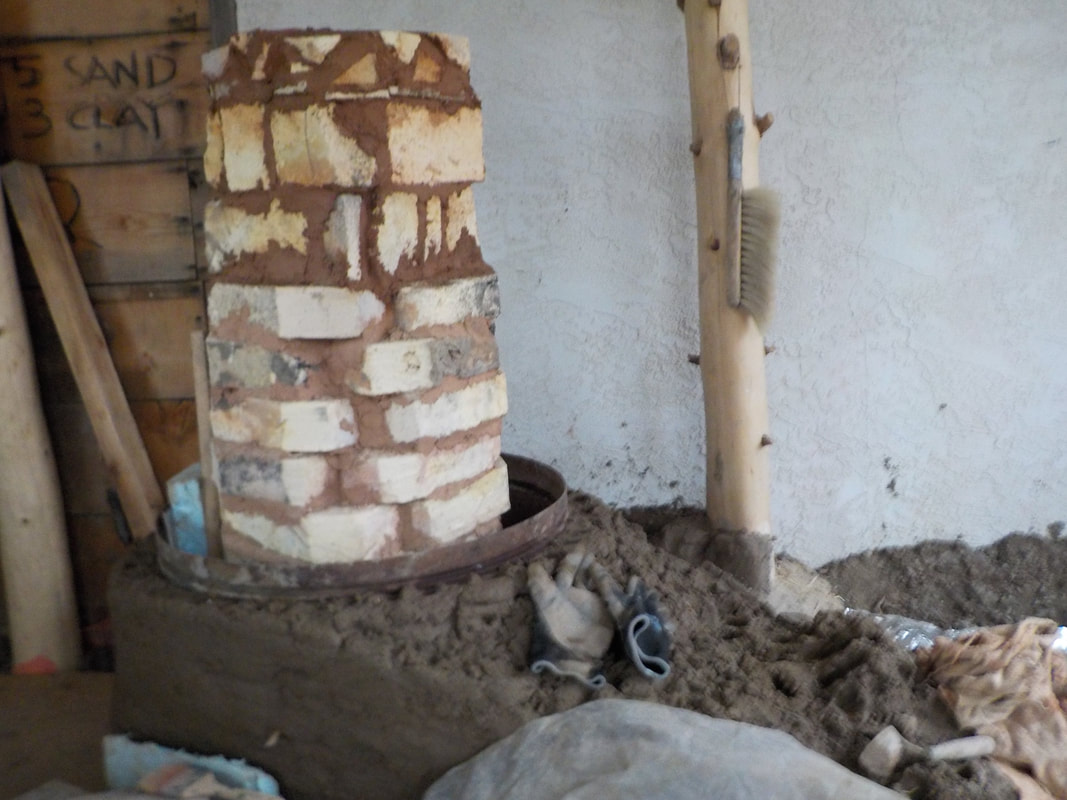
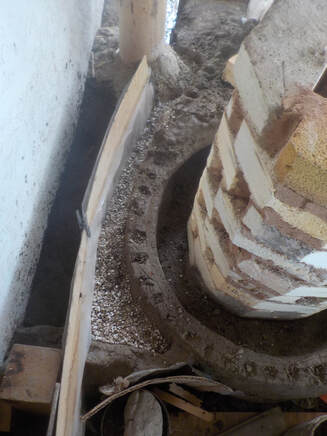
My bricks are kiln bricks donated by a local potter. Many clearly were used in an arch as they are trapezoids now, not true rectangles. For the feed tube and much of the burn tunnel I used heavy rectangular bricks, but even shaved bricks are still rectangular when laid on their side so they work that way.
My bricks are kiln bricks donated by a local potter. Many clearly were used in an arch as they are trapezoids now, not true rectangles. For the feed tube and much of the burn tunnel I used heavy rectangular bricks, but even shaved bricks are still rectangular when laid on their side so they work that way.
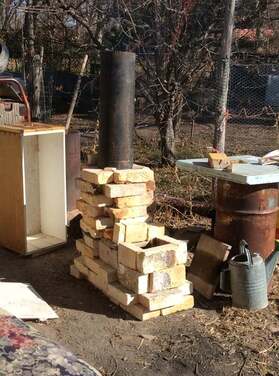
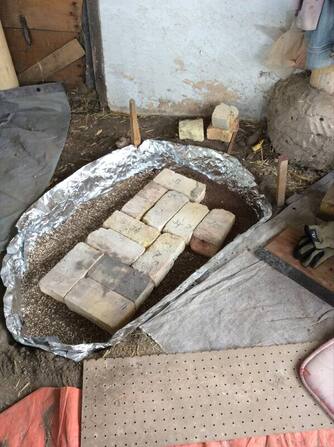
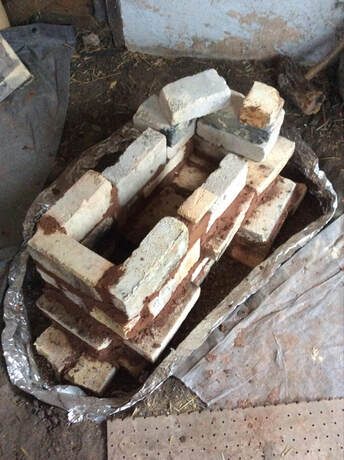
Above: A mock up is dry stacked outside. I had to redo it twice. The first time the burn tunnel was too long (should be less than half the height of the heat riser). The second time the burn tunnel was too large (should be 7"x7" and I somehow made it too tall). It fired up fine.
|
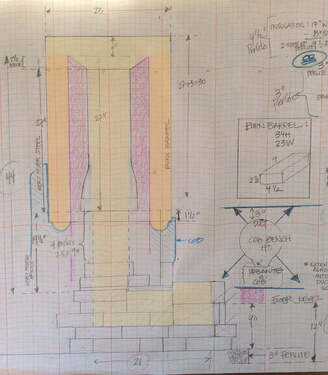
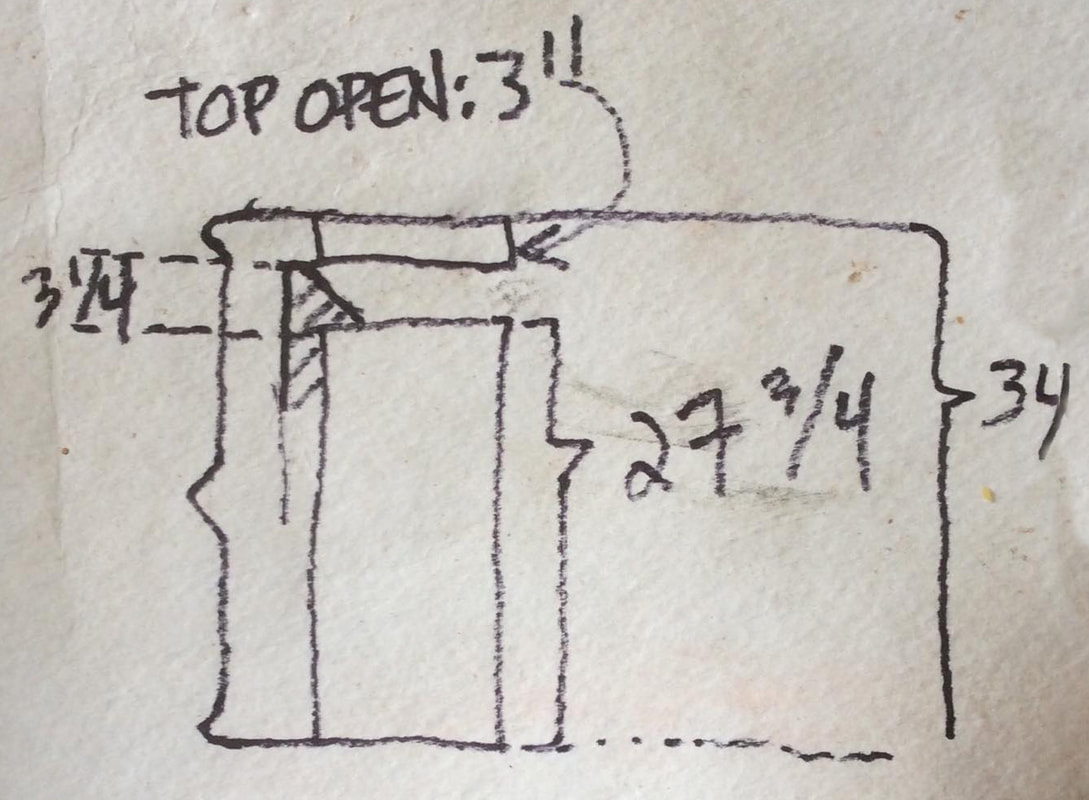
Once the mock up was done I did a drawing on wonky grid paper to make sure I knew how tall the whole system would be and determine how deep a hole to dig for it. The floor will come up 5" from existing ground. The system will be 12" underground so the hole size was determined to be 7". Suggestion was made that exit duct be deeper than 3" from surface of the bench.
|
NOTE: At some point here I decided not to use the steel pipe for the heat riser because it is so heavy.
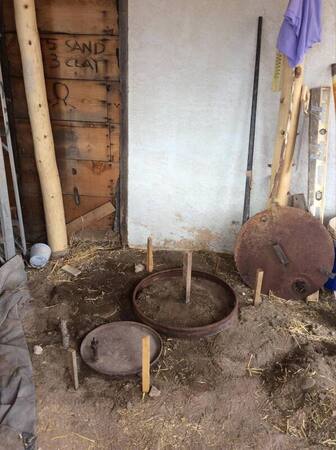
Above: Using measurements from the mock up and drawing, the site is marked with barrel rings and stakes for the pit. It is under metal ceiling, leaves a walkway around it (to the left) and is away from the wall (albeit not 18" but there will be perlite insulation).
Ha! I see charcoal notation on the wall: 5 sand, 3 clay...this was from a year ago when starting the cob oven. I remembered the clay was from the brick yard so it already had some sand in it. |
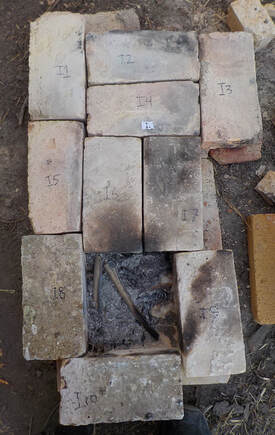
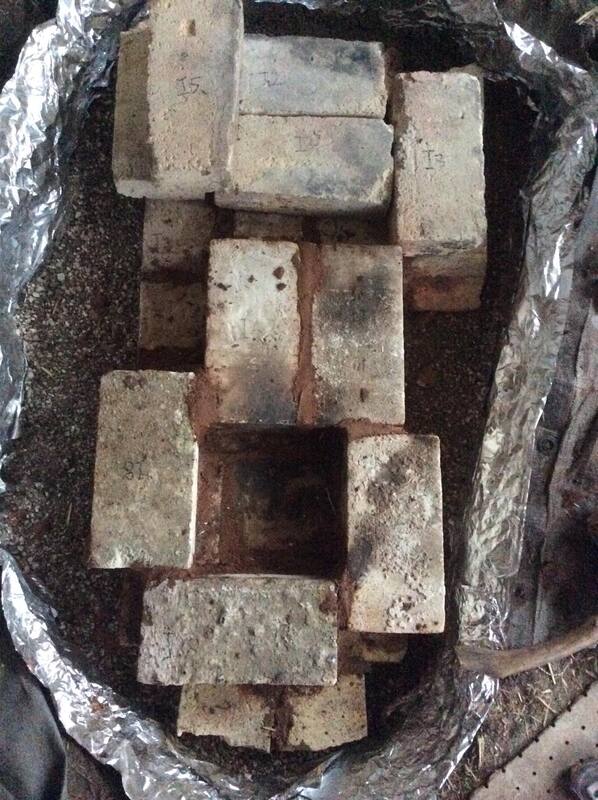
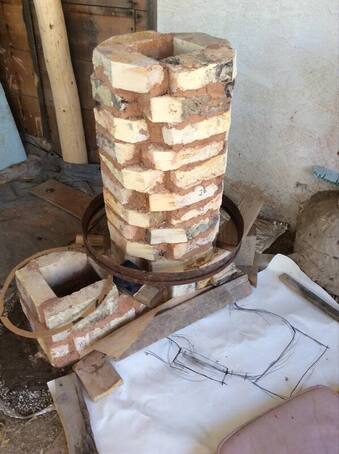
I didn't want to reinvent the wheel so as I disassembled the mock up I labelled bricks with a sharpie (levels A through J) and photographed each.
|
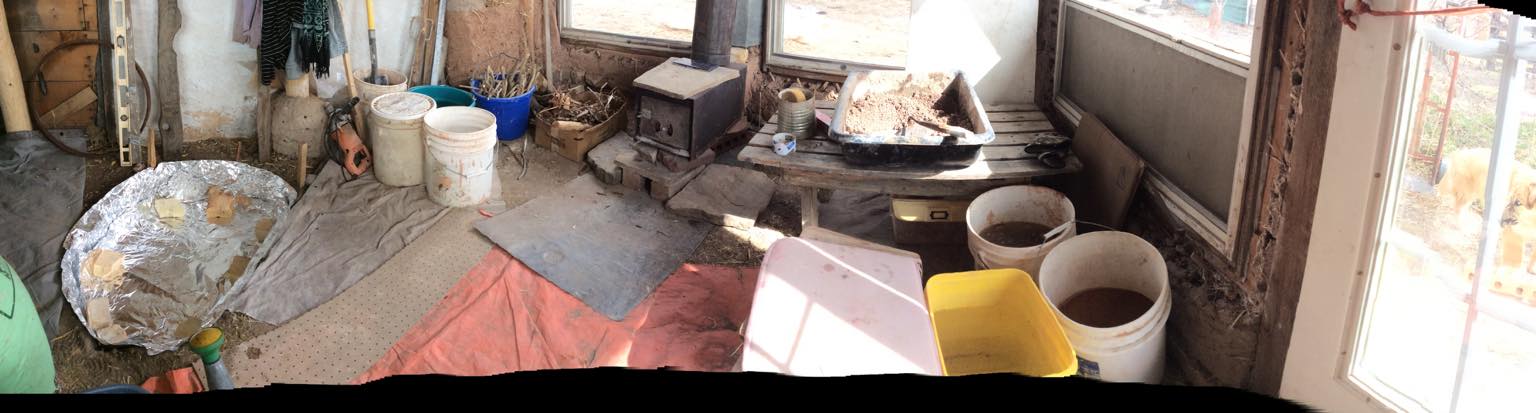
Above: The pit for the system is lined with tinfoil as vapor insulation barrier. Wet clay in buckets brought inside to keep it from freezing.
Little portable woodstove is set up in the space with forecast for rain and some snow. Exit is through stovepipe built into wall for eventual rocket stove exit.
Little portable woodstove is set up in the space with forecast for rain and some snow. Exit is through stovepipe built into wall for eventual rocket stove exit.
Perlite/clay insulation lines the pit 3" deep and is gently tamped with a chunk of 4x4. The first course of bricks is laid out dry in order to get the angle of the whole just right. I then marked the edges with dark powder, removed the bricks and started mortaring.
|
Day 1 mortaring, March 12th, 2021.
Sand/clay mortar is 5 parts sifted sand to 2.5 parts potters clay. |
Day 2: One thing the Rocket stove book doesn't mention is that, while it prescribes very accurate measurements for the burn tunnel, it doesn't tell you to compensate for the extra space the mortar will add. The side of the burn tunnel got taller that 7". I think I have to deconstruct it & see if scraping off as much mortar as possible will lower it.
Below left: plan for the manifold.
Regarding heat riser, NOTE: We learn from our mistakes; bricks should have been laid on their side! Thankfully they are insulative kiln bricks so I'm pretty sure it will be fine with a thinner sleeve of perlite.
Regarding heat riser, NOTE: We learn from our mistakes; bricks should have been laid on their side! Thankfully they are insulative kiln bricks so I'm pretty sure it will be fine with a thinner sleeve of perlite.

Above: I used an old kiln shelf to hold ceiling of manifold. Again, note how it cuts off exit duct, thereby again reducing area to less than 50 sq.". My solution was to back the stovepipe off (to the right) & make a transition from the kiln shelf roof to stovepipe opening. I used a couple of small broken pieces of kiln shelf to hold cob up between the two.
|
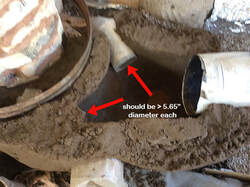
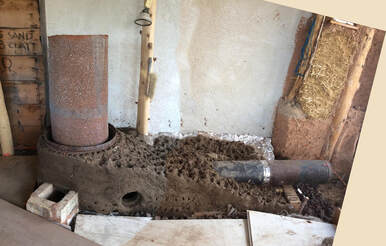
Above: I used a can & a small stovepipe to hold cob over tunnel from base of heat riser into manifold. There are no really good pictures in the book for how to do all of this. But after I'd done it, I realized their combined area (πrsquared) should be no smaller than 50 sq." (size of burn tunnel), so after things firmed up some I went in & carved the openings bigger. Below: I thought the base of barrel was done but you'll see in later pic that to meet necessary minimum height for heat riser I had to add 7". Boards are covering lava rock that I got free on facebook marketplace. I didn't want to move it twice so I wheelbarrowed it into the space. 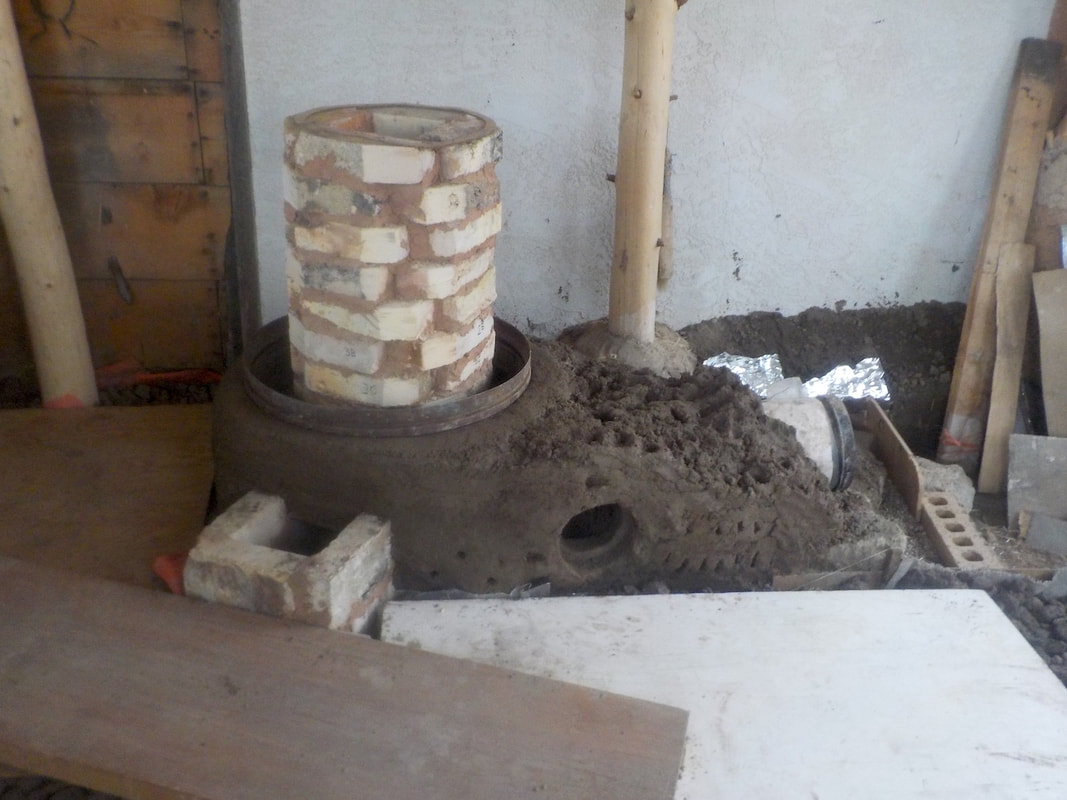
|
The metal ring in all these images is temporary. It just helped me shape everything to the exact right circular base for the barrel. I don't know where it came from but it's been in my materials pile for a long time!
Above: I am not good with numbers & I had it in my mind the barrel was 37". Well, it's 34! So I had to add to the base of base of burn barrel.
Note: Heat riser should be at least 2x the length of the burn tunnel, so once that height is met, one must add the height of perlite insulation sleeve & height of top of opening. • Barrel is 34" to top surface. • There will be 3" from top of heat riser to top of barrel. • There will be 3.25" to top of insulation. • Heat riser then needs to be 27.75" from base of barrel. |
Above: A tiny stick can be seen protruding from the front. It marked where 7" needed to be added above.
I ran out of firebricks! (because I used them flat & not on side.) Having trimmed off the corners of bricks in heat riser, I was able to piece together sections of bricks then the trimmed corners to get the height I needed. |
Date check: April 23, 2021
|
Below: I got insulation on heat riser today. The roll of hardware cloth was exactly the right amount.
|
Above: Detail of the top capped with mortar mix. I have a little home made hawk that's just a scrap of sheet metal. I'd been using it to scrape insulation in mortar tub into large can but it also happened to be the exact right size to cover the hole in the heat riser while I applied the mortar mix to the top. Happy coinkydinks :-)
|
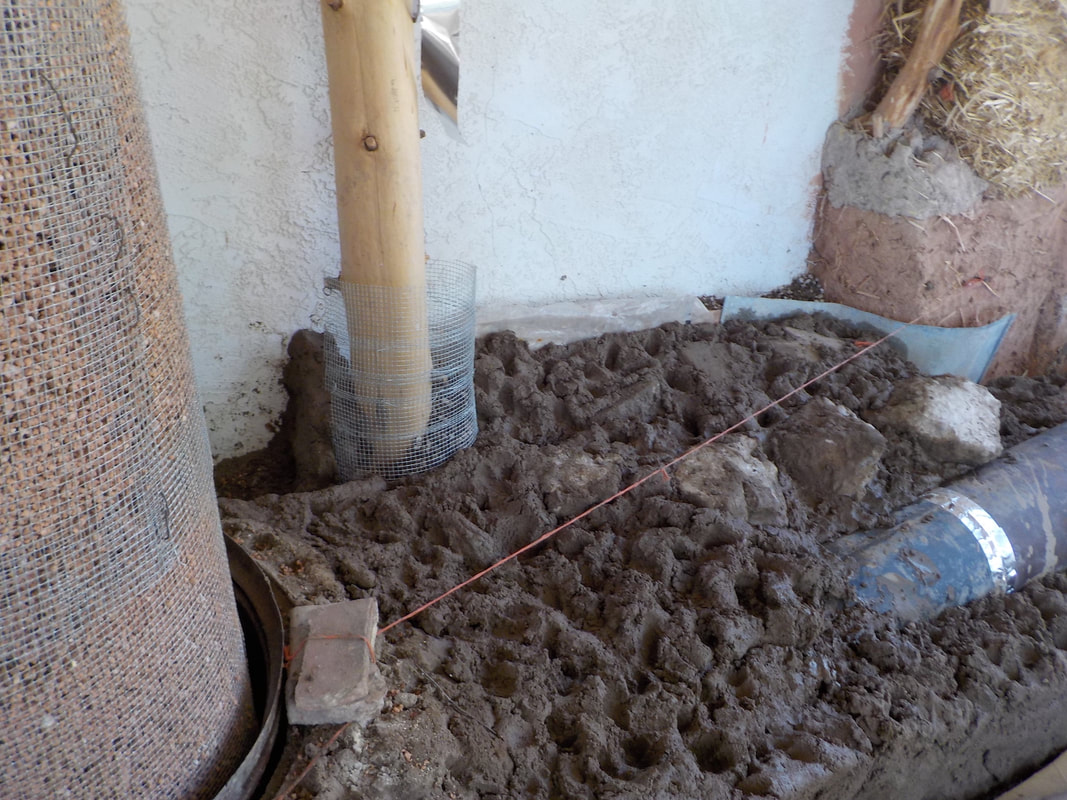
Left: This shows what's going on behind the stove. The white speckled material is insulation: perlite mixed with clay slurry. Then between insulation & wall is tamped soil; why make cob or use up insulation when soil will do the job just fine.
The board separating them allowed me to fill each material without them mixing then slip the board out. Wrapping it with plastic helps it come out better.
A little wall of cob on the end nearest holds it all in.
Note that the deepest cavity here surrounding the heat riser collects gasses that fall into this bottom. It slants steeply towards the exit so ashes fall into the manifold.
Note there are little notches in the cob so that after barrel is placed the cob that locks it in has some tooth to hang onto.
|
BELOW: Bench rises. • String indicated final height • On the right you might find of interest a screw can be driven into cob. • Against back wall there are forms to separate perlite/slurry insulation against wall (Right) • Looking for alternative to purchasing "T" pipe for cleanouts. They're $30 each & I need 5 more cleanouts at turns. I'm contemplating cleanout up into bench which I recall is said can be done... do I cut a hole in the pipe? |
|
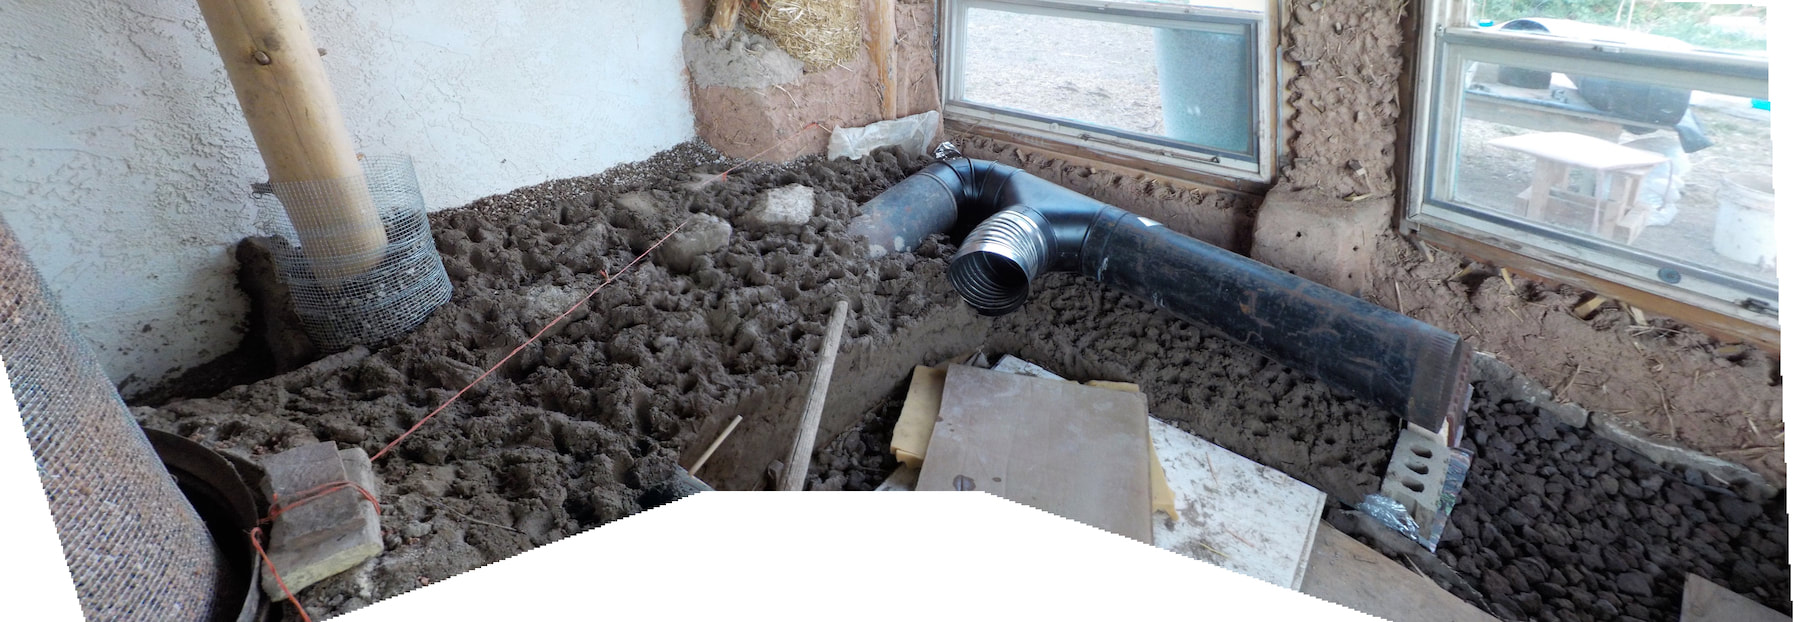
Above: If you notice in this pic the silver pipe cleanout is a corrugated section of duct. I ended up removing this and using smooth section pipe instead. Corrugation creates unwanted disturbance in the airflow (even though this angle isn't in the main flow I thought it best to be on the safe side.)
Finishing most of the ductwork & starting the actual bench

|
|
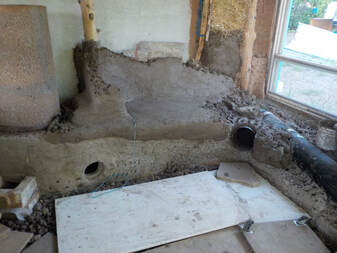
Cobbing of bench complete
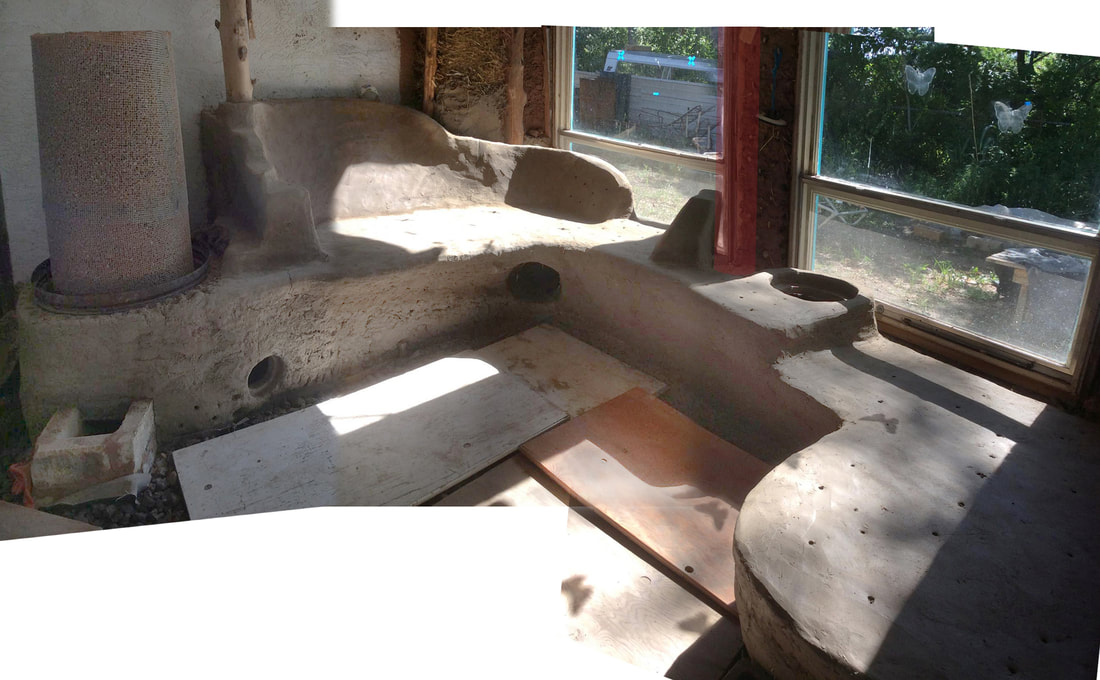
First week in June 2021: Bench cobbing is done! The exit pipe is yet to be cobbed in (once acquired); location shown in red tint. Winter sun will help warm pipe as will backrest/trombe wall though there is a cleanout/prime hole you can see on bench top. Lower right side will be tiled for plants and shelves for spring seedlings.
After finishing the manifold, bench cobbing began about six weeks ago, though a week or two was lost to rainy weather.
All clay has been dug about 30' away on site; this is at my home just outside city limits. I did mix in a little bit of pottery clay for edges which is also the only cob that contains straw. The dug clay starts about 18" below grade (under topsoil & topsoil/clay mix). The pit it left will eventually be made into a living pool (w/cob sauna yet to come!)
This solarium along with adjacent cob sun porch/bench & cob oven are on the south side of a building that is a heated garage/studio space and once the solarium is completely done I'll cut a doorway into the studio.
Lava rock is already in place to insulate the floor, thus the boards laid to walk on.
I use a cement mixer to make cob. It's insanely easier on my body. I dump cob straight from mixer into a wheelbarrow then roll it into where I'll be putting it on.
One ton+ of sand, same amount of clay. I'll be 69 in August & did this 100% solo. Slow but sure