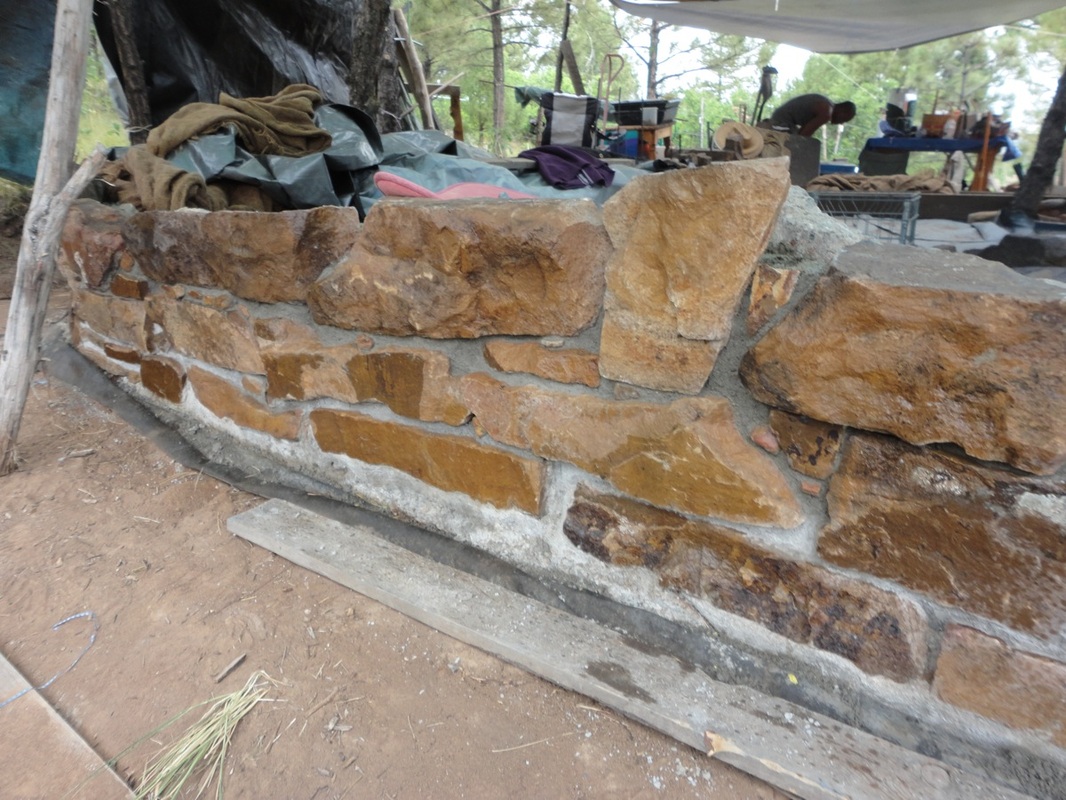
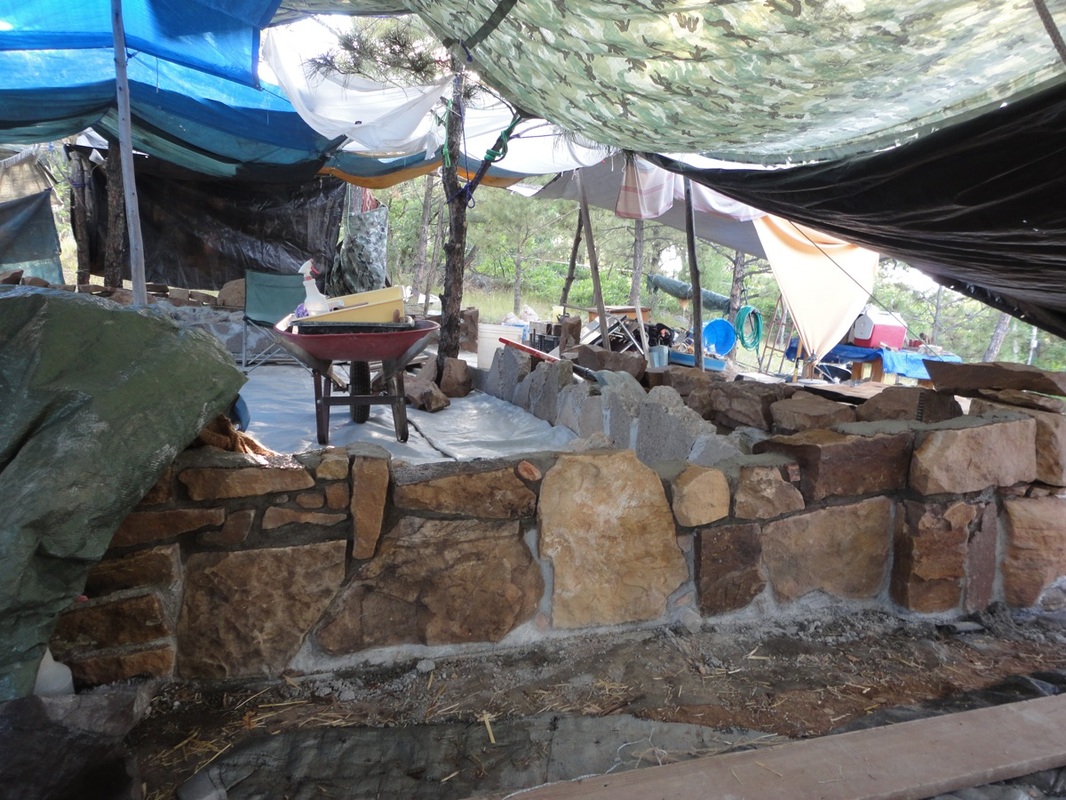
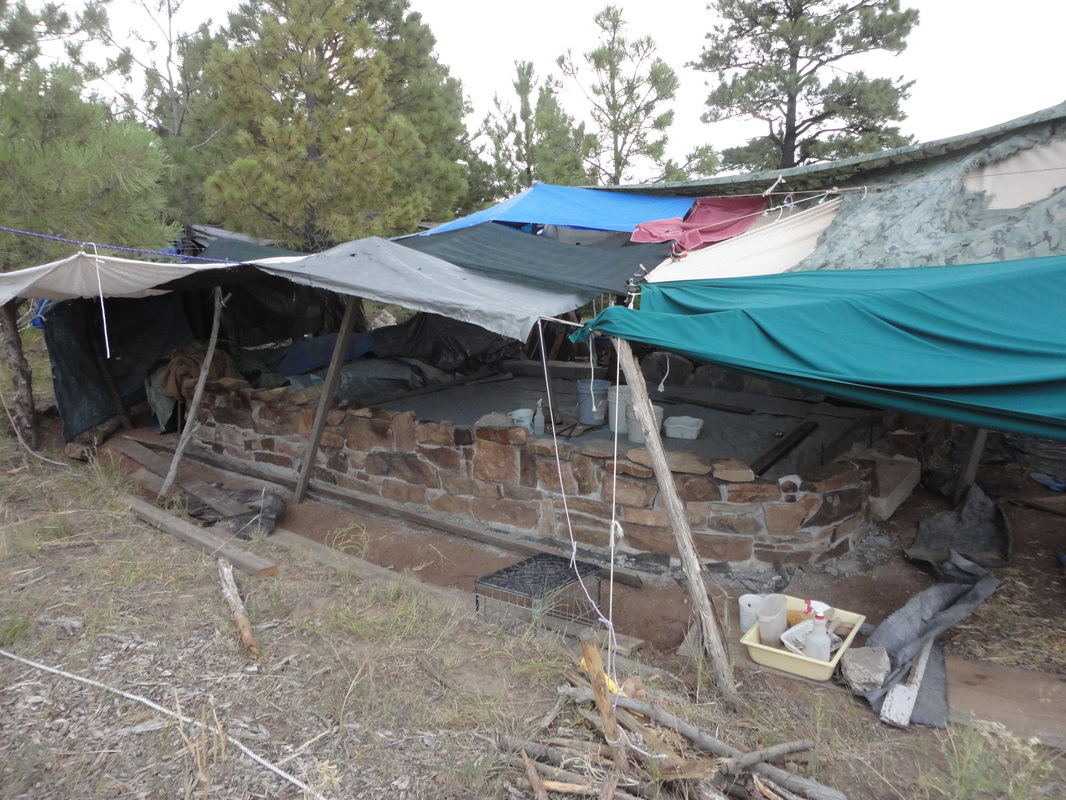
Summer 2012 Walls Rise!
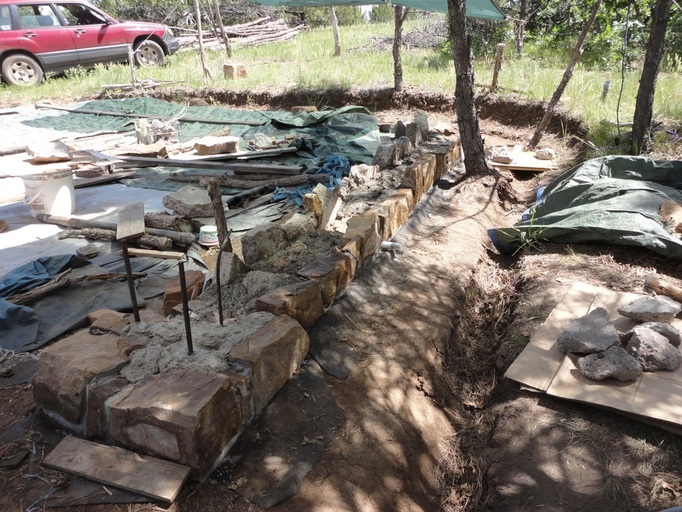
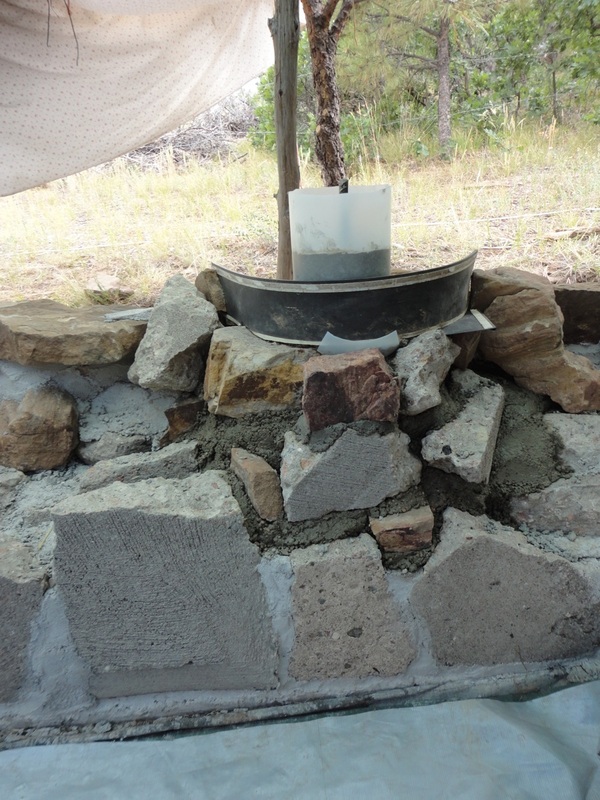
Above you see the first course of the stone wall which will go up about 20" before cob (earth aggregate) begins. The stone will prevent backsplash from rain and drifted snow from damaging the earthen wall.
The history of this site began in 2005 when I purchased 35 acres here and began fire mitigation and timber thinning. It took a couple of years to figure out the best site and design.
I had a teaching sabbatical through Summer 2009 during which I hand-built the rubble trench foundation–see I. "ATV Shed"; Summer 2010 I took a break from this site to build a cob chicken coop in town; Summer 2011 I returned and completed stone piers and drystack walls which hold backfilled soil on the hilside and support porch posts. (see II. "ATV Shed"
So it's very exciting to see the walls of the building itself begin to rise. There will be another course or two of stone, windows and doors will be fit into walls, then roofing. It likely will not be finished this summer, but we'll see!
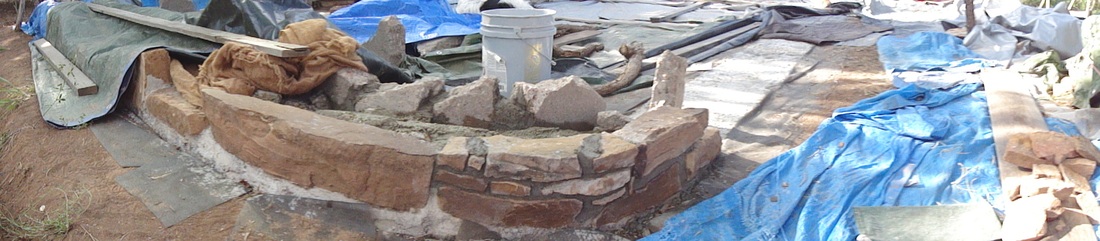
Wall & Foundation side view
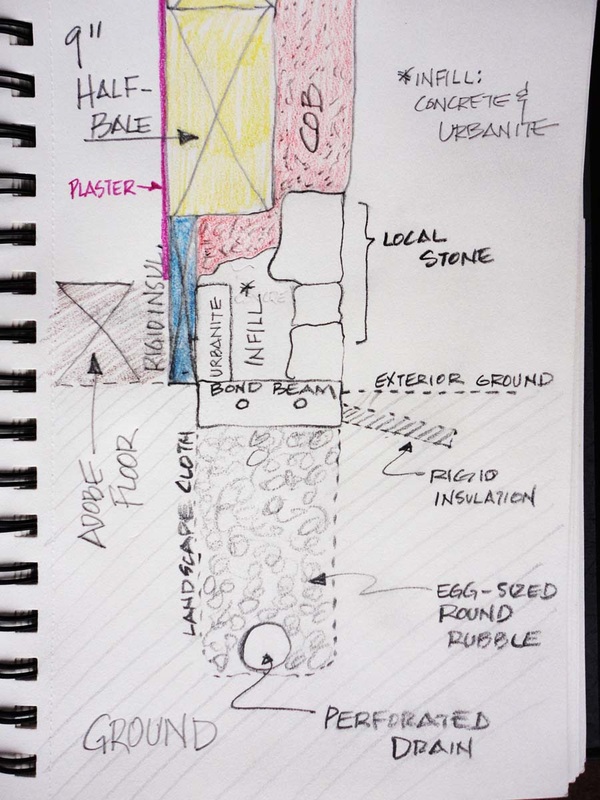
WALL MAKEUP
This drawing illustrates a side-cut view of the stem wall and foundation.
1. At the bottom is the rubble trench foundation with drain.
2. Above that is the 6" thick concrete bond beam/stem wall with long continuous rebar on each side of the building.
3. Above that the wall has an outside, middle and inside.
Left to right:
• Adobe floor to the left of the wall (interior) will eventually rise one foot.
• The inside of the wall will eventually have blue rigid insulation at the base to prevent a thermal bridge. Part of the straw bale will sit on this.
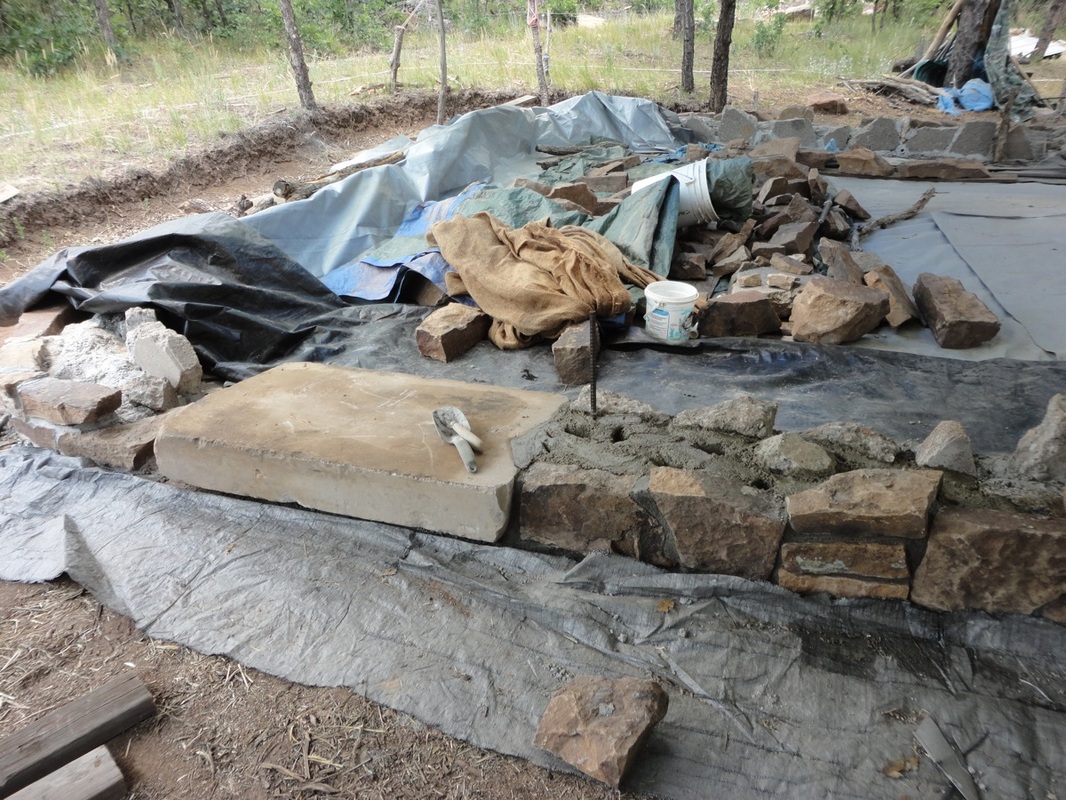
• Directly on top of the bond beam on the inside is "urbanite", (recycled concrete usually from broken up sidewalks).
• The infill in the middle is concrete that I mix from bags of Quikcrete with irregular chunks of urbanite (not drawn in infill) to displace concrete. (I used 60 bags of 60# Quikcrete for all work above the stemwall (mixed in the wheelbarrel, stored in the timber shelter, hauled up a few bags at a time in my Subaru, though I did one or two trips of a dozen or so bags in my truck).
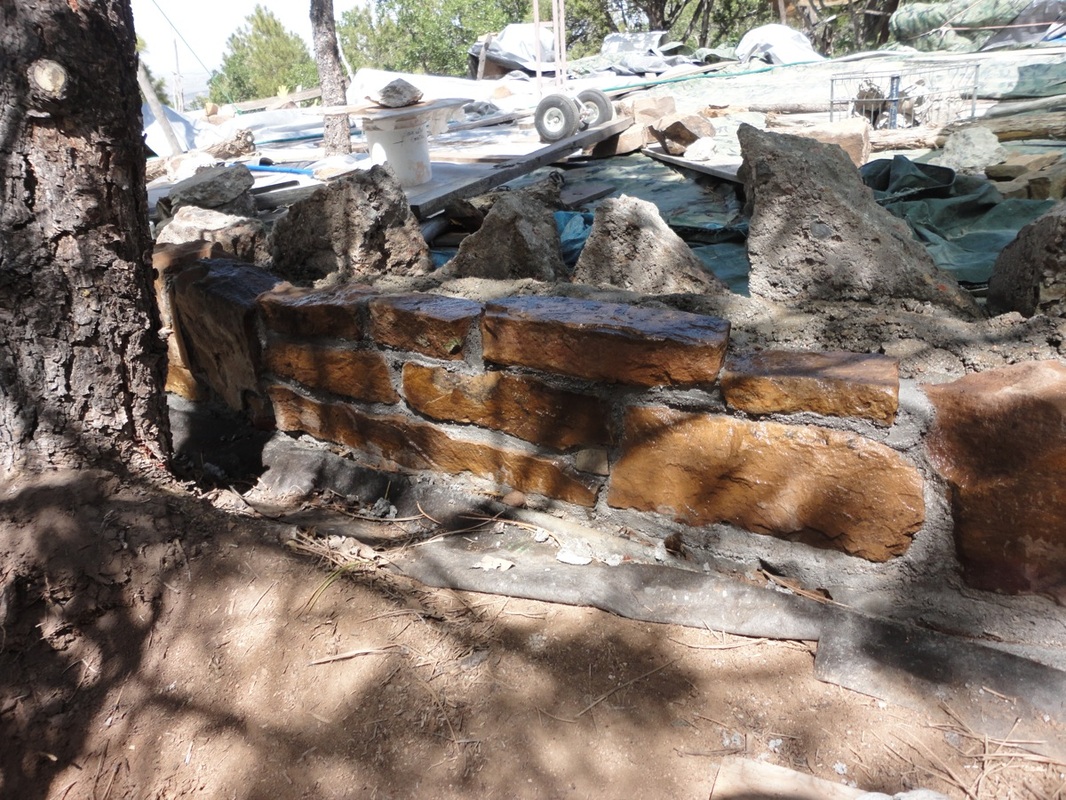
• The outside of the wall is local stone masonry. (I am the mason.)
4. You can see how the cob will easily fit into the irregular top of the masonry and concrete. I finished off all concrete and masonry so there won't be any frozen puddling on the wall this winter.
SEQUENCE
After foundation and stem wall, I went up one course with stone masonry on outside; then laid and mortared urbanite on inside; then did infill. The first course had more short segments of rebar. The second course was masonry and infill as the urbanite on the inside rose as high as needed with the first course. The last course was mostly just exterior stone masonry with perhaps a little concrete to make sure there would be no puddling of moisture over winter, and also the raised bases for timbers you can see below for which I used vinegar bottles as forms.
In narrower portions of the wall, the cob wall will rise as pajareque (corbels woven around vertical poles like in my chicken coop), smoothed on the inside to accept bales. After the roof is on, half-bales will be added. The bales are added as follows: spray cob and bale w/water, slather with clay slip and put bale in place (again, illustrated on page w/chicken coop). At cob cottage company they say once dried in place, a 200# man can walk on these balecob walls and they are extremely strong.
RIGID INSULATION SKIRT
For every foot of rigid insulation skirting on the outside of a building, you can reduce the depth of the foundation one foot from typically required frostline depth. I learned this at CO Straw Bale Association conference.
CURTAIN DRAIN
Not illustrated is a curtain drain that will be dug, lined and filled just under the edge of the roofline. You can see a trench of sorts in some images outside of the walls. This was the first dig for the drain. It'll probably be completed last thing next summer.
ROMAN USE OF RECYCLED CONCRETE (URBANITE)
The Romans recycled concrete, and in fact, I found an article which explains that the very wall I am making was the strongest wall the Romans made: http://cedb.asce.org/cgi/WWWdisplay.cgi?126868
This drawing illustrates a side-cut view of the stem wall and foundation.
1. At the bottom is the rubble trench foundation with drain.
2. Above that is the 6" thick concrete bond beam/stem wall with long continuous rebar on each side of the building.
3. Above that the wall has an outside, middle and inside.
Left to right:
• Adobe floor to the left of the wall (interior) will eventually rise one foot.
• The inside of the wall will eventually have blue rigid insulation at the base to prevent a thermal bridge. Part of the straw bale will sit on this.
• Directly on top of the bond beam on the inside is "urbanite", (recycled concrete usually from broken up sidewalks).
• The infill in the middle is concrete that I mix from bags of Quikcrete with irregular chunks of urbanite (not drawn in infill) to displace concrete. (I used 60 bags of 60# Quikcrete for all work above the stemwall (mixed in the wheelbarrel, stored in the timber shelter, hauled up a few bags at a time in my Subaru, though I did one or two trips of a dozen or so bags in my truck).
• The outside of the wall is local stone masonry. (I am the mason.)
4. You can see how the cob will easily fit into the irregular top of the masonry and concrete. I finished off all concrete and masonry so there won't be any frozen puddling on the wall this winter.
SEQUENCE
After foundation and stem wall, I went up one course with stone masonry on outside; then laid and mortared urbanite on inside; then did infill. The first course had more short segments of rebar. The second course was masonry and infill as the urbanite on the inside rose as high as needed with the first course. The last course was mostly just exterior stone masonry with perhaps a little concrete to make sure there would be no puddling of moisture over winter, and also the raised bases for timbers you can see below for which I used vinegar bottles as forms.
In narrower portions of the wall, the cob wall will rise as pajareque (corbels woven around vertical poles like in my chicken coop), smoothed on the inside to accept bales. After the roof is on, half-bales will be added. The bales are added as follows: spray cob and bale w/water, slather with clay slip and put bale in place (again, illustrated on page w/chicken coop). At cob cottage company they say once dried in place, a 200# man can walk on these balecob walls and they are extremely strong.
RIGID INSULATION SKIRT
For every foot of rigid insulation skirting on the outside of a building, you can reduce the depth of the foundation one foot from typically required frostline depth. I learned this at CO Straw Bale Association conference.
CURTAIN DRAIN
Not illustrated is a curtain drain that will be dug, lined and filled just under the edge of the roofline. You can see a trench of sorts in some images outside of the walls. This was the first dig for the drain. It'll probably be completed last thing next summer.
ROMAN USE OF RECYCLED CONCRETE (URBANITE)
The Romans recycled concrete, and in fact, I found an article which explains that the very wall I am making was the strongest wall the Romans made: http://cedb.asce.org/cgi/WWWdisplay.cgi?126868
May 22nd: Walls Rise!
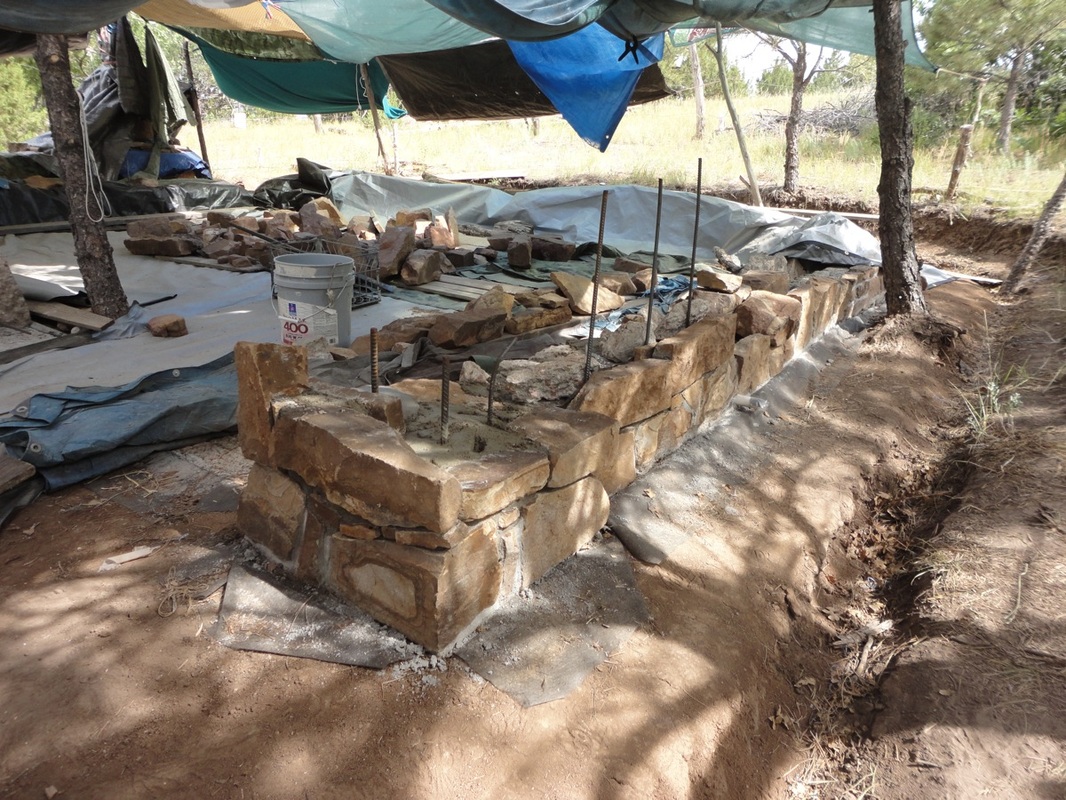
SUMMER 2012: I started above-ground stonework on the northwest corner. Two sides of the building have no porch necessitating that the stone will go up about 20" to protect earthen walls from backsplash and snow. The NW & NE corners are also more massive and will be solid cob w/a timber embedded (vertical rebar is f/tibers) to satisfy building inspectors should they ever challenge the design.
The inside base of the wall is "urbanite" which is recycled sidewalk (I drove by a crew breaking up a driveway about a month ago and they kindly delivered it to my house f/FREE!). The exterior wall base is to be native stone. In between is is Quikcrete (I buy 60# bags) with as much small urbanite as possible to displace concrete.
The wall will go up another course, but I am going to go all the way around the building with the first layer in order to keep weight distribution fairly even.
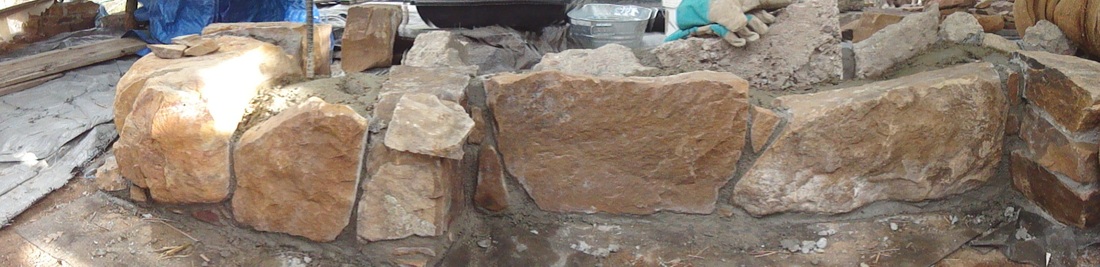
Stone masonry w/natural stone and urbanite.
Pacing and principles:
Twelve days and I'm not quite halfway done with first course...about a fifth done? ...so maybe 40 days to finish stone base and begin cobbing...mid July?
A stone wall like this is much easier than the piers I did last year. Piers have exact side dimensions required precise fitting. STONE MASONRY PRINCIPLES: 1. Make sure you have a good foundation (see Part I), especially in locales where it freezes. NOTE: If you add a skirt of rigid insulation out from the foundation, for ever foot out you go with the skirt you can eliminate a foot deep f/the foundation. I will have a 1' skirt eventually. 2. First, dry-fit stones w/potential fissures parallel to ground vs. perpendicular; use shims under stones if necessary so they sit solidly; infill small stones in larger gaps so mortar is never very thick. 3. As you fit stones, lay them "one over two and two over one", in other words, you don't want a continuous vertical seam as it creates potential weak point f/wall to crack. 4. If you're going very high, you'll need a level and/or plumb line to make sure wall stays vertical. If laying a drystack wall, string a rope between stakes to keep wall straight. (My foundation is my guide so I don't have to worry about this.) 5. Scrub stones w/steel brush (and water) before mortaring. Ideally I like to wash a quantity so I have them to choose from and don't confuse dirty stones w/ clean ones when fitting. I decided recently to shade stones so the sun doesn't make them too hot causing mortar to dry too quickly. NOTE: All water on the land is hauled up in a 40 gallon tank and siphoned into another 40 gallon tank that is kept on site; or it is rain catchment. So I try to re-use water as much as possible, for example rainwater becomes burlap-wetting water becomes stone-washing water. Stone-washing water gets pretty dirty and goes onto plants. 6. Mix mortar 2.5-3 parts sand to one part Type N mortar. An average batch is 15 parts sand and 6 parts mortar. I use a sturdy garden hand shovel to measure I keep sandpile covered so it stays clean. |

Inside-facing part of wall using "urbanite", recycled concrete. Rigid insulation will go over this.
–––––––––––––––––––––––––––––––––––––––––––––––– 7. Dry mix mortar first with large trowel or hoe, then add super clean water. Very wet mortar is weaker, so don't over-wet.
8. Before mortaring stones in place, spray or brush stones and surface w/water. Trowel down mortar, chop a bit so it can spread to where it is needed. Place stone on mortar. Do not rock big stones down, rather lower, or they squish mortar out one end. 9. Tuck point tools are very useful! I didn't know about them when I made my first cob wall, but read about them in Charles McRaven's book, then purchased two sizes on ebay. 
10. Once stones are mortarted and have begun to set (10-15 minutes) they MUST NOT BE MOVED OR JOSTLED, or mortar contact will be compromised, so DON'T LEAN ON THEM OR BUMP THEM!!!
11. At the end of the day, go back and clean up your joints if necessary. I use a toothbrush and water sometimes, or the tuck point tool. If stones look like they got lime on them, I might wash a little with vinegar/water 1:1. 12. Cover the day's work with 2-4 layers of wet burlap. I found if I put additional burlap on the very top, it wicks down slowly and keeps everything moist longer. Cover the whole shebang with tarps and weights on the edges. Keep moist for 2-3 days for slow curing and strong mortar. 
|
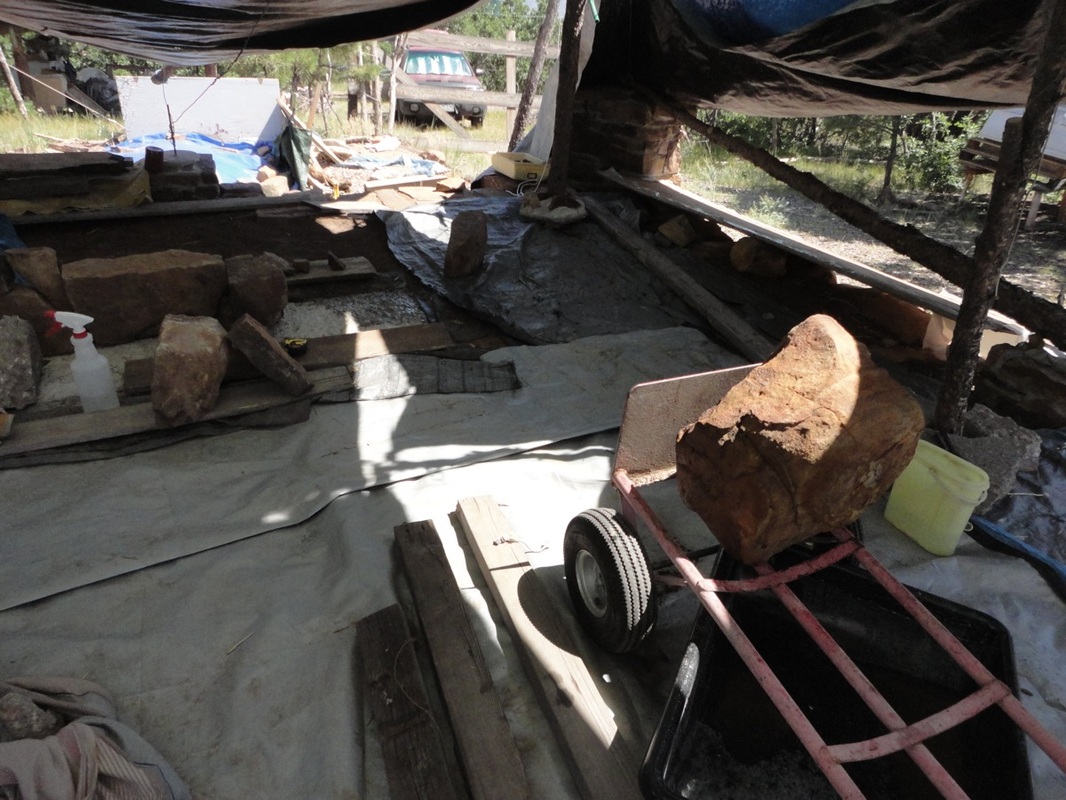
Tarps, tarps, tarps!
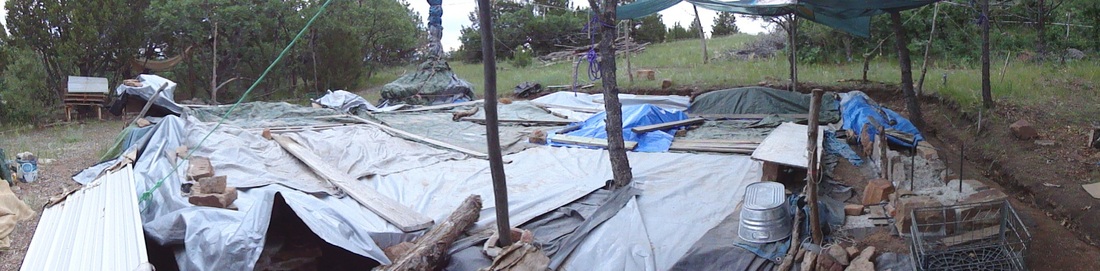
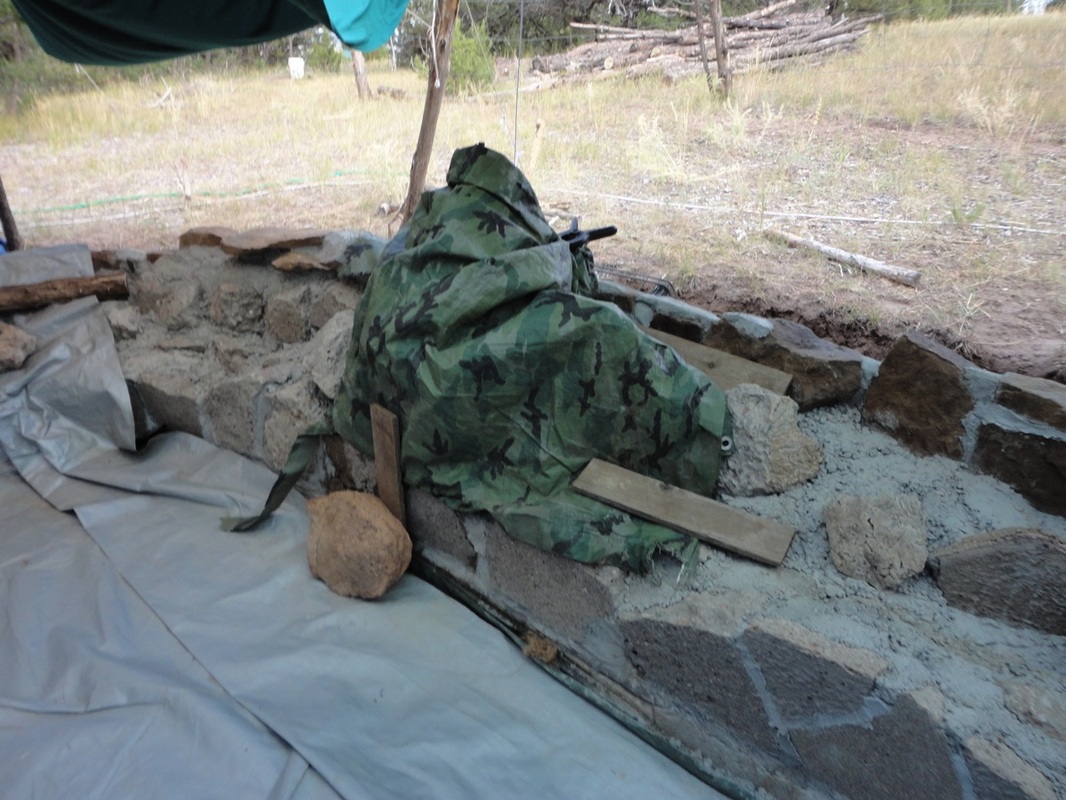
Keeping everything in order makes working more pleasant for me. Put all washed stones under blue tarp in the middle of site, swept and straightened tarps. I keep a tarp over all the completed stonework because as I built dry-stack walls, I put diatomaceous earth between stones to discourage scorpion habitat (crushed microscopic sea shells that cut the carapace of insects). I don't want it to wash away, so I keep it all covered. I so look forward to the day the porch is done and I can uncover all that stone work to be enjoyed!
Visits from friends and helpers.
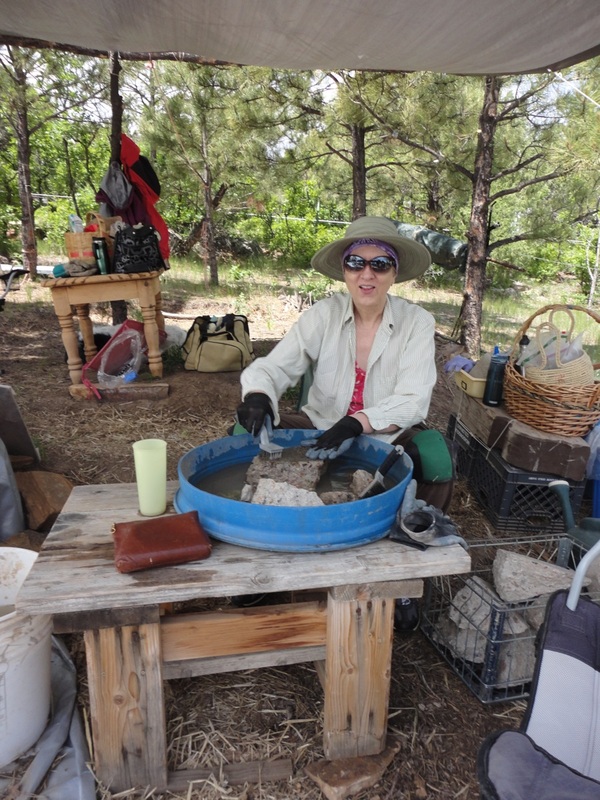
HS friend found on FB came f/2+ weeks to help. She was a trooper given that her normal daily life does not involve being outside a lot nor doing any kind of heavy work. Here's Anne washing stone.
Shade is essential and over the summers I've worked on the land I've figured out good systems for shade tarps that double as water catchment. Also, sturdy tables are essential.
Shade is essential and over the summers I've worked on the land I've figured out good systems for shade tarps that double as water catchment. Also, sturdy tables are essential.
JUNE 8
The first course of stone rounded the SE corner of the building. You can see here the exterior, again, is natural, the interior is urbanite which will be covered on the inside w/rigid insulation. Daniel set the urbanite and I native stone and we both worked to infill w/concrete.
94˚ Friday midday in Pueblo. Need rain.
Purchased very sturdy interior door for front door at Habitat f/Humanity store f/$70. The stone work from yesterday seen above ends about where the front door timbers will be placed. I'd found a good old doorstep stone in town but haven't moved it as it is too big I think for my usual methods. I can start on another part of the wall until I get that stone up the mountain. Can work on a model for steps, timber (and rebar placement), interior floor insulation depth and perhaps a wood threshold on top of the stone porch stone. Insulation doors f/studio are about kaput so it's hot in there. I do not like the heat. Insects bit yesterday and today the ones on my face are reacting as never before. Almost like poinson oak.
I went to sit outside here and the cob bend is nice. The tree makes a beautiful canopy over where one sits. It gave me rise to think about planning niches inside for gloves, timber for coats, niches outside for light. Brought a large slab of redwood burl with me from the NW which has been waiting for its place. It will be a bench. Maybe not by the lizard bench they would be quite different. Curving stones on the lintel of the SE corner window will be a perfect transition from the curby lizard to the angular aspects of the building.
Mid June
|

|
This big stone is more like sandstone, but I wanted to soften the corner of the building w/a roundy stone and had my eye on this for a long time. Here you see it hauled on the doll, placed on the corner, then mortared.
June 27
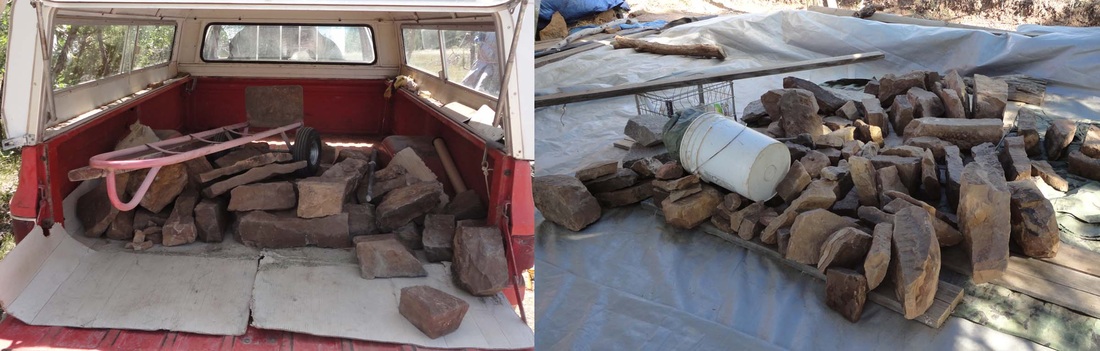
Load of stone in the truck before unloading. Washed stones are in the middle of the building laid out so I can see sizes and shapes for selection and fitting.
|
|
345# doorstep was in front of neighbor's in town. I'd offered $35 for it a couple of years ago but never picked it up. I asked again this year and at first she said her daughter might want it for her landscape business, but the day I got to this part of the wall, she called and said okay, I could buy it.
My friends Levi, Lisa and the boys came to help me move it one day. It took both Levi and I to roll it gently up two long boards onto his truck bed. When we got to the land, there was a WILD thunder & lightning storm, so we just opened the tailgate and pulled the boards off w/the stone, walked it a few feet and leaned it against an oak.
Then, I had to figure out in the next week or so how to get it into place solo. With dolly, boards strapped to it for leverage, poles on the ground to roll it on and a 2x4 to flip it up on (so as to not squish concrete out as it is rocked down), I got it into place with the slant for run-off actually going in the right direction! One 60# bag of Quikcrete mix under it instead of masonry mortar.
Doorstep is in the SE corner. On the right is the NW corner as I begin the second course of stone which will be required on the two sides of the builidng without a porch. The vertical rebar will have juniper poles on it because this little section of wall will be pajareque.
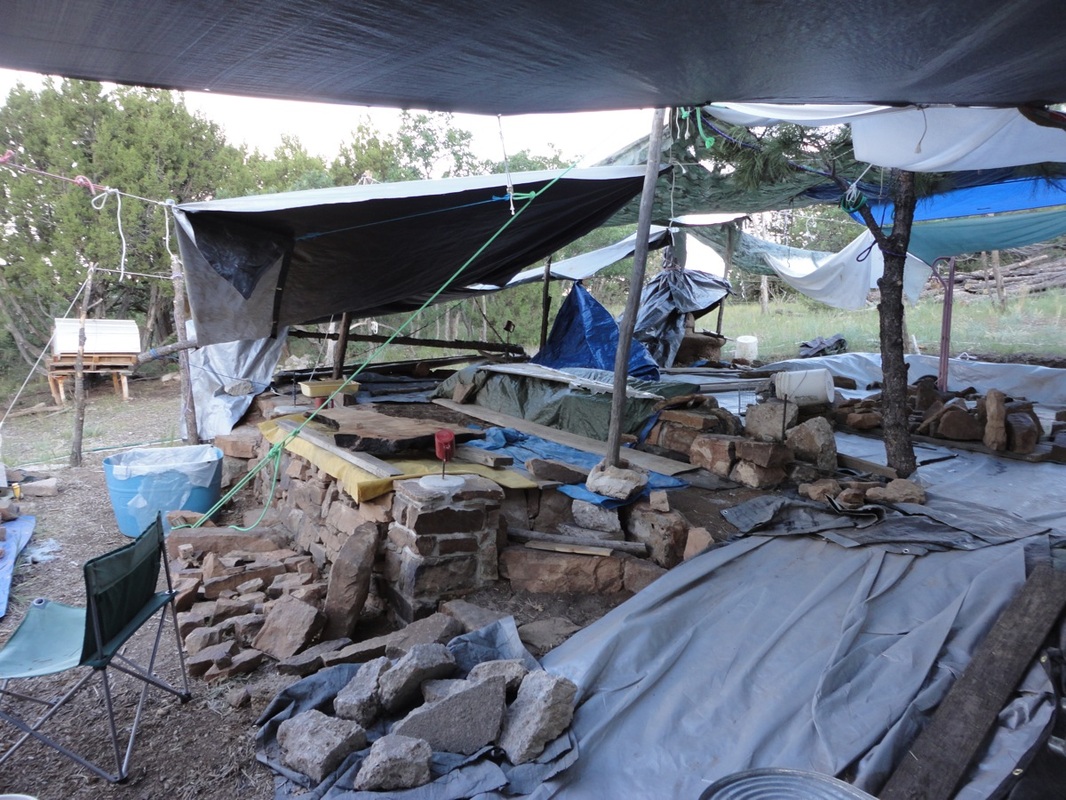
tent city!
The first day I laid stone, May 22nd, I put up a section of shade tarp. Well, the weather has been in the triple digits and it looks like there's no end in sight, so the tent city has been added to and added to until I have 16 tarps and sheets that shade the whole area! I think the wind can move through many small pieces better. I don't know why it took me so long to realize how good sheets work, but on senior day, I can get them for a couple of bucks at the second hand store.
It's also important when setting mortar I think that the rocks not be so hot, so shade is not only for comfort but for building integrity.
It's also important when setting mortar I think that the rocks not be so hot, so shade is not only for comfort but for building integrity.
Visitors
|
|
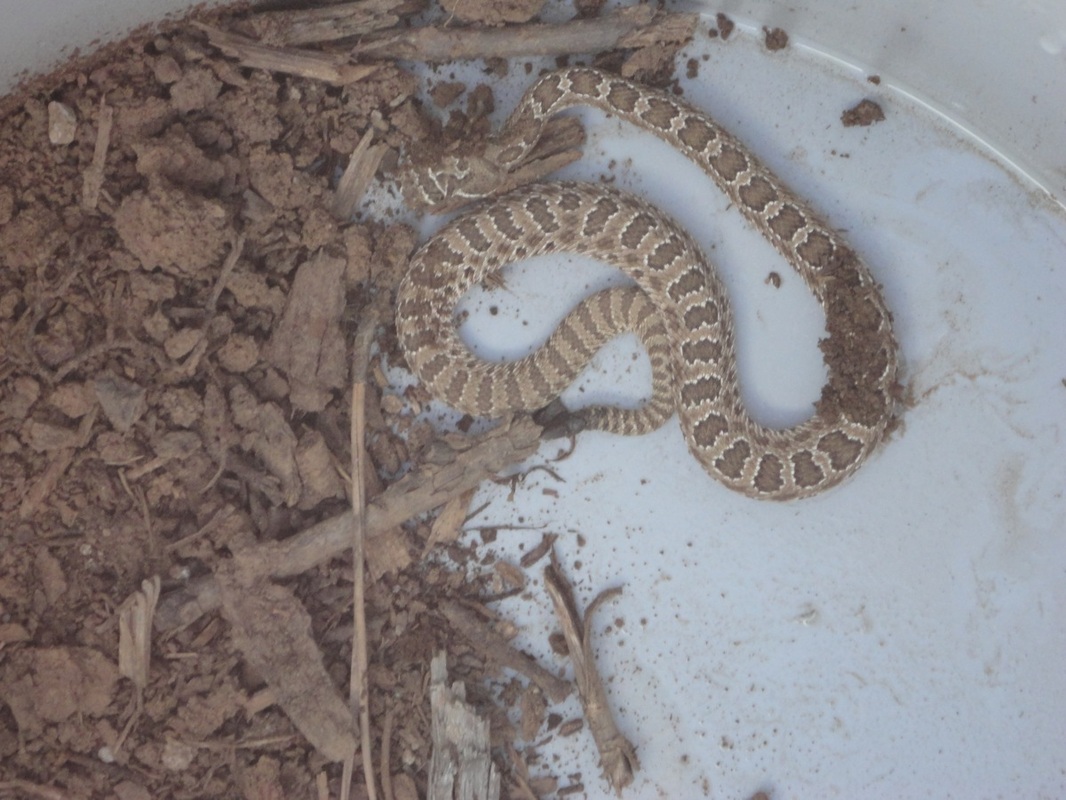
A few days after someone asked if I'd seen snakes on site (never), I saw this baby rattler sleeping by a stone. Though my first inclination was to kill it, I gave pause and ended up scooping it up w/a shovel, putting it in a tall bucket, tying it to the outside of the car and relocating it a mile or so down the road in a dry creekbed. I decided after that I had to raise the tarps to eliminate mouse habitat. A fellow told me about laying a rope on the ground around the perimeter of the site...that for some reason snakes won't cross it. I purchased a rope, though not a large one, but also laid old hoses around the site.. I also put old steel scrub brushes that started to lose their bristes face up next to big stones so that snakes won't want to slither into cozy spot. Every day when I come to the site now, I walk around and check f/such visitors and I try to remain vigilant in keeping an eye out for them at all times. Doggies have been staying home in the heat.
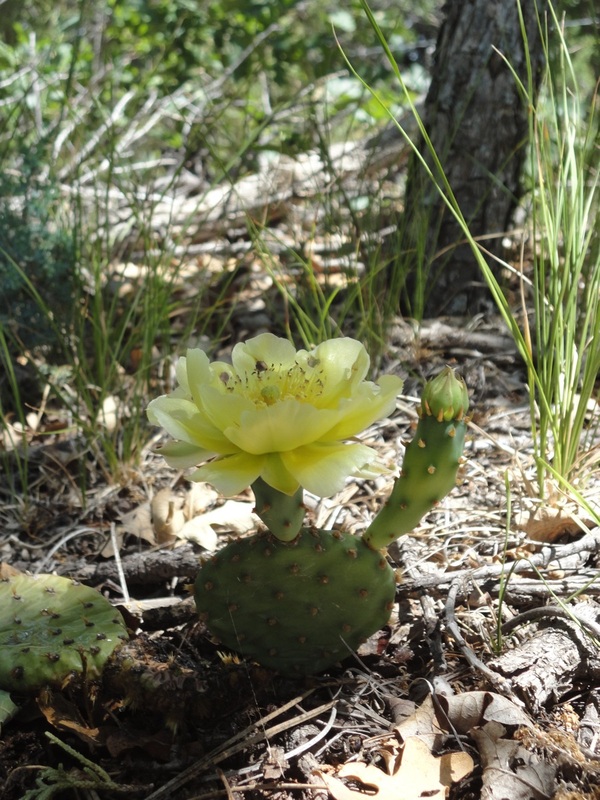
One day I saw buds on a prickly pear cactus so I gave it water. At the end of the day I looked over and it had bloomed! Sweet.
|
|
First week of July
Have been laying second passage of stone this week and made it half way down the south wall. Will need to taise it a bit more and slope it for drainage under the cob. Poured a ramp f/ATV. The building is an "ATV shed" to satisfy the covenants but an ATV is not a bad idea as it would fascilitate fire mitigation on the hill.

|
|
|
|
July reassessment
Musings while riding bicycle in the rain: had a pressure cooker dream, a fussy finger nick on cuticle, a day "lost" to goat pick-up postponement and now rain and Pinner pick up (son's dog)...hmmmm....time to reassess. if this building is getting hard on me (100˚+!!! f/20 days!!), probably time to take care of me, do internal work I've postponed too long. probably over-engineered building, how to simplify some? ...wonder if I can finish what needs to be done w/the one bag of quikcrete left (won't drive on wet roadpath to deliver more) also bring up more water collection, aerate the roadpath. (glad I put that tiny drainpipe in the low spot of the building or I might have a swimming pool!...we'll see how rubble trench foundation works too...). clearly I will not finish the building this summer, so take time to plan how it will winter-over. get cob high enough to hold temporary timbers then cover w/tarp..this way can continue cobbing into the fall as high or not as it gets. work on rocket stove?
STONE July 19, 2012
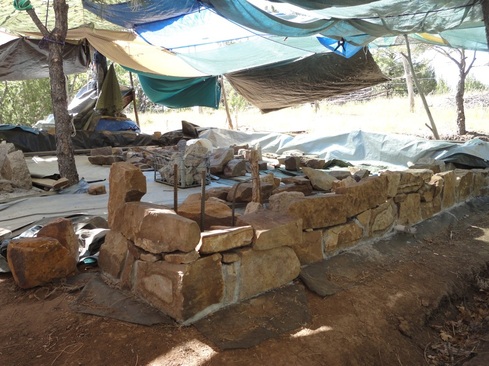
Since May 22nd, all around with first course of stone, then second. Two days ago a small pile was left in the middle & I looked around and saw West side could go up a bit for snow protection to reach the desired approximate 20", plus a couple of "two-stone" seams could use a "one-over" stone, and the main NE corner could go up a bit. So I laid remaining stones all around the wall end-to-end and began mortaring the East side one more (or a few little) stone up.
It's very interesting how it seems to happen that when one doesn't over-think the selection of stone to fit a space, but rather just picks up one after another, they seem to magically fit. And if one ends up working long and with rigor to get stones to fit, you've probably got the wrong stones. Put them aside, relax, and try something else.
STONE. They have been:
• gathered and hauled from stone field
• washed with a steel brush
• laid out on clean surface so you can see sizes and shapes
• fitted into place, sometimes removed and replaced
ª sometimes scored to fit and, with mallet and stone chisel, reshaped
• sprayed, mortared into place
• mortar seams cleaned with steel brush, toothbrush and trimmed with sponge with vinegar to remove lime
• kept moist with wet burlap and tarps for days following (double burlap then a wet coil on top of wall works well with moisture seeping down for a couple of days)
Working with stone for weeks has a gravity to it. This material....concrete. Not the most natural. AT 55 60# bags I decided the walls could be cob into the cavities. I had planned to make all surfaces outward-sloping, but no more concrete!!! I counted mortarted stone on two sides of only the building...will count all someday. Guess? 5-800 stones set.
But the stone itself...itt is beautiful to behold with syncopation of shape, color, and size. The surfaces with topography and lichen; the relationship of angles, linear lengths managed level with the ground. Stones with a curved side for turning roundy corners of building. Most of it is limestone with bit of sandstone that I normally avoid f/building but use some with its interesting shapes and colors.
Chinkers are smalls stones and chips from shaping used to shim stones to the right angle against its brother. Long thin stones. BFR's, the heavyweight papa and mamas.
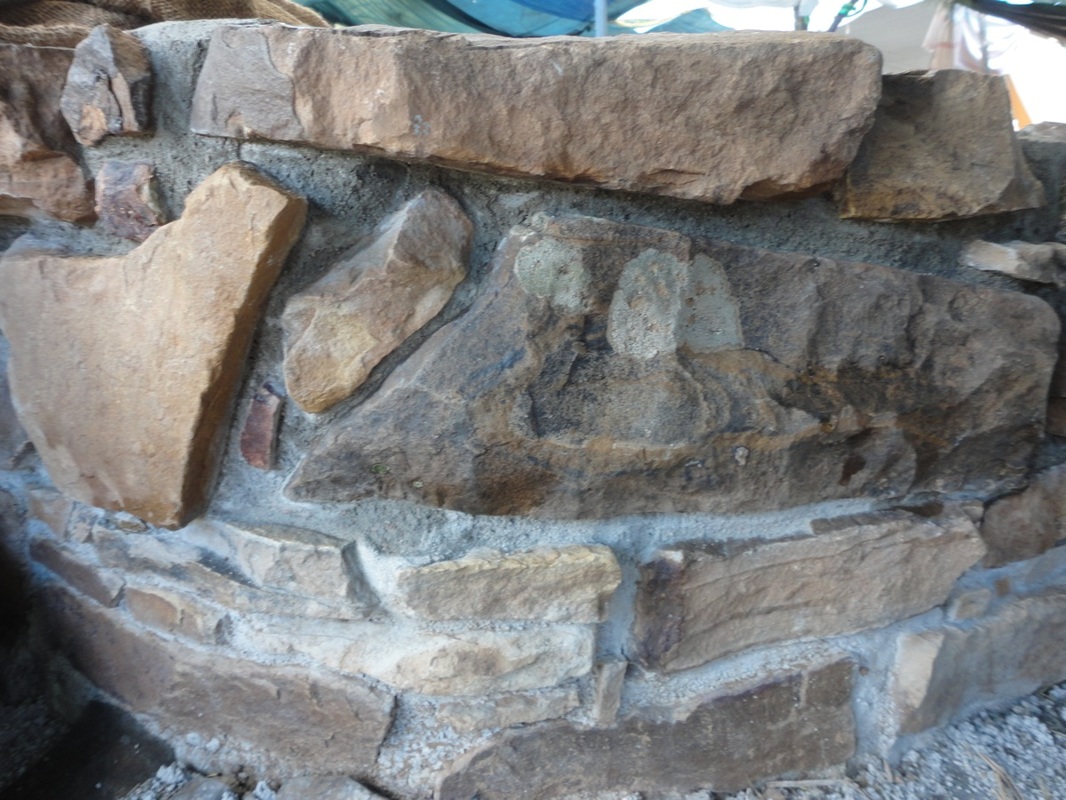
Stones with a few stories to tell like bead-making hole in the one I set into NW corner. Or slash of the scooploader blade set into left door pillar.
I just saw a. film on Stonehenge in which they explained that for those stone age people stone was related to the ancestors and they made their dwellings–homes of the living–out of perishable material. As I filled mortar water bucket yesterday I looked at the word mortar with the root MORT.
Stone has weight & heaviness. It tells the story of the history of the earth.
I hope to get to cob before summers end and raise it high enough to run timbers rested on low walls from one side of the building to the other then to put a tarp over it for winter. The building season it too short here.
Not to mention that I am just getting strong again. Off season is too long.
It's very interesting how it seems to happen that when one doesn't over-think the selection of stone to fit a space, but rather just picks up one after another, they seem to magically fit. And if one ends up working long and with rigor to get stones to fit, you've probably got the wrong stones. Put them aside, relax, and try something else.
STONE. They have been:
• gathered and hauled from stone field
• washed with a steel brush
• laid out on clean surface so you can see sizes and shapes
• fitted into place, sometimes removed and replaced
ª sometimes scored to fit and, with mallet and stone chisel, reshaped
• sprayed, mortared into place
• mortar seams cleaned with steel brush, toothbrush and trimmed with sponge with vinegar to remove lime
• kept moist with wet burlap and tarps for days following (double burlap then a wet coil on top of wall works well with moisture seeping down for a couple of days)
Working with stone for weeks has a gravity to it. This material....concrete. Not the most natural. AT 55 60# bags I decided the walls could be cob into the cavities. I had planned to make all surfaces outward-sloping, but no more concrete!!! I counted mortarted stone on two sides of only the building...will count all someday. Guess? 5-800 stones set.
But the stone itself...itt is beautiful to behold with syncopation of shape, color, and size. The surfaces with topography and lichen; the relationship of angles, linear lengths managed level with the ground. Stones with a curved side for turning roundy corners of building. Most of it is limestone with bit of sandstone that I normally avoid f/building but use some with its interesting shapes and colors.
Chinkers are smalls stones and chips from shaping used to shim stones to the right angle against its brother. Long thin stones. BFR's, the heavyweight papa and mamas.
Stones with a few stories to tell like bead-making hole in the one I set into NW corner. Or slash of the scooploader blade set into left door pillar.
I just saw a. film on Stonehenge in which they explained that for those stone age people stone was related to the ancestors and they made their dwellings–homes of the living–out of perishable material. As I filled mortar water bucket yesterday I looked at the word mortar with the root MORT.
Stone has weight & heaviness. It tells the story of the history of the earth.
I hope to get to cob before summers end and raise it high enough to run timbers rested on low walls from one side of the building to the other then to put a tarp over it for winter. The building season it too short here.
Not to mention that I am just getting strong again. Off season is too long.
|
|
July 29th
July 29th Sunday
Musings:
It feels like a propitious day.
I was surprised by a decipherable whisper
Across my hand this morning as I laid something
On the front seat of the car.
Autumn!! It had a presence. Brief, soft and gentle, but a presence.
On the drive home, as soon as I got on the Beulah highway heading east, I was thinking of bench ideas on the corner of the porch when, a beautiful large dove-like bird flew along with me carrying a little branch with tiny limbs, for its nest. Then two swallows dipped and dived with me as I neared town.
Building:
(Will soon count stones in the walls. Guess? 463)
I laid the final stones on the south wall. At first thought I was done, with only 8 stones in the two disappearing piles of washed But I saw an unevenness in the top line and thought it best to even it out. I used every single stone that was gathered and washed weeks ago. Washed five very small stones–not as tiny as chinkers, but palm-size. They were on the stone washing table to be washed. The middle of the tarp is empty. There are a few irregular sandstones, and two palm-size stones on the cob bench, and one ok building stone holing down empty cement bags, but other than that, every single building stone has been used. No more. No less. Remarkable!
I used the three of the four buckets of rainwater sponged up from the tarp on Friday to make mortar, to wet burlap, to mop big tarp, and to wash a few smallish stones that has been waiting on the wash table.
I initially planned to make cement so that any water on it would drain away which would mean filling between all urbanite. But at 50 bags, I said enough is enough. I have been rethinking this...
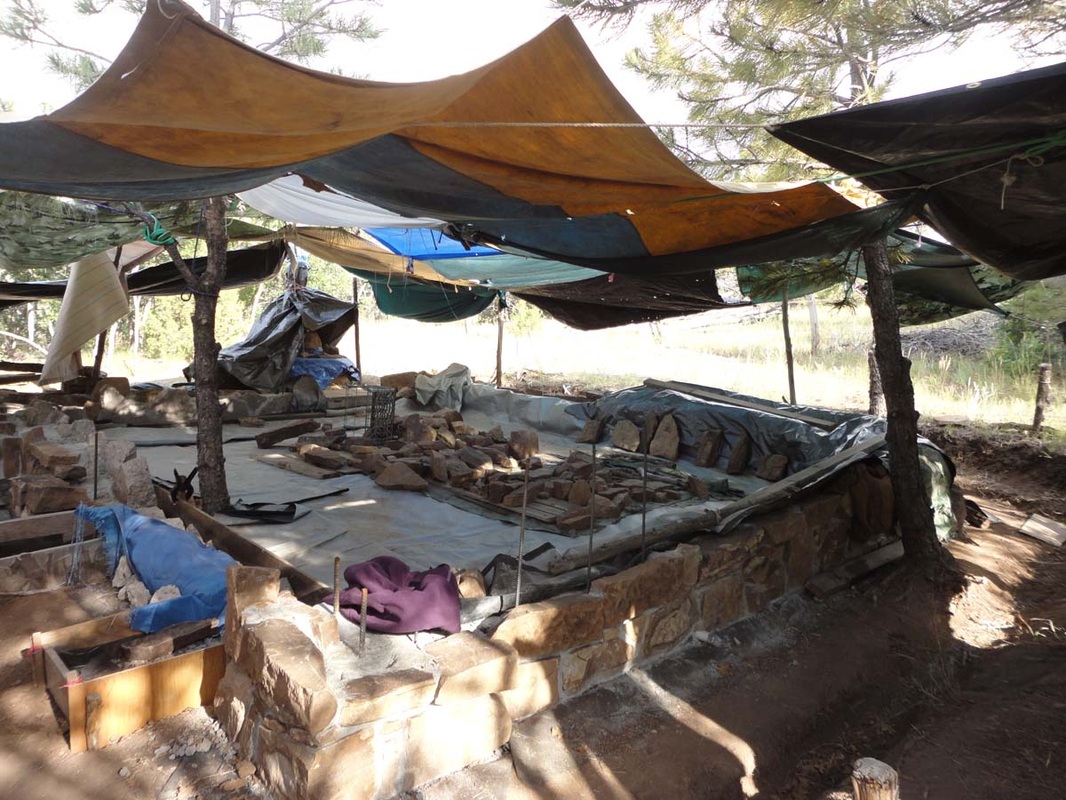
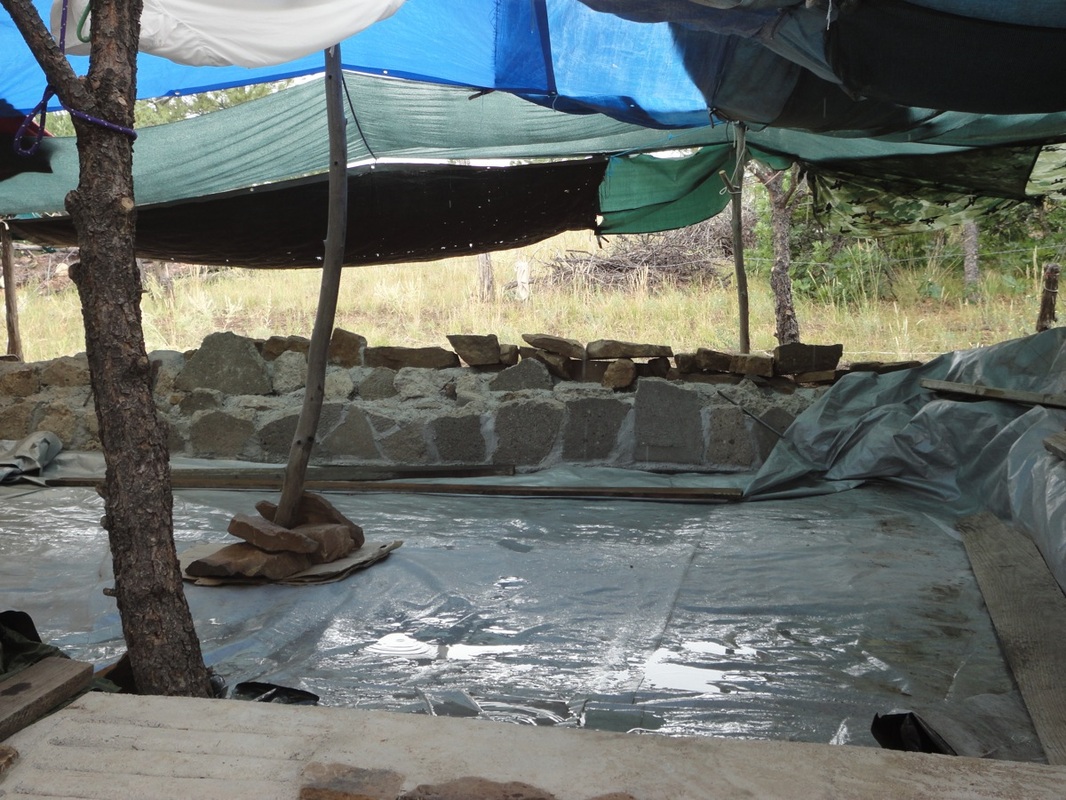
NORTH STONE WALL
NORTH WALL/STONE view from above. Note urbanite facing interior will be covered with rigid insulation.

NORTH STONE WALL: Detail 1, Cornerstone NE
|
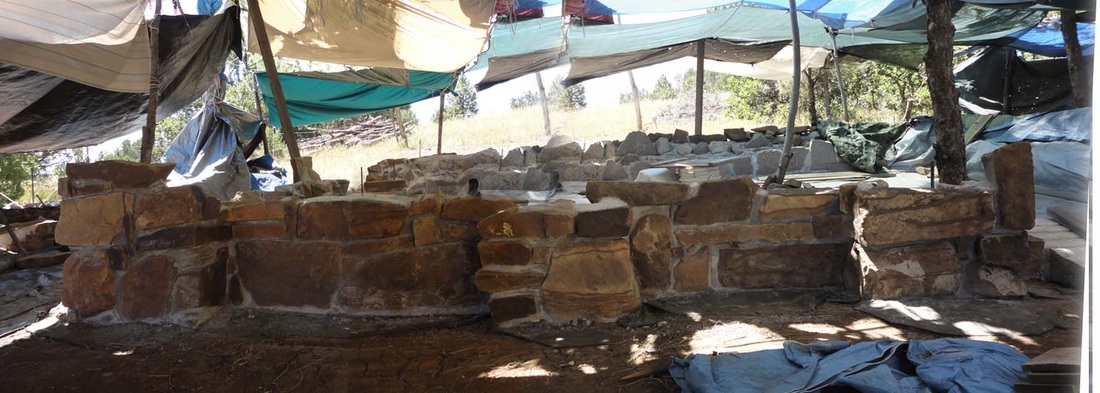
NORTH WALL/STONE: Panorama
|

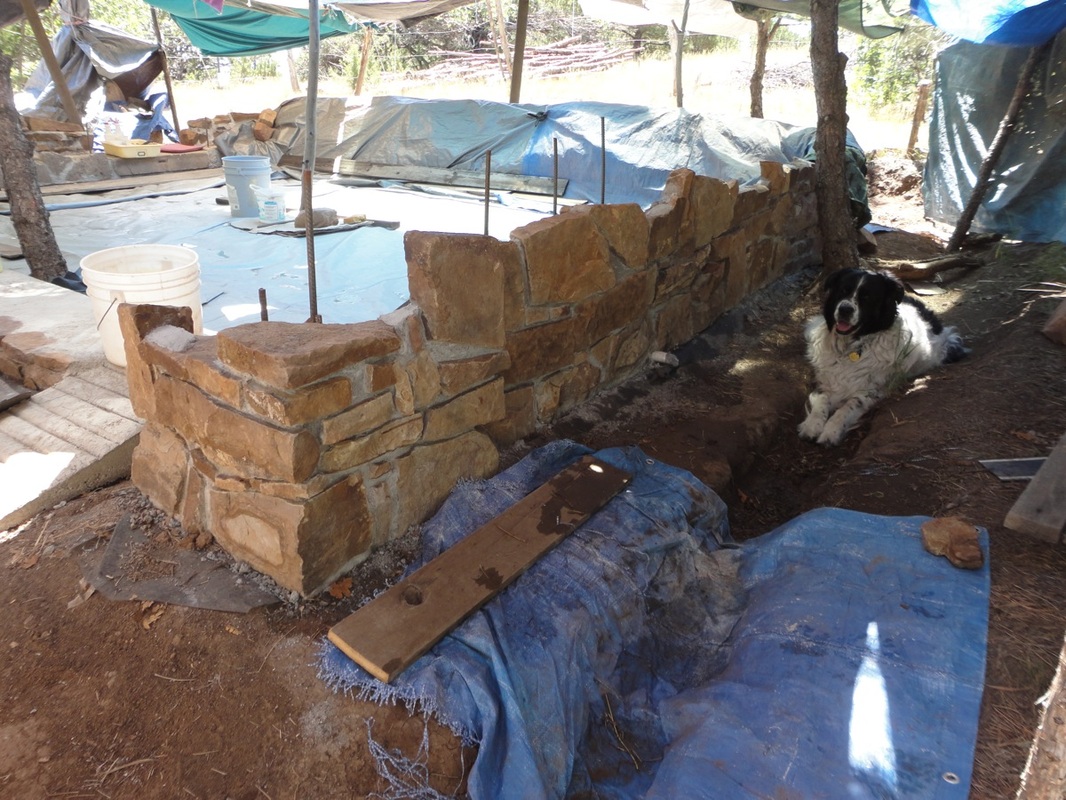
SOUTH STONE WALL
SOUTH STONE WALL
|
SOUTH STONE WALL with what I thought were final stones placed but not mortared yet. I thought the pile of washed stones in the middle were the only stones I'd have left over, but I used them to even out the wall. I USED EVERY STONE!
|
WEST STONE WALL
WEST STONE WALL
Sweetie is lying in what was the beginning of the curtain drain. I wet the little dtich for her to keep cool during daytime heat.
Sweetie is lying in what was the beginning of the curtain drain. I wet the little dtich for her to keep cool during daytime heat.
Snakes and wasps
...are our friends, but we don't want to get stung or bit....so....
....I give the wasps their own water pail.
|

Rock washing brushes eventually lose their bristles which are needle-like and end up in the water and sponges, so they must be retired. I found a use for them, placing them around rocks to discourage snakes from cozying up to warm stones.
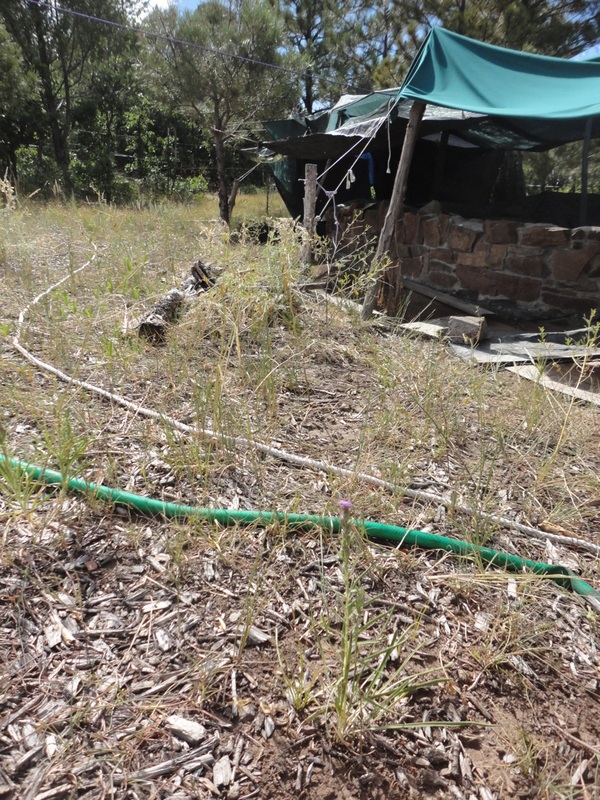
...and both a hose and a rope all around the site. A Mexican guy told me "...you know like you see in all the old cowboy movies, they put a rope on the ground around the horses at night because for some reason the snakes won't cross it..."
|
A look at the small worksite

Efficiency is a beautiful thing. This is the sum total of my work area, other than the actual walls being built. Clockwise from top: mortar-mixing coffee table. To the right, "grand central table" the first thing I built first season. It has drinking water and the two bags I take up and home each day.
Bottom left, foreground: rock-washing table. I cut off a molasses barrel into a very large shallow tray. I keep it upside down & empty unless in use so it doesn't attract wasps to the wrong area. Hoe, shovel, broom & level are next to it leaning against a completed stone porch pier.
Bottom left, foreground: rock-washing table. I cut off a molasses barrel into a very large shallow tray. I keep it upside down & empty unless in use so it doesn't attract wasps to the wrong area. Hoe, shovel, broom & level are next to it leaning against a completed stone porch pier.

Another view of "grand central" table.
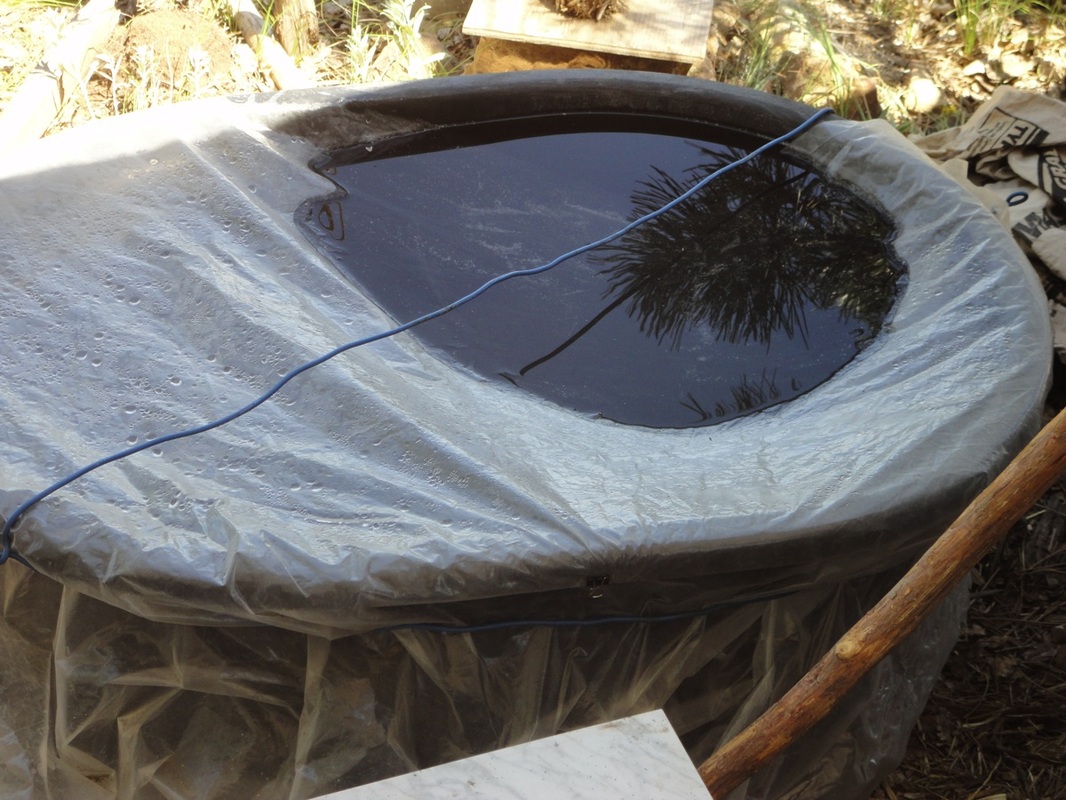
A nice rain fills up water catchment good for mortar & many other things. Tarp deteriorated into it, but I had an old scarf I used to strain the water making it clean and nice....wouldn't drink but otherwise great.
I keep it covered so as to not attract cattle or wildlife. |
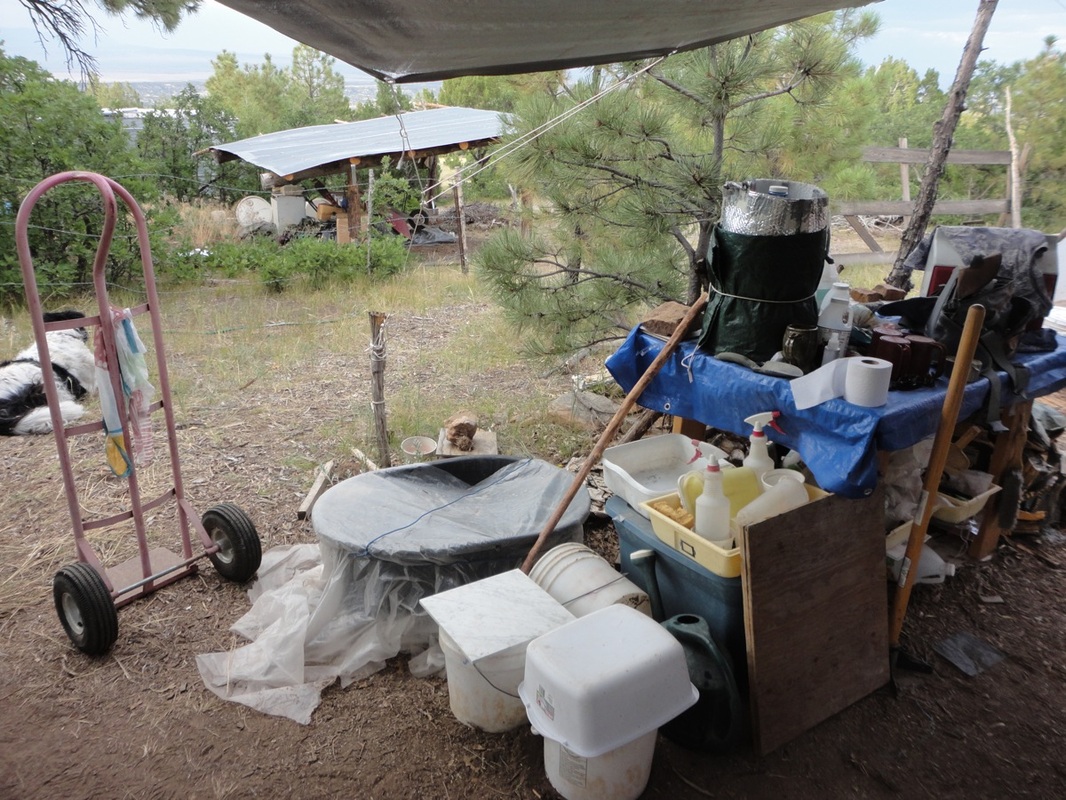
On the left side of grand central table is the mortar station and rain catchment.
Mortar is in the 18 gallon plastic bin w/snap on lid to insure it doesn't get wet. BUCKETS BUCKETS BUCKETS! One designated for clean water for making mortar. Others for dirty rock-washing water, sponged up rain water, etc. |
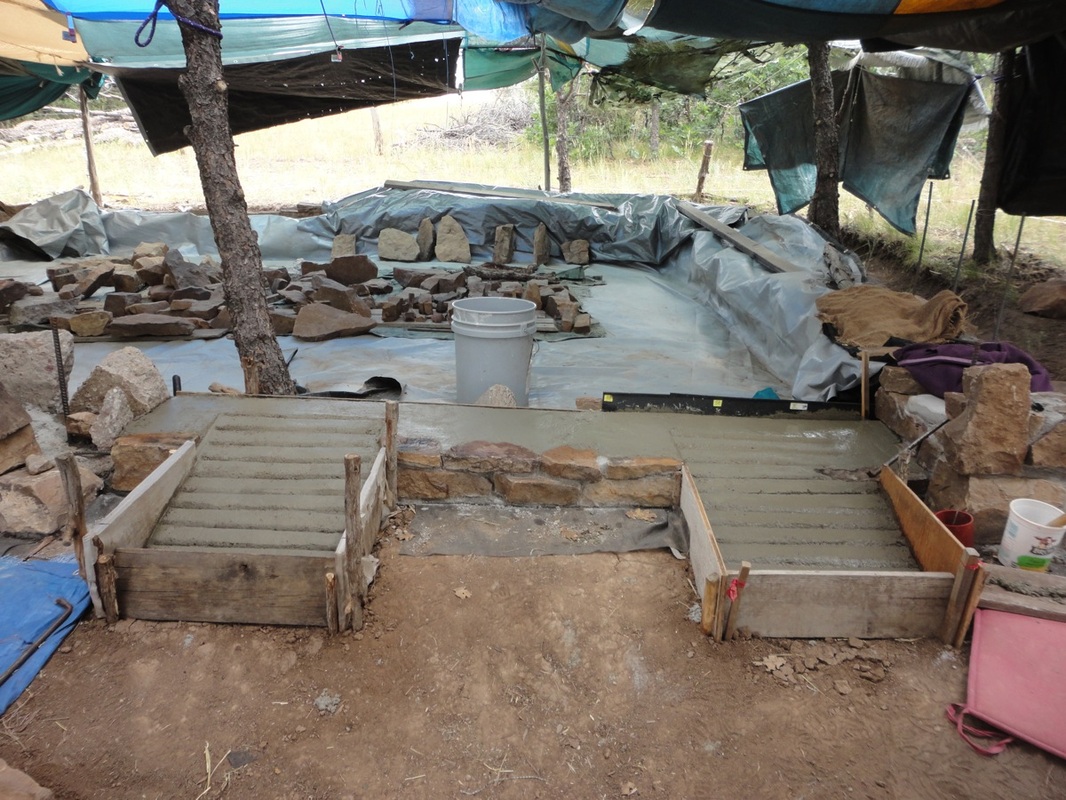
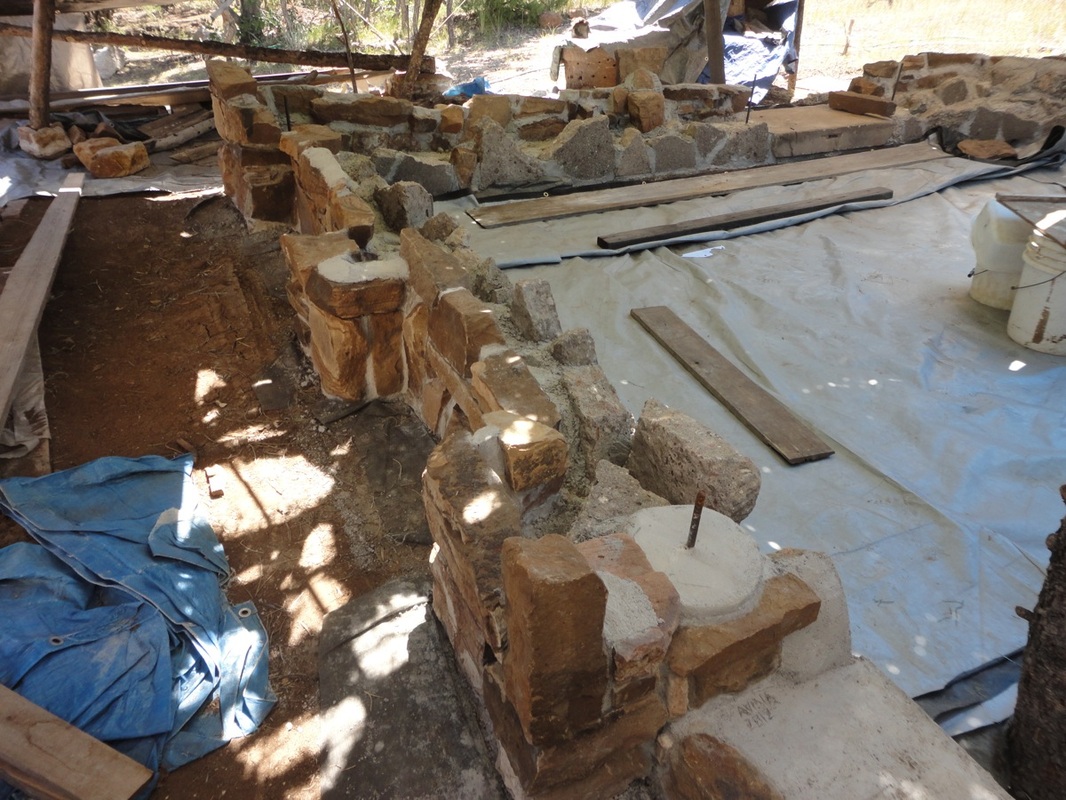
FINISHING ALL STONE AND CONCRETE
NW Corner
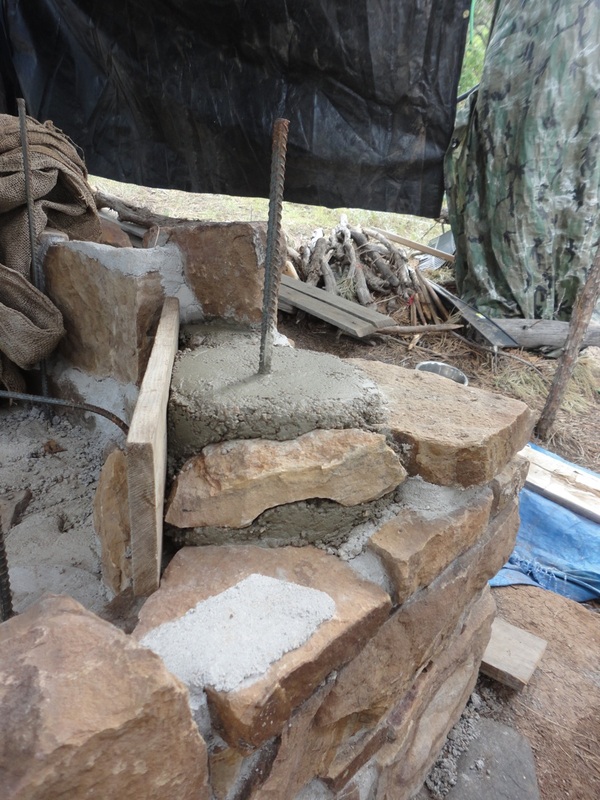
There are several places where vertical timbers will be embedded either in the wall or on the sides of doors.
|
South wall base for a timber
This is to make a seat for the timber at the side of a window and also to support a girder. I stacked and mortared the last few stones I could scavenge and used some long plastic strips scavenged from the dumpster behind an auto supply store and a vinegar bottle. Rebar is in the middle.

Here is is after removing the plastic "form" from lower part. The pillar base above and this one are level with each other. They will partly frame south-facing windows.
|
Curing concrete
Mortar and concrete is strongest if it is kept moist for five days after the pour. As mentioned, I cover with wet burlap, but then tucking tarps around it so the wind won't blow it open is important, too.
|
Tarps!
And as mentioned, the tarp I used to cover the whole site last winter serves as a good cover to keep new mortar or concrete moist (with wet burlap, too, of course). This camo shade tarp was over it to keep the sun from deteriorating it over the winter. I raised it for shade, but you can see the UV's are finally doing it in.
|
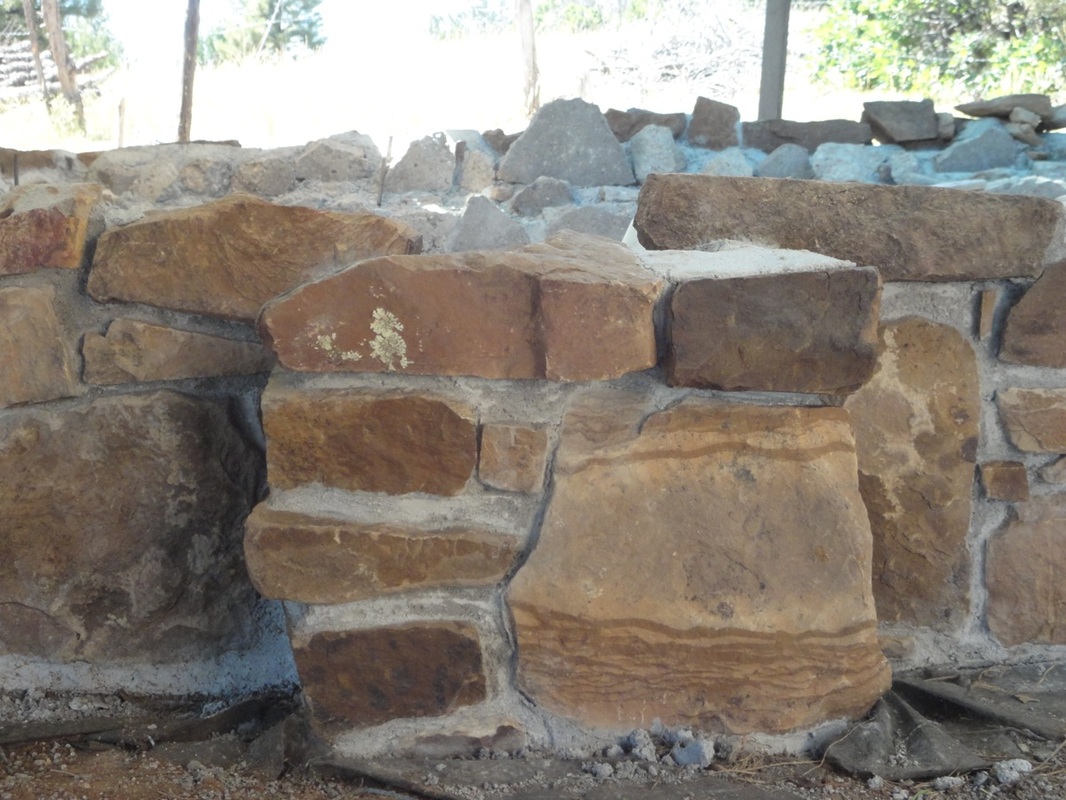
Ready for winter
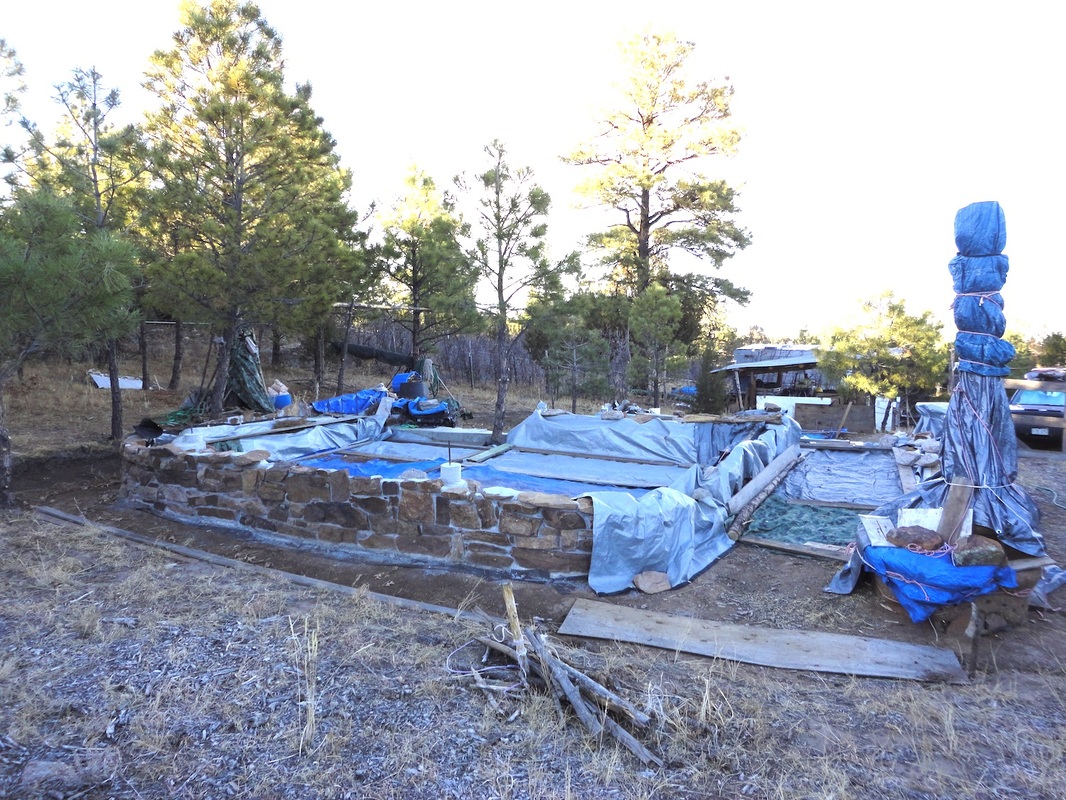
Here is a view of the south wall with all stonework completed. Stone under cob, as this will be, does not have to be straight at the top, but as I finished my stone work I decided this side would look better more straight than not. One stone at a time, I picked up stones from the small pile of remaining stones. Each I picked up fit perfectly in a spot on the wall and I used every single last stone that had been washed for mortaring. The 3 or 4 left on site were used to hold tarps down and were rounder crumbly sandstone that I avoided using in the wall. Using every stone is virtually unheard of in stone work. It is said you need 3x as many stones to choose from for a stone wall.
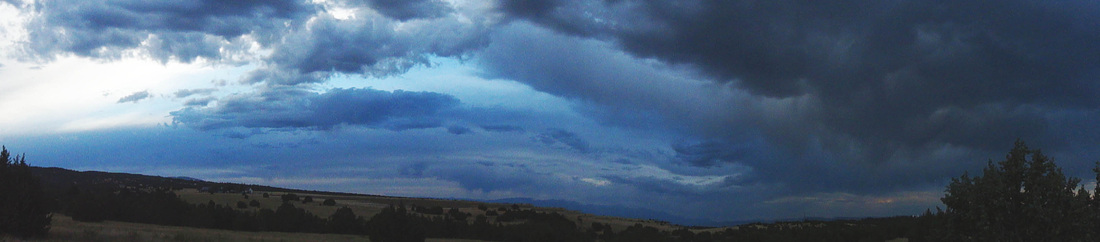
Stone work was done in early August, but I'd left a few things out and covered the wall with tarps. By November, a wicked wind had come and vandalized the whole place, so I took a day to reconfigure tarps for the winter. On the right where the tall pole rises is the lizard bench. Between it and the building is a porch that runs north/south (doorstep stone is here). The distant view is to Pikes Peak but the camera exposure made it white.
The cob bench will be a place to sit in the sun in the winter under the porch. The porch preserves views to Pikes Peak, or from down the hill, the view of the meadow.
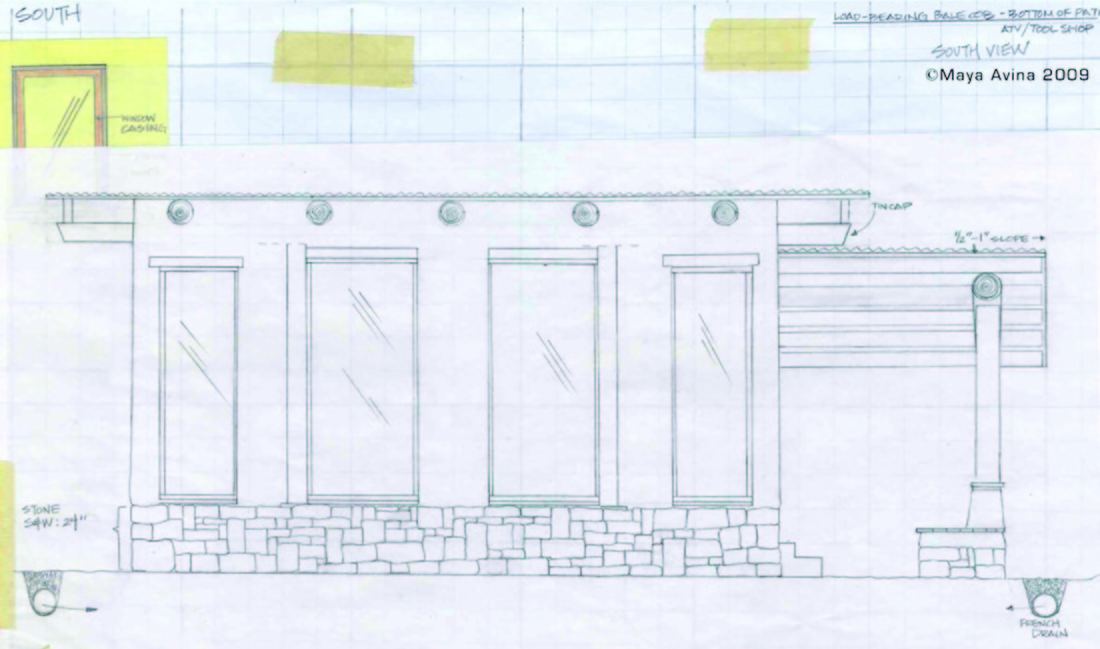
Below is drawing of what this wall will look like. As I studied the building, I rather wish this solid cob wall would have a continuous gentle curve like most cob buildings, but then I recall that part of my intent was to make a building that was palatable to the sensibilities of people who are accustomed to stick-frame buildings, so the curves only on SW and SE corners make sense once again.
Stone work was done in early August, but I'd left a few things out and covered the wall with tarps. By November, a wicked wind had come and vandalized the whole place, so I took a day to reconfigure tarps for the winter. On the right where the tall pole rises is the lizard bench. Between it and the building is a porch that runs north/south (doorstep stone is here). The distant view is to Pikes Peak but the camera exposure made it white.
The cob bench will be a place to sit in the sun in the winter under the porch. The porch preserves views to Pikes Peak, or from down the hill, the view of the meadow.
Below is drawing of what this wall will look like. As I studied the building, I rather wish this solid cob wall would have a continuous gentle curve like most cob buildings, but then I recall that part of my intent was to make a building that was palatable to the sensibilities of people who are accustomed to stick-frame buildings, so the curves only on SW and SE corners make sense once again.
Friday August 3rd, 2012
Now that all stone and concrete work is done, it is time to shift gears for timber and cob. But whatever is done must winter over, so it will take some strategizing to figure out how to best go about this. It's also time to shift gears to begin the teaching year, the next nine months. It is quite difficult to do the less-physical work of teaching for nine months, then get in shape and do such physical work for three.
This was my third summer working on the building on the land. Perhaps I can finish it next summer.
I like to see the flitting bluebird
to find a frog under molasses barrel
to be surprised by late summer purple liatras
saved sans heavy equipment
I like gathering rainwater
and listening to the new song
in the trees
as summer thinks
about giving over to autumn
Principles for working with people:
1. Time for learning and awareness. First, spend time just being on the land and feeling it; this is more important than “doing”. It will inform "doing". The central ethic to being here is to learn how to be in partnership with the land and not dominate it.
2. Focus energy to understand (vs. only entertainment, chatting, etc.) Understand the implications of tasks we are doing and do tasks in so that the process and end result serves intended purpose; be aware enough to invent procedures, tools, etc. as needed; understand what needs to be planned to proceed in terms of tools to bring up, what to prioritize, etc.
(For example, yesterday I was just standing looking at the site and I realized how important the simple retaining wall (yet to be made) will be for the lower terrace. It will appear much larger than the building because it will be in the foreground when one looks uphill. I want it to create a sense of structure without appearing rigid. Also, I saw that the corner I started May 22nd will be visible from below so I need to make sure I use a couple of substantial beautiful stones on it.
Another recent realization was that that first post needed to have rebar extending into the doorway next to it so that I can add to the continuous bond beam around the building.)
3. Be safe. Statistics show people have more injuries when there are more people working or they are closer to "civilization". Use tools safely. Put them in safe place. Think ahead to prevent accidents.
4. Enjoy!!! Pace oneself, don't overwork.
5. A broader general concept I think we need to contemplate: the impulse to design evolved to facilitate survival but how has it become a liability as we use up resources; and how do we need to manage that impulse and carefully choose what is sustainable.
