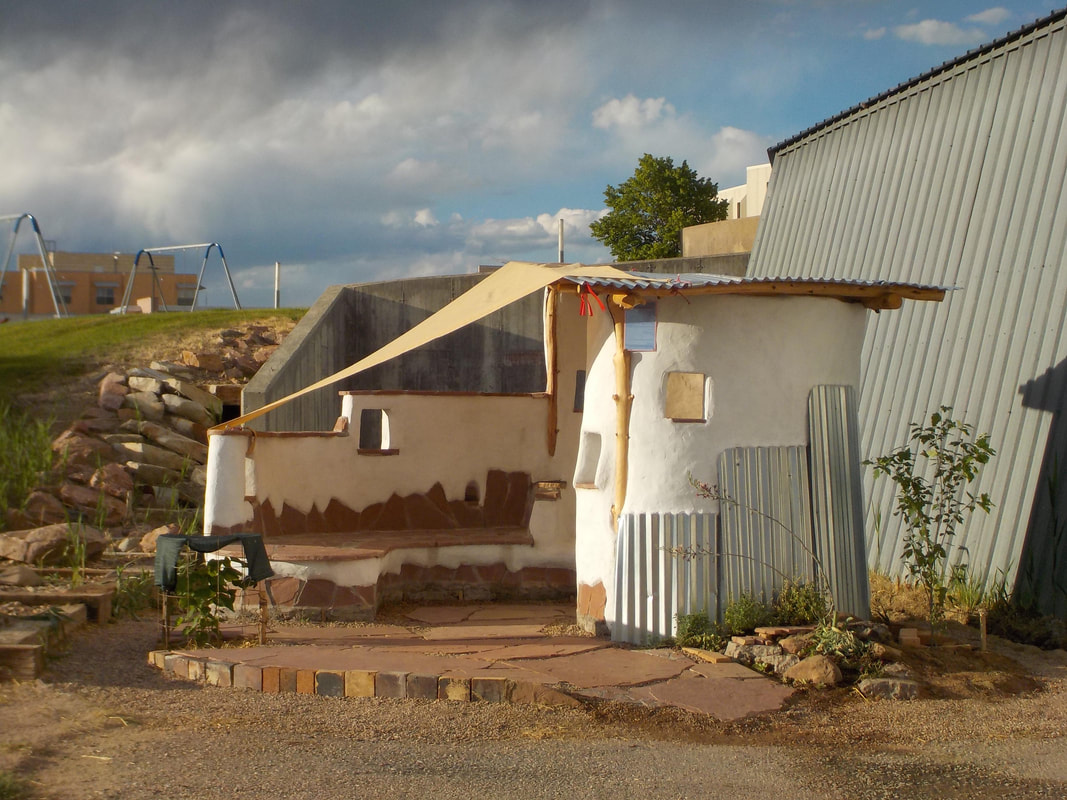
Cob bench at Colorado State University-Pueblo
Retiring from academia this year, I decided to teach a class in Natural Building before I left. The university is very pro-technology and pro-placing students in the existing economy, and Natural Building is much less, if at all, about these things; so I'd never tried to bring it to the table. However, I will credit them with having been supportive of my research in this area with two sabbaticals for working on the ATV Shed project.
Creating a syllabus and schedule for something that is such an organic process was challenging, even more so where the weather changes every five minutes. But we made it work. Seven women enrolled in the course. In the dead of winter, we began the semester with a PowerPoint I made based on the book "Cradle to Cradle" and I assigned readings from "The Hand-Sculpted House". We did field trips to see projects I've completed and the students designed and built small scale models of something they might build out of cob.
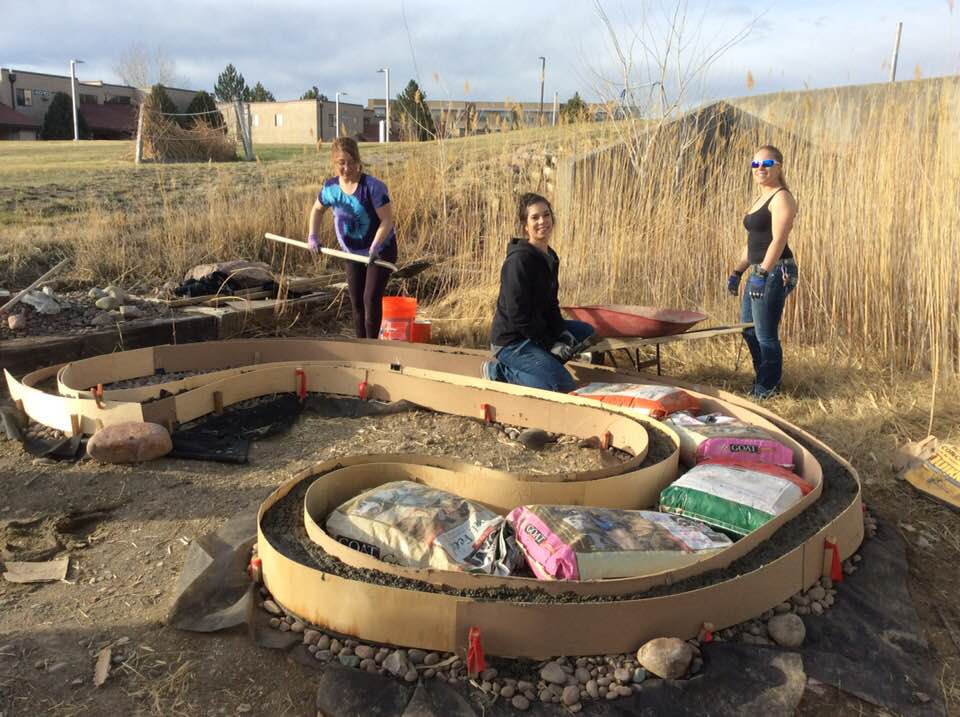
Finally as weather warmed up, we chose a site, they collaborated on a design and we began the foundation. There had been a commitment by university facilities for a tractor and we had two days of making tractor cob on the schedule, so our project was quite ambitious. As it turned out, the tractor did not manifest, so the bench was not finished by the end of the semester. However, one student hung in with me and a former student and dear friend, Jen Derge, stomped 99% of the cob. Three of us worked into May and two of us finished it all June 24th.
The students were amazing–so interested, engaged and full of ideas. I was curious to see who was drawn to what materials as I've found most everyone has an affinity for something. Some like stone, others not. Same for wood, cob, cooking, etc. Sydney loved stomping cob, but Alicia (an Art History major) couldn't handle the mud on her feet. She was super good at hugs, smiling, reporting on the Notre Dame fire and snacking. She also got us gravel from her house and a beautiful agave. Scarlet loved peeling logs. Catherine tried a little bit of everything. Liz hauled a huge load of rubble in her truck, got us straw from Big R and did her best working full time and going to school full time. Brittany did anything asked of her and more. Nancy, too. Nancy is just a few years younger than me and she began cobbing in earnest when the seating was being finished and she worked until the very last day nearly every day with me.
Creating a syllabus and schedule for something that is such an organic process was challenging, even more so where the weather changes every five minutes. But we made it work. Seven women enrolled in the course. In the dead of winter, we began the semester with a PowerPoint I made based on the book "Cradle to Cradle" and I assigned readings from "The Hand-Sculpted House". We did field trips to see projects I've completed and the students designed and built small scale models of something they might build out of cob.
Finally as weather warmed up, we chose a site, they collaborated on a design and we began the foundation. There had been a commitment by university facilities for a tractor and we had two days of making tractor cob on the schedule, so our project was quite ambitious. As it turned out, the tractor did not manifest, so the bench was not finished by the end of the semester. However, one student hung in with me and a former student and dear friend, Jen Derge, stomped 99% of the cob. Three of us worked into May and two of us finished it all June 24th.
The students were amazing–so interested, engaged and full of ideas. I was curious to see who was drawn to what materials as I've found most everyone has an affinity for something. Some like stone, others not. Same for wood, cob, cooking, etc. Sydney loved stomping cob, but Alicia (an Art History major) couldn't handle the mud on her feet. She was super good at hugs, smiling, reporting on the Notre Dame fire and snacking. She also got us gravel from her house and a beautiful agave. Scarlet loved peeling logs. Catherine tried a little bit of everything. Liz hauled a huge load of rubble in her truck, got us straw from Big R and did her best working full time and going to school full time. Brittany did anything asked of her and more. Nancy, too. Nancy is just a few years younger than me and she began cobbing in earnest when the seating was being finished and she worked until the very last day nearly every day with me.
Below are images in sequence for the project.
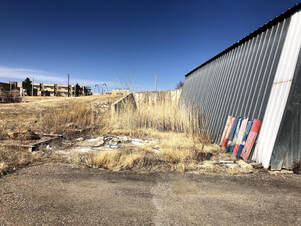
Site:
|
|
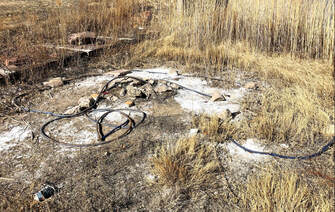
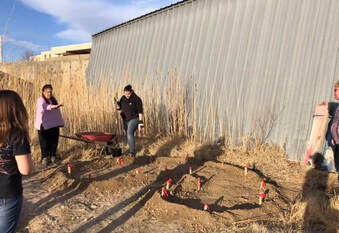
Above: I gave students three locations to choose from and they selected this distressed site (with a view of the mountains) and we laid down an old hose to mark the general area for the footprint.
|
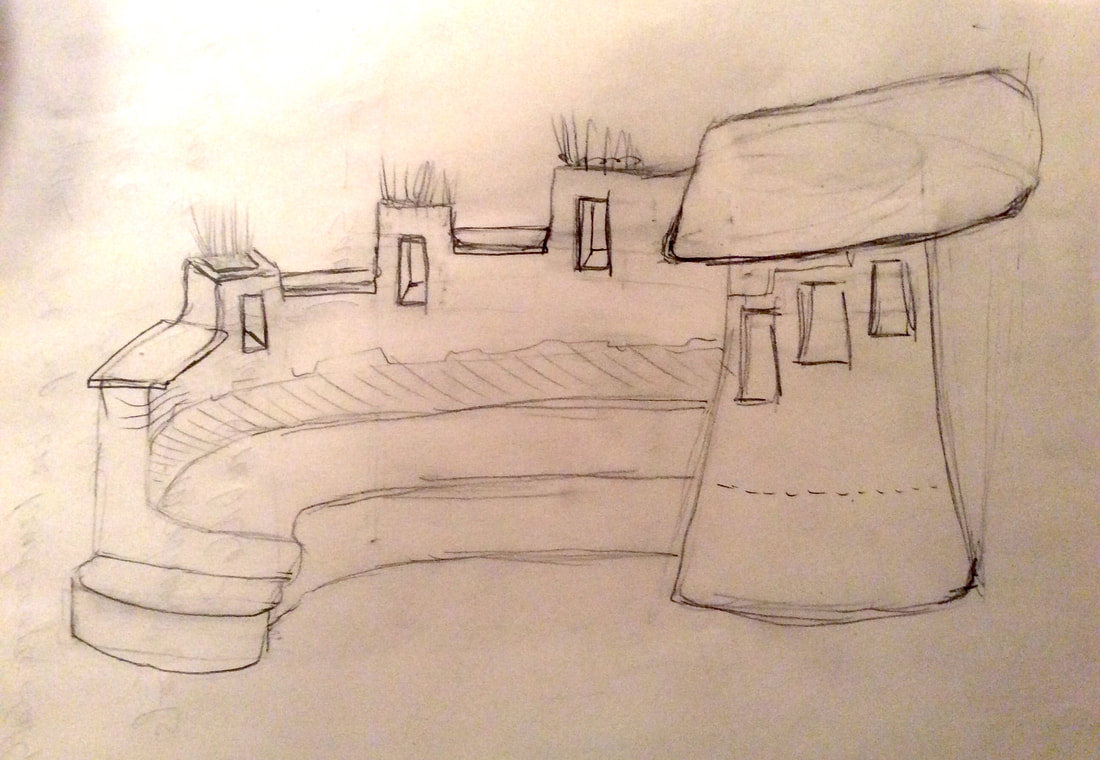
Below left: One weekend, homework was to design the bench for the site. All ideas were laid out on the table, discussed and once an approach was agreed upon, I drew them.
|
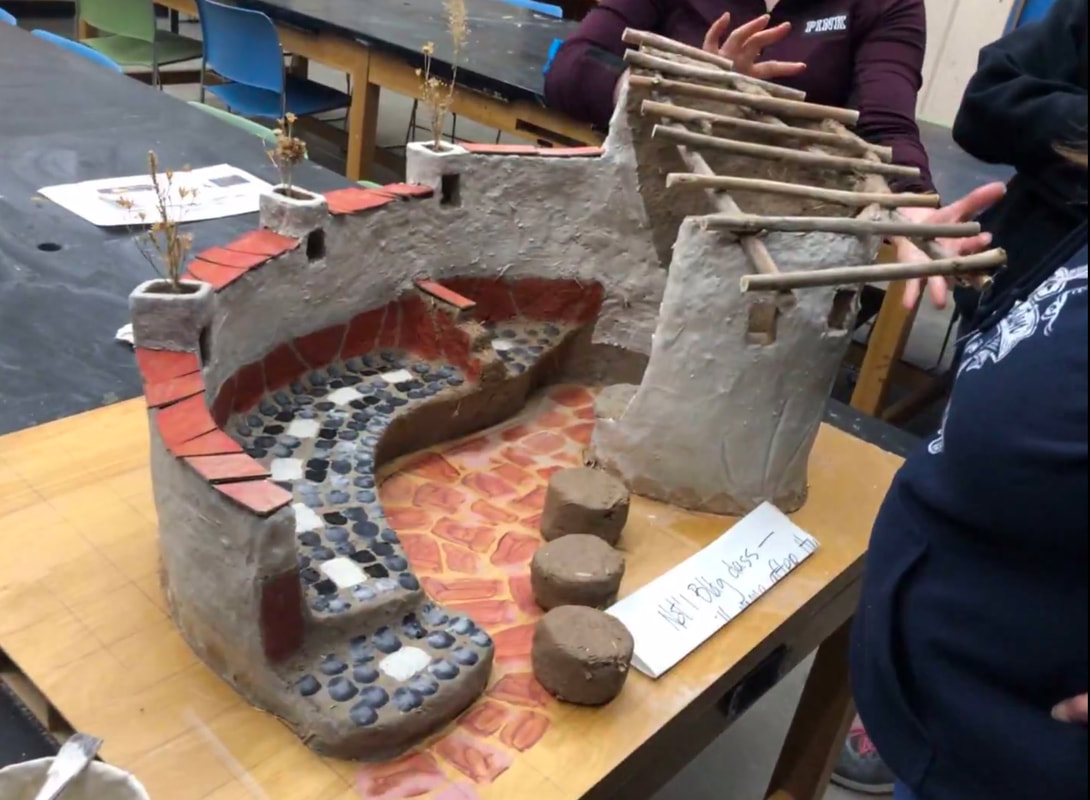
Below right: We then created a 2" to 1' grid and based on the drawing, made a to-scale cob model so that we could present and get approval for the project, which we received.
|
|
|
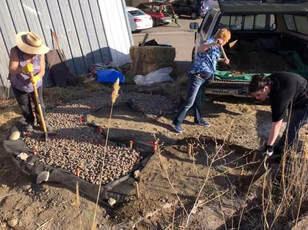
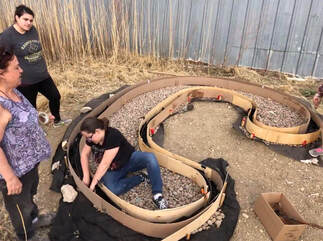
Above: The site clearly had somewhat of a drainage problem so we asked for a source of soil and hauled enough to raise the bench about 5". A rim of soil was to hold in rubble foundation until more soil could be brought. Rubble is unloaded from Nancy's truck and tamped.
At this point, we'd scaled down the length of the bench though we eventually decided to go back to the original design.
At this point, we'd scaled down the length of the bench though we eventually decided to go back to the original design.
Below: Rush Lumber gave me sheets of veneer from their scrap pile. I cut it into strips to make a form for a small bond beam to sit on the rubble with a bit of landscape cloth between and some tape inside-to-bottom to keep concrete from seeping out. The girls learned how to mix Quikcrete and we mixed and poured half a ton.
Goat feed bags filled with soil were placed inside the forms to displace some cob.
Goat feed bags filled with soil were placed inside the forms to displace some cob.
|
|
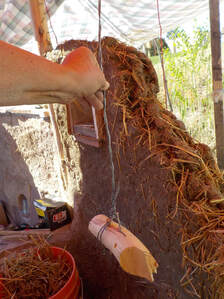
Cobbing begins!
Donley's landscaping donated and delivered 4 tons of sand. I did my best to calculate square footage for the project and estimating the cubic yardage needed. I didn't do too badly. We had to purchase another ton for some cob and the stuccoing but the amount of sand was almost right on.
Clay was reclaim from the university pottery a hundred feet away, and some from site.
Clay was reclaim from the university pottery a hundred feet away, and some from site.
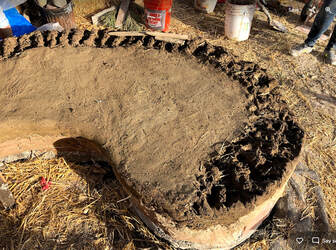
Above left: bench with texture of "spines and ribs" for the wall to go up behind the bench.
|
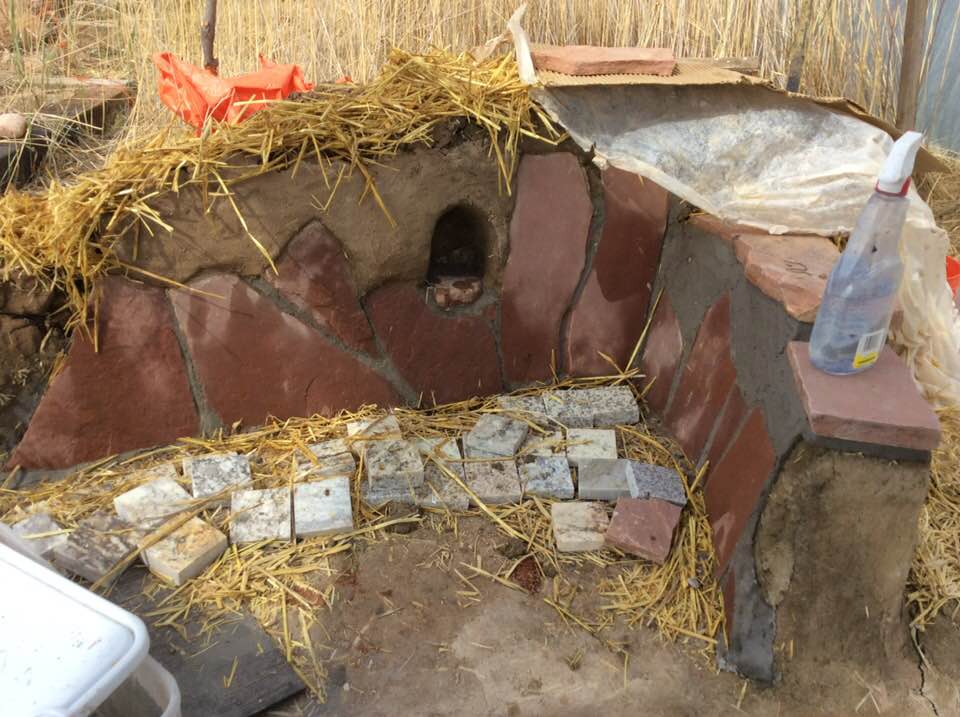
Back of outside seating: Flagstone was mortared against the cob for splash protection and then the cob was gently snugged over the top of it.
|
Below: The bench is starting to look like something!
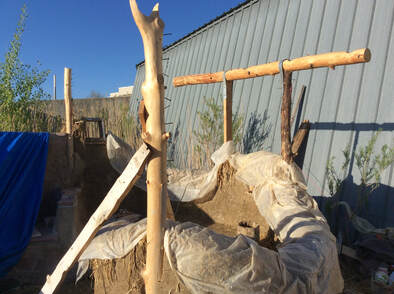
Wood elements
With the help of Jen Derge we went up to the forest and selected trees that were too crowded and the right height for our needs, cut and limbed them, tied them to the top of the Subi and brought them down for peeling in the spring when it is so easy to do. A Walnut tree had blown over in my yard a month earlier and you can see one dark piece of walnut; also another 2x4 because both of these are to be embedded in cob.
You can also see nails on the inside of vertical post so that cob can hang on to it. I added a couple big lag bolts for extra strength.
Below right: is a "dead man", a small length of wood embedded a foot or two down into the cob with a wire going up and around either girder and/or rafters. You'll also see "hurricane straps" going around the girder to hold the roof down in high wind; and this site gets high wind!
|
|
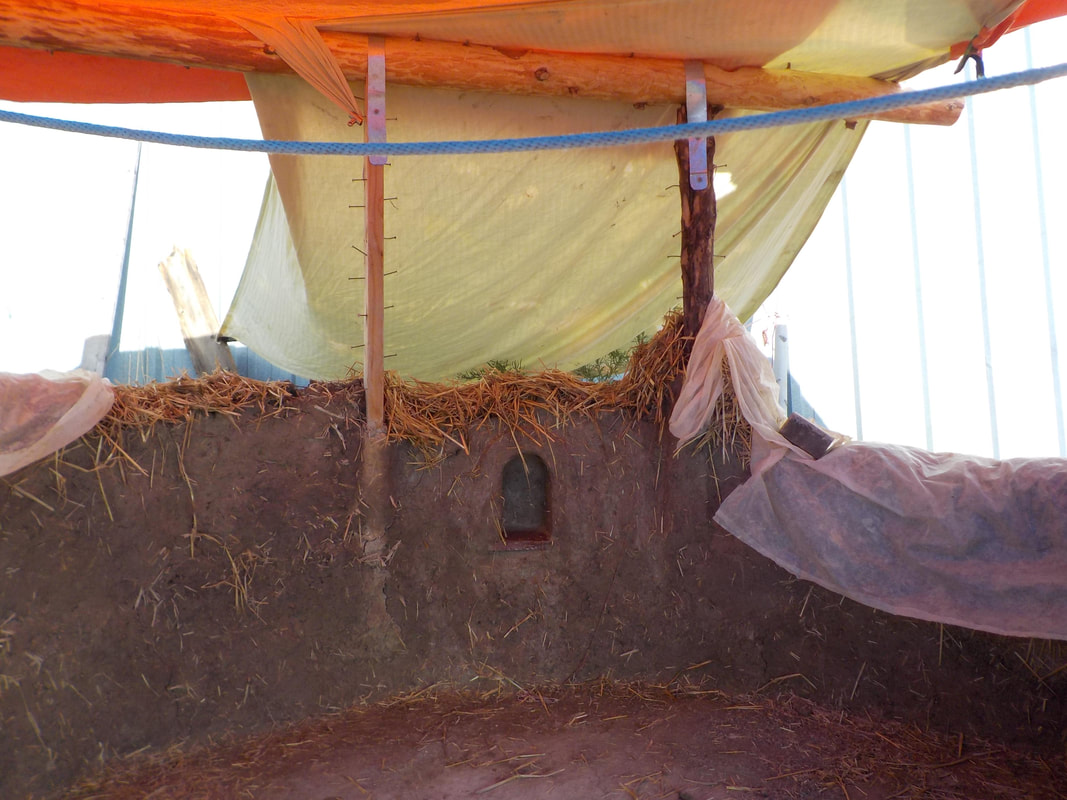
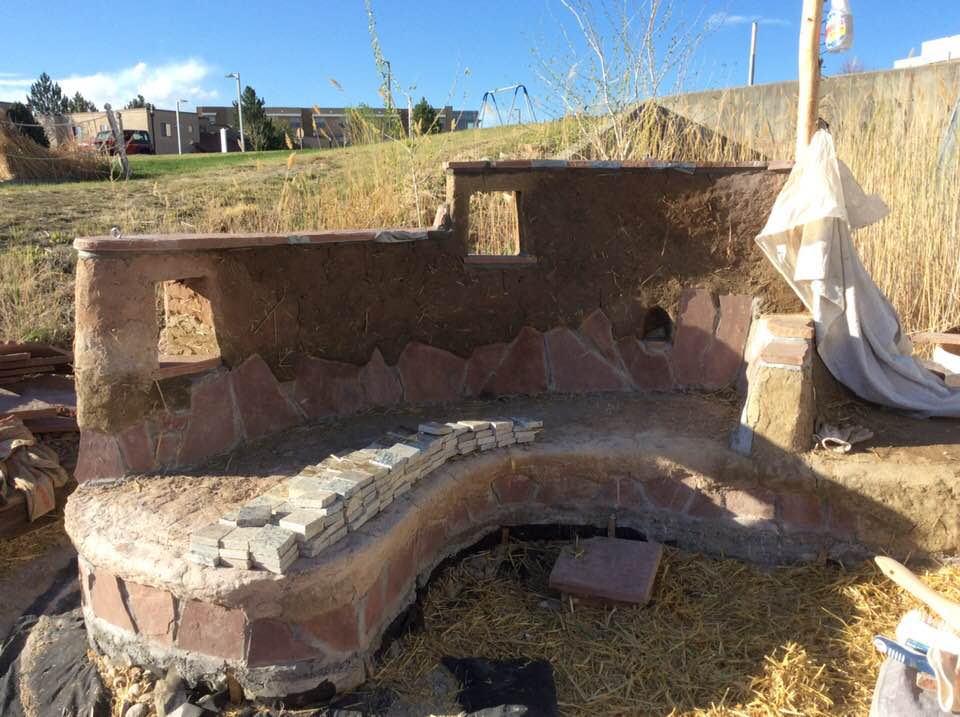
Below: Walls done! ...rafters bolted down & waiting for roofing
Jen D. sculpted the beautiful mandala.

Earthen stucco, lime stucco, lime wash, finé!!!!