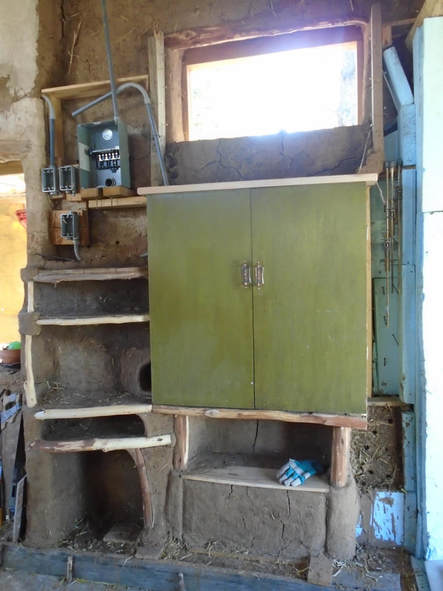
West Wall shelves: June
|
Right top:
Sturdy re-purposed green cabinets with cob shelves below and to the left. Thin rigid insulation and a layer of bubble insulation is behind cabinets. Behind cob shelves is half a straw bale cut lengthwise and to size. Right side of cabinets (for broom) is to be filled with light straw clay (straw tossed in clay slurry). The bottom has one layer packed in with drying holes visible. Note nails in rigid insulation for light straw clay to grip. All but wood will be finished with earthen plaster. I also learned a new technique from Carol Crews' book to give rigid insulation a surface that can be plastered: one cup glue to a gallon of clay slurry–dip burlap in it and pin it to the insulation with baling wire staples. Works great! The area around electric box and switches will have non-flammable fiberglass insulation (I have saved scraps from insulating my garage nearly 20 yrs. ago!!!). Bottom right: Lintels over windows have been cobbed in and half straw bales are going into place above them. To attach half bales to the wall, slurry the bale, slurry the wall, put it in place and when it dries it isn't going anywhere! |
|
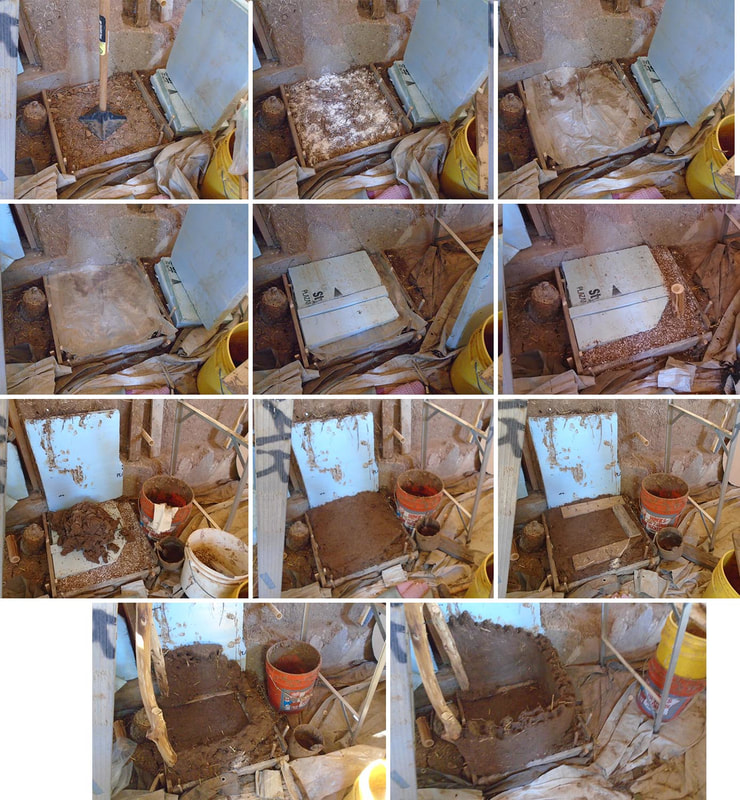
Making a floor/foundation for interior elements
I'd though the adobe floor would go in, then other elements, but it hasn't worked out that way. I wanted to get the West wall above done so the ceiling insulation would meet it and be complete. Then, extra cob was stomped so I decided to go ahead and build the firewood storage box next to the double doors.
Below is the sequence for this. First I wet the ground and drive in little juniper pegs to hold a wood form around it all.
Images 1-11 reading in rows left to right:
1. Mix of smallish stones from near the road with rubble from sifting sand: tamped
2. I put diatomaceous earth on it to discourage insects coming up through the floor, ever
3. Old tarp scrap to protect vapor barrier from rocks
4. Plastic vapor barrier (just got a long piece from behind mattress store)
5. Rigid insulation (re-purposed from re-roofing scraps over Art Dept. at university)
6. Perlite/vermiculite mixed with slurry around edges that will be closer to rocket stove (insulation that can take heat)
7. Rigid insulation on the wall attached to embedded peg put in wall for this purpose; screw into peg, baling wire around screw and through rigid insulation. Framing nails at base to pin it towards wall. Light straw clay in gaps between wall.
Pile of sand/clay mix ready to spread
8. Sand/clay mix spread
9. Boards with screws on both sides to distribute weight of cob (not necessary if foundation isn't squishy at all, ie. dryish
10. First pass of cob. Wood on front sides are to protect cob from firewood tossed in.
11. Second pass of cob with tiny spines and ribs to anchor next layer.
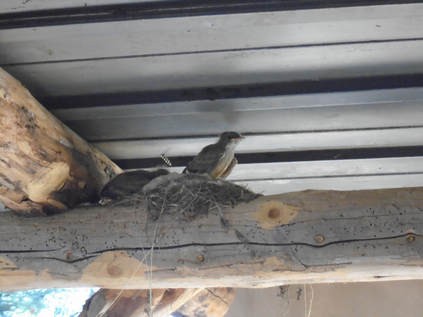
Baby bird
|
We have been graced with the company of a bird and her nest. The babies were born maybe last week, but one jumped up onto the edge of the nest today. Mama bird comes and goes as if we are her friends.
|
|
|
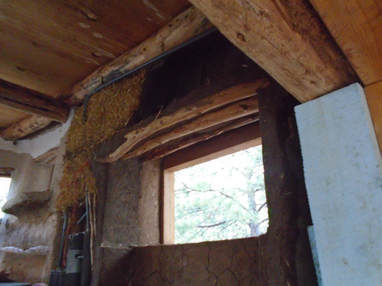
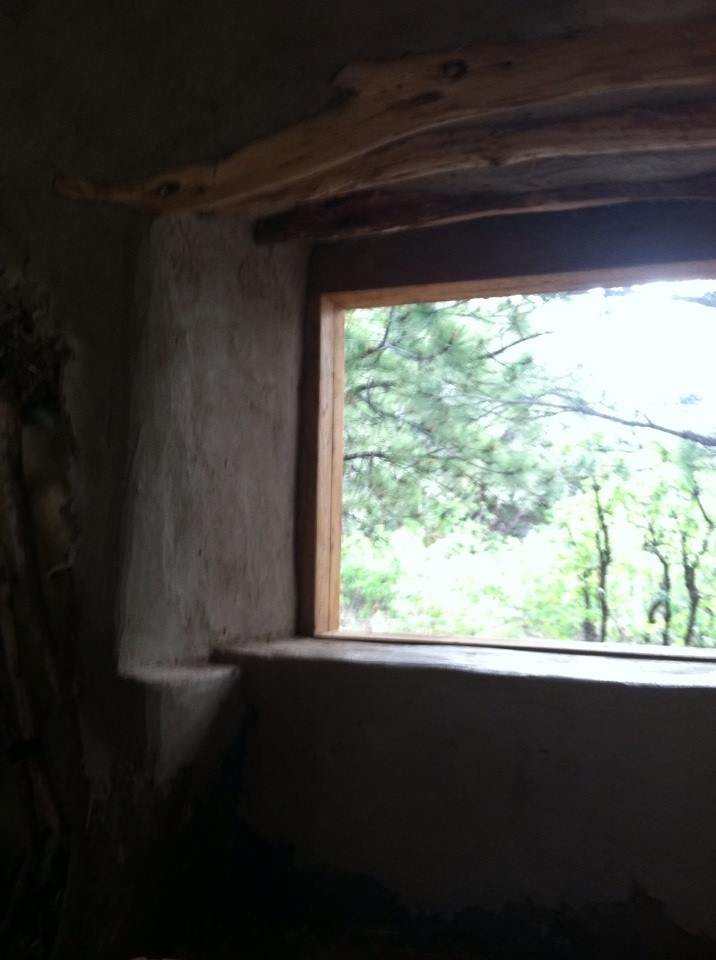
Below: Finished window opening, west wall.
|
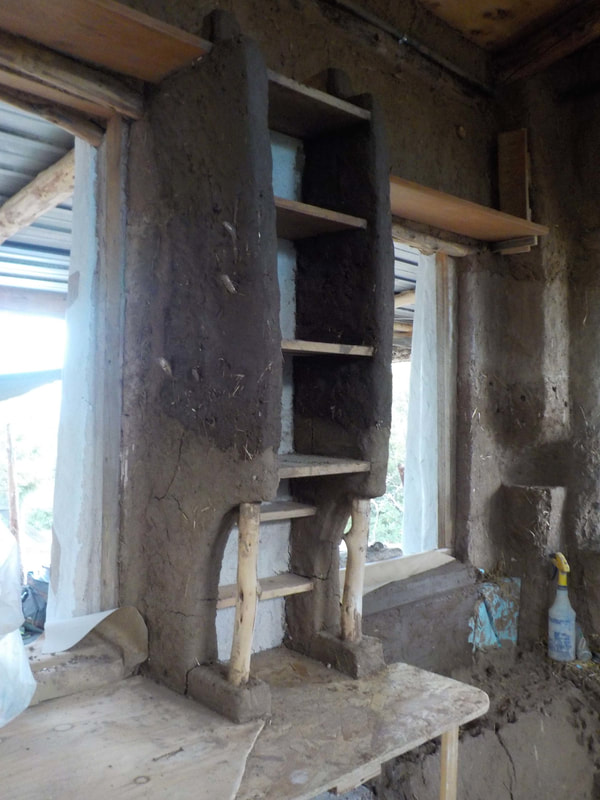
Below: Cob shelves, north wall
|
