....almost summer 2013.
They call it permaculture.
I cannot not grow vegetables. It's as much part of my natural building ethic as anything but it always means a delay for building. I knew there were things I could do in the winter to start framing windows and doors, but it was just too difficult to imagine what needed to be done when the project is not underway.
May was spent gardening, making a good workbench, and seeing my son leave for Norway.
May was spent gardening, making a good workbench, and seeing my son leave for Norway.
|
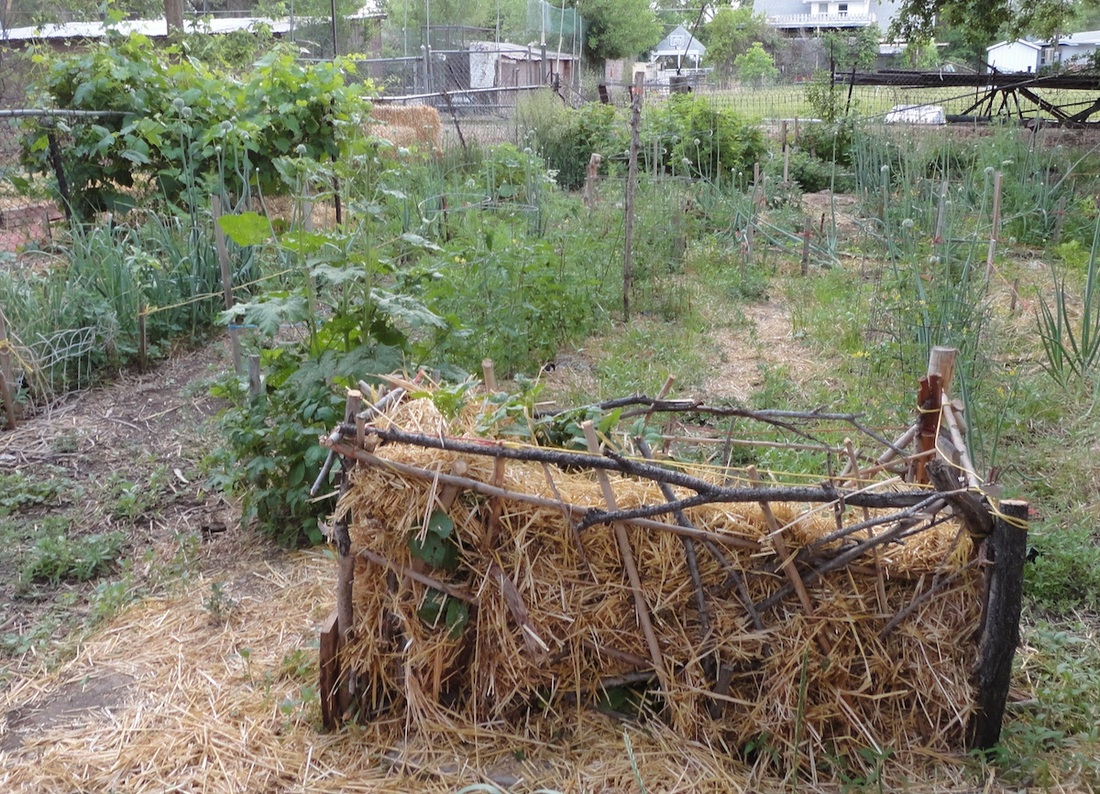
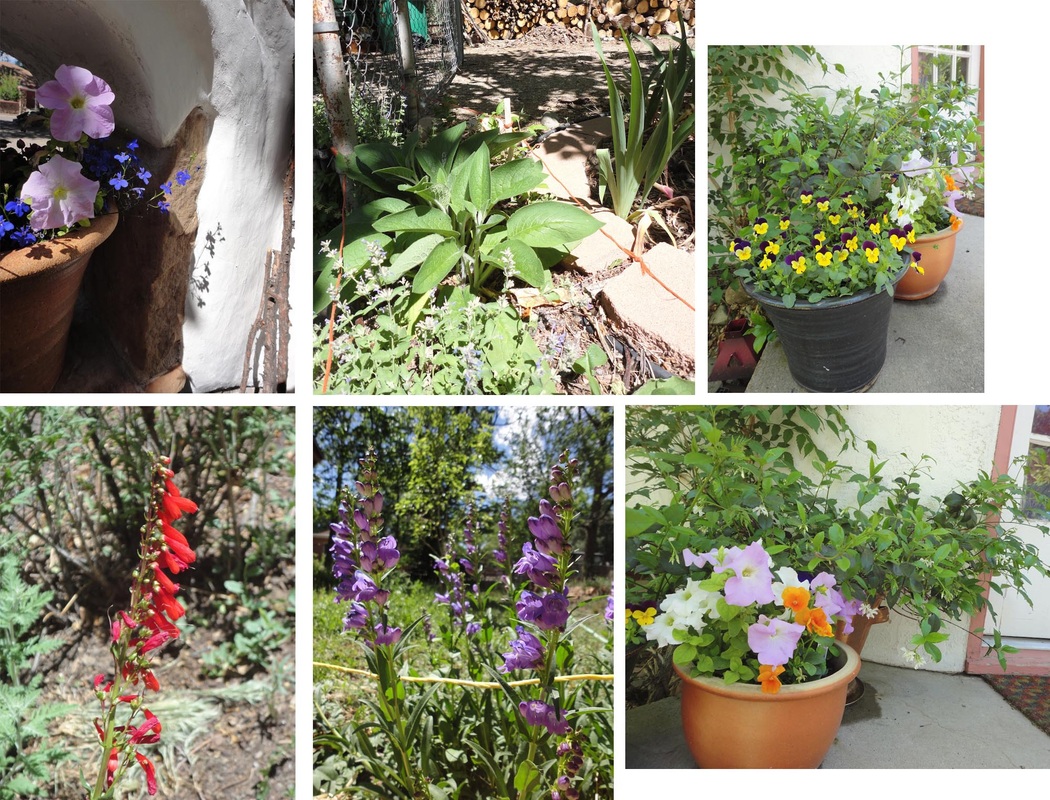
JUST TWO GARDEN PICS...
I've read you can pile straw in bin over potatoes and they pop up the top but make potatoes in the straw. Here's a bin made of sticks from trees in the yard. Drive corner posts, tie tops together, then weave sticks...good to avoid instrustrially-produced fencing, and used is hard to come by. |
Half an acre in town is a lot to take care of by myself along with the building. But this year I had help two days from friend Ellioutt. A happy environment makes happy worker.
A few days into June I realized a weedy grass I thought was innocent enough is foxtail! ...so not good for animals, so I spent my last major garden day yesterday pulling most of the grass. But things work out. Today, the minute I finished, my call to the woodworker I needed was returned, we met...you'll see more below. |
Windows and doors
|
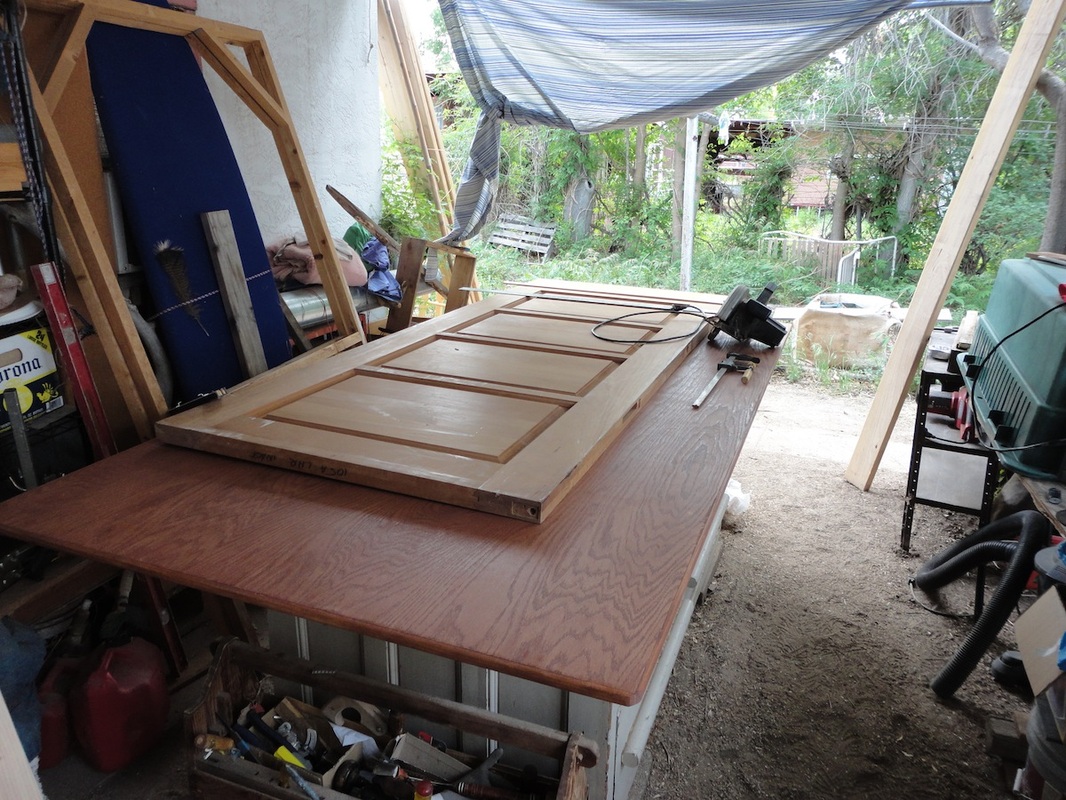
A good workbench is essential. I used a big old set of drawers left at my house, bought a large good piece of oak plywood, bolted it to the drawers, edged it and now I can make good solid flat window frames.
For a while I've been keeping an eye out for windows and doors. Since I began, I've had four large glass doors for the south side stashed, but I need pretty specific sizes for north and west. I've finally got what I need from Habitat for Humanity Resale Store, the local antique mall, Craig's list and ebay for hinges and a special little window not show (it'll be a surprise). |
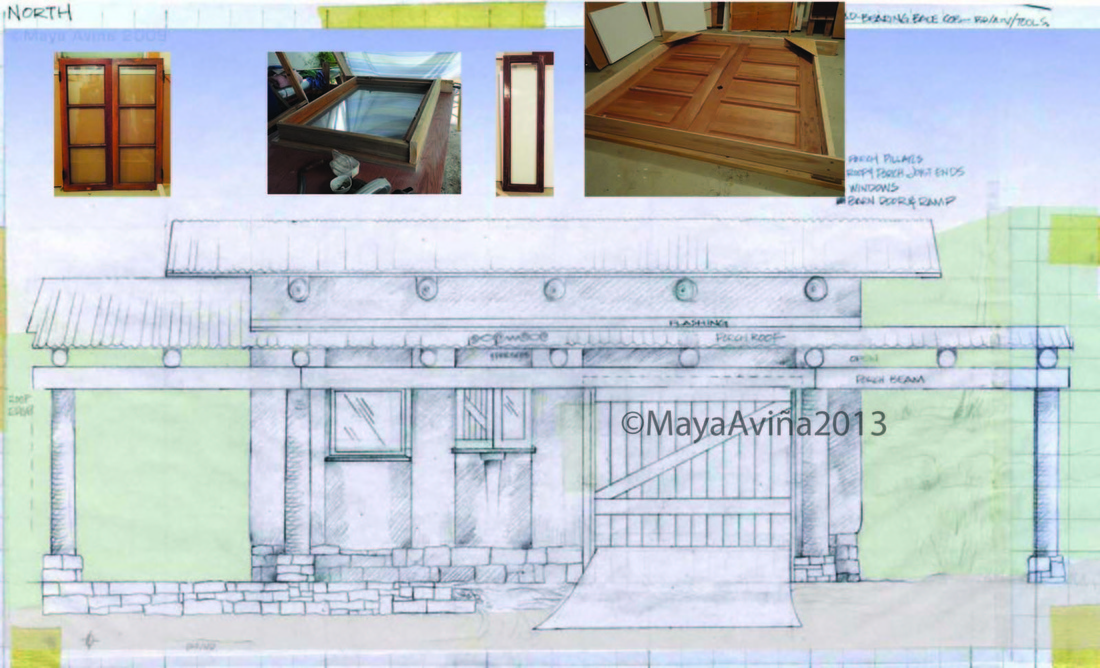
North side with actual (recycled) windows.
Above you see the north side and above the drawing, the accompanying windows and doors. The tall narrow window will be adjacent to a cold box, seen in old homes in Denver and often put in cob buildings.
The NorthEast corner (single double-pane window) will have a view to Pike's Peak. The two triple-pane windows on the far left go around the corner which is the East. With both windows being able to open, I've decided to make this the main bed to sleep by sweet mountain air. The corner will have a little semi-circular cob bench.
On the top right is my attempt to make a frame for double solid heavy cherry doors. It's not bad and with my woodworking skills, took a lot of planning. But I suspected it was too tight to the doors and when it came time to set hinges, I decided to seek the help of a professional fine woodworker. I called his gallery and today he called as I finished pulling foxglove and was set to do the hinges. It will take a couple of weeks to get it in his schedule, but this just means I will start cobbing on the NorthEast corner instead of NorthWest.
Timber
|
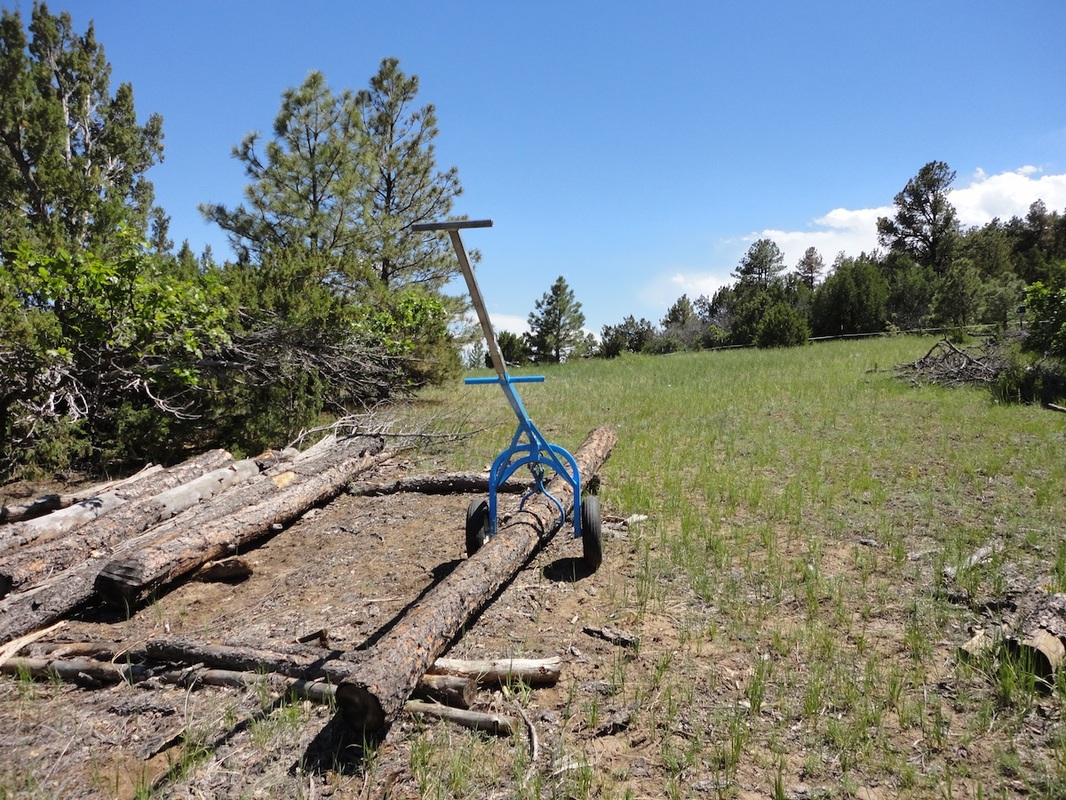
The Junior Log Arch is a valuable tool making it possible for me to haul timbers by myself. This one belongs to my friend Charlie who hasn't been able to pick it up for over a year. I so need it. Thank you, Charlie.
I will probably not have all the timber I need. I found a good source in Colorado in Kiowa for beetle-kill pine. |
Remember, this building is unique because it uses the concept of balecob (half a straw bale cut lengthwise adjacent to about 5" of cob in the same wall), but the innovation here is the addition of embedded timbers which should hopefully eventually assist in getting buildings permitted, quite likely provided the timber is graded by an engineer.
(In my design, the narrower cob part of the bale-cob wall has thicker portions; see foundation pics in ATV Shed I)
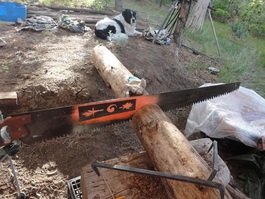
After going through timbers we fell several years ago and weeding out ones that were no longer good, I've found segments and here you see a section being cut with my one-person logging saw. A vertical hole will be drilled into the base for rebar protruding from stone wall.
Note the "log dogs" in the foreground of this photo. I had a local blacksmith make them for me. They secure a log while cutting. Some people may think a chainsaw is easier, but they can take so much time fiddling. A cut like this takes 5-10 minutes. It's not hard!
June 10, 2013
SO!..... where am I now on June 10th? I made the frame for narrow beveled window and cold box and started the frame for 3'x4' Anderson window. Tomorrow I finish it and do frame for triple-pane windows.
Then the cobbing shall begin!
Then the cobbing shall begin!
June 23, 2013
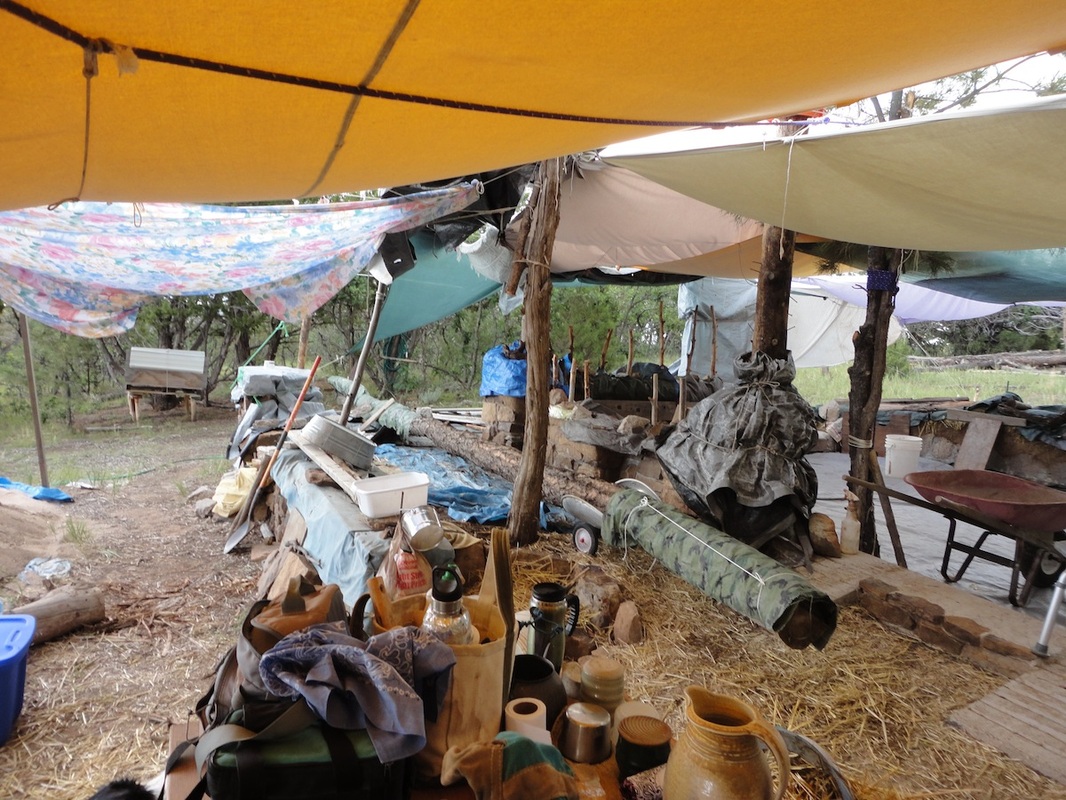
Set up yet more shade (solstice was 100˚). Hauled water for big Ponderosa as many that face the plains are dying (have also set up water catchment w/overflow going to this tree). Put a trough of clay to soak. Built a frame for the single front door and managed to load it into the truck, unload it on site and pivot it to next to where it will go. You can see it in the photo above on the far distant corner wrapped in a tarp, leaning against the post of the lizard bench. I had to take a couple days off after pinching my fingers in articulating garage door in town. But after my fingers got better....
Cobbing bagan!!!!
To beat the heat I rose at 5:30 a.m., was on the hill by 7:30, cobbing by 8:30 and had 6 batches of cob stomped before lunch. A local artisan can come some Sundays to learn and help. (I will pay him a little, too.) We cobbed two timbers into place.
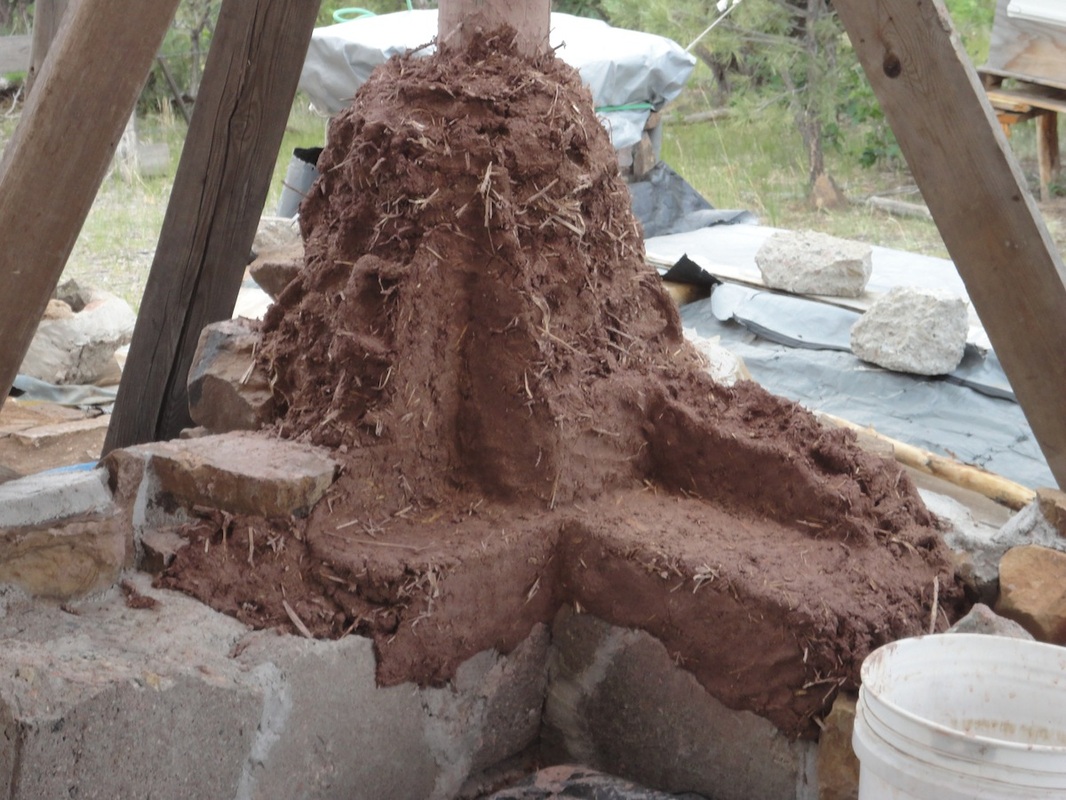
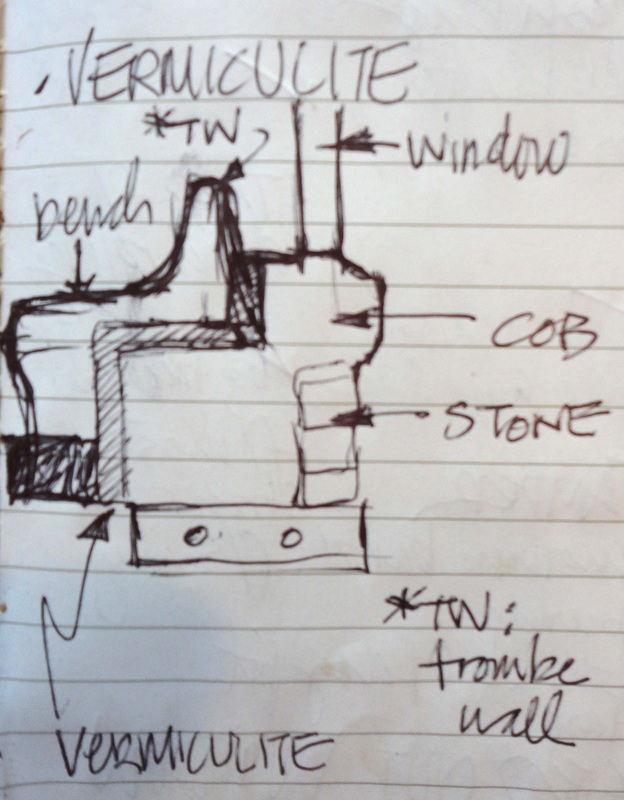
The flat platforms being sculpted on the inside will seat half-straw bales cut lengthwise. The textured bits are where more cob will be added. "Spines" and "ribs" are "tooth" to give new passage something to hold on to. If you go back to III. ATV Shed the second picture is a side-cut view/diagram of the wall which shows how part of the bale will sit on rigid insulation that goes against the base of the wall on the inside. Remember preventing a "thermal bridge" is important. A thermal bridge is a massive radiant section of wall that can potentially transfer cold (or heat) into the building....so we'll insulate the base. The straw will insulate above that.
Very happy.
June 25th: NE corner rises
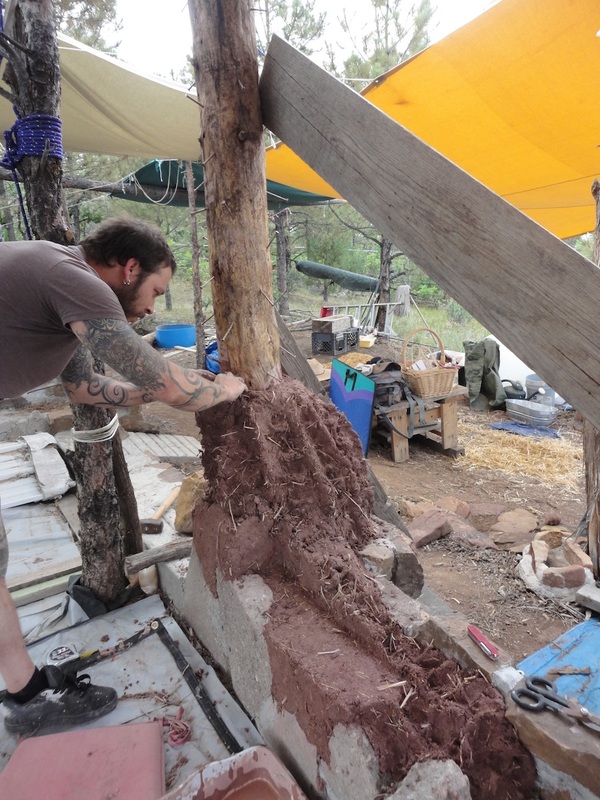
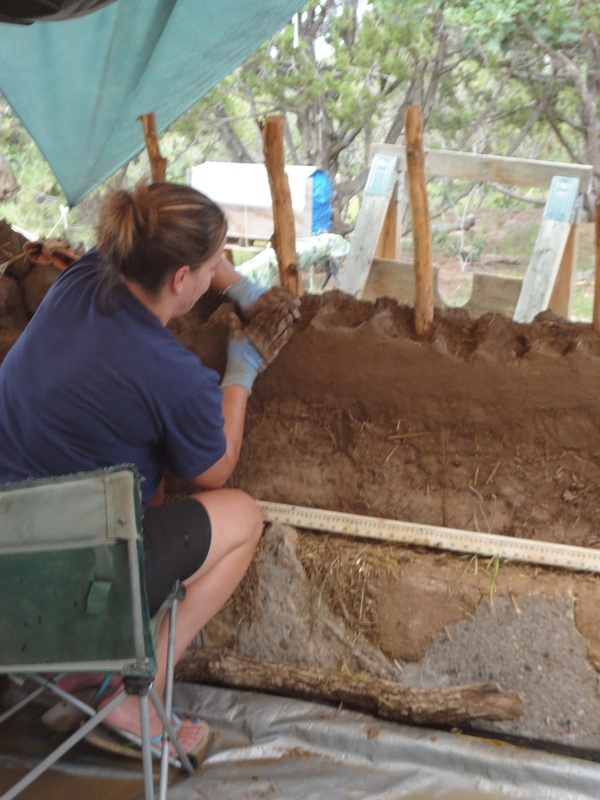
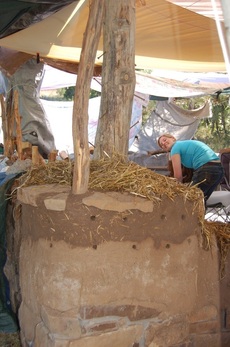
Cobbing: 1) put cob in place 2) use cobber's thumb to push straw from new cob into previous 3) sculpt.
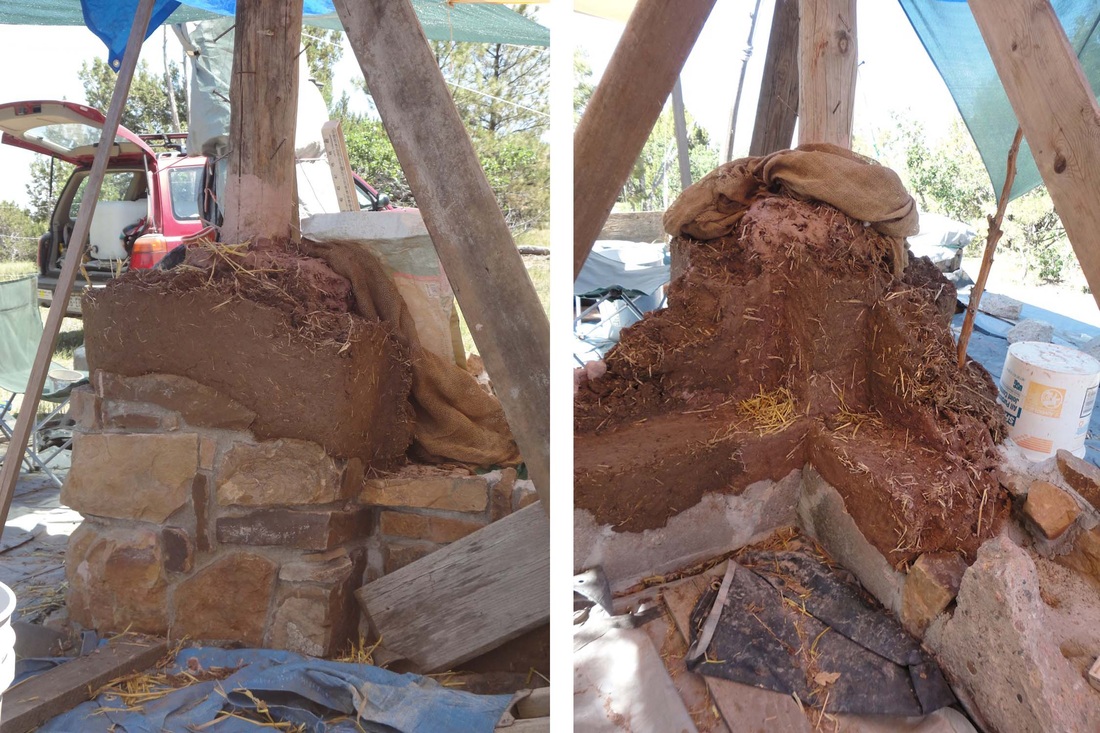
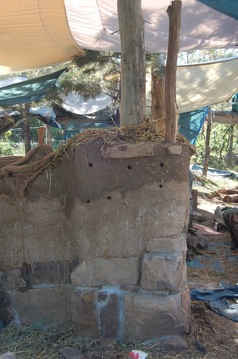
I left the little stone on the corner uncovered for people to put their feet up while sitting on the porch.
I left the little stone on the corner uncovered for people to put their feet up while sitting on the porch.
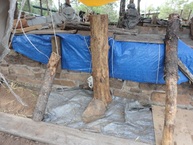
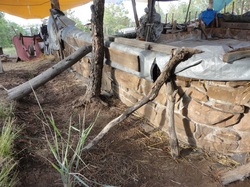
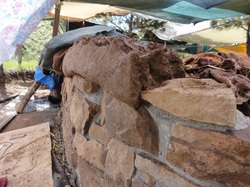
Inside and outside of NE corner, the main one seen when approaching the building. On the inside, you can see the sculpting of a platform which will be for half a straw bale cut lengthwise.
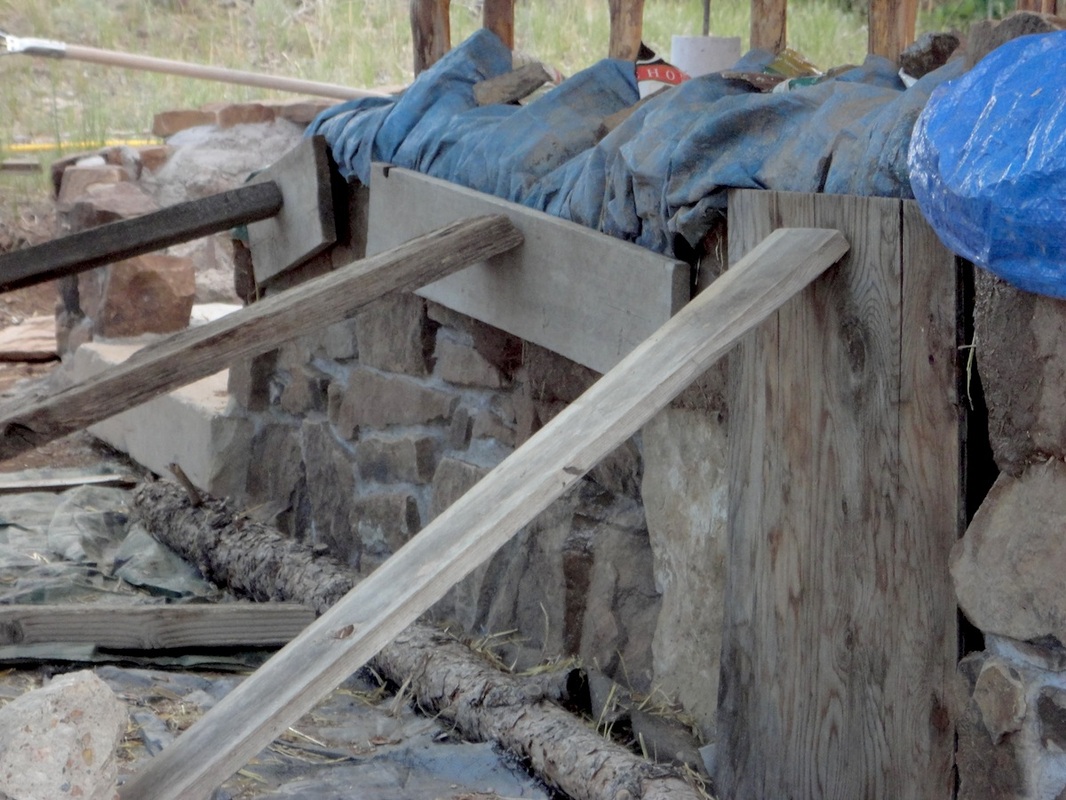
North wall: first pass, platform on the inside for half a straw bale, rough texture on the outside to accept rising cob wall. Diagonal boards are to hold timbers in correct vertical placement until cob base solidifies.
June 27: East wall
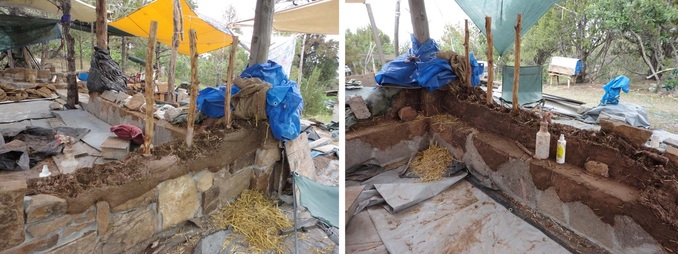
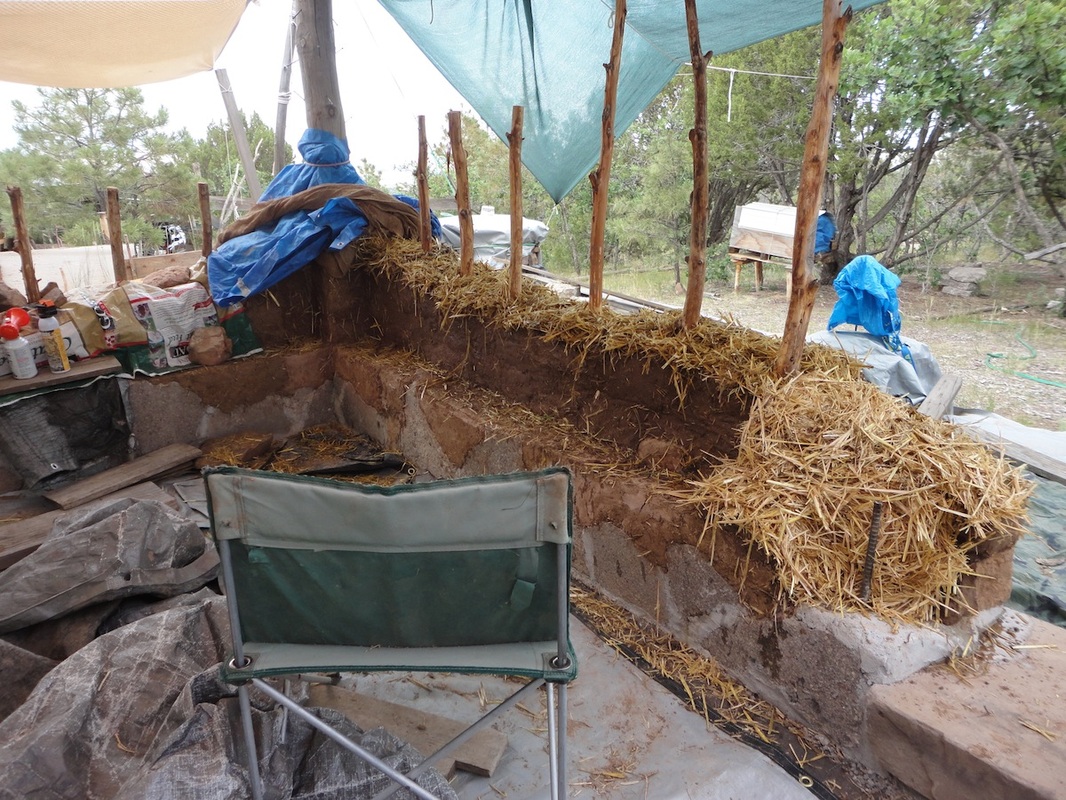
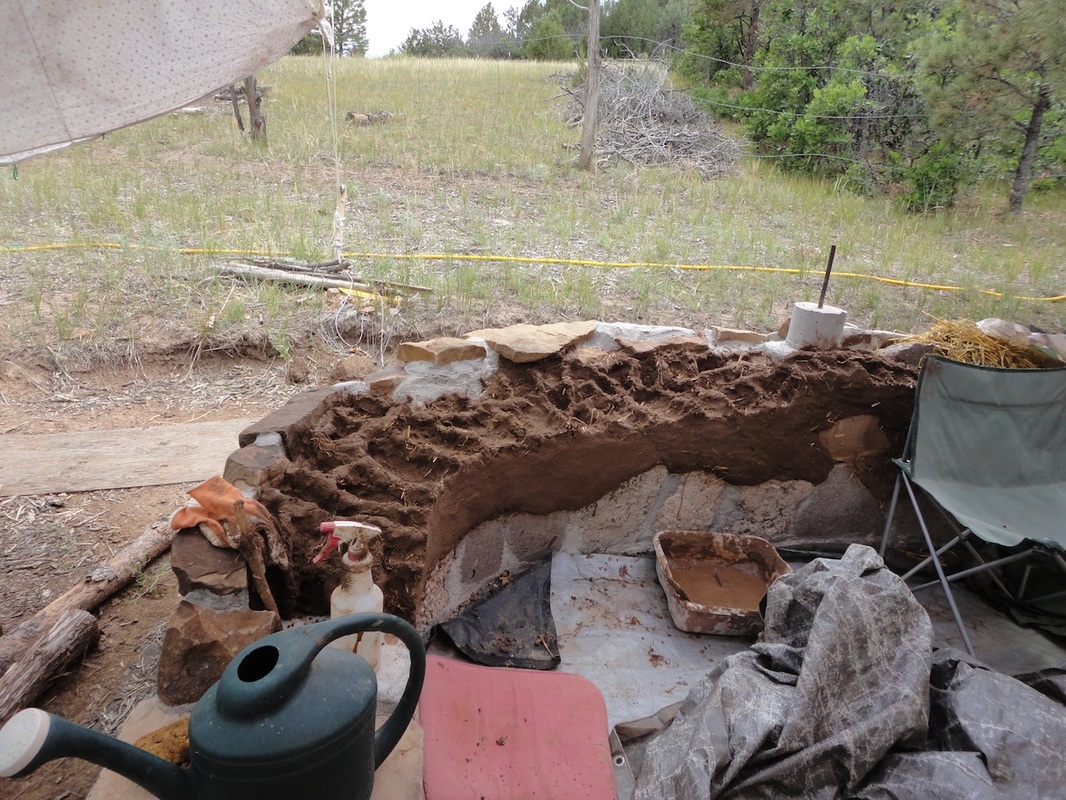
This is the first pass for the east wall. Vertical poles will be for pajareque, the weaving of corbels (long coils of cob) in and out to give a narrow cob wall more strength. (The chicken coop page shows this. ) Spray bottle: moisten concrete before cobbing. I also use slip (clay slurry) if cob starts to dry. The small spray bottle is natural insect repellant: mostly rubbing alcohol, a teaspoon or so of almond oil (emolient) 20-30 drops each citronella oil and lemon eucalyptus oil. The wasps seek moisture but they really don't like this stuff and fly straight away when it's sprayed into the air.
Note the diagonal boards have been removed.
TIMING AND OUR BODIES:
One thing, as mentioned before I think, is that I have come to understand in this exercise in "learning how to live in nature with respect", is to take care of my body with the same regard. So this week, the way it is unfolding is a day of work on, a day of work off.
Because it has been hot, I rise at 5:30 a.m., feed the animals, water the veggie garden, and aim to be up on the hill by 7:30. It is a 30 minute drive. (If I were to do this again, it would not be far away. I used to camp to diminish driving, but with the animals and garden I must be in town in the morning).
On Sunday, when I had some help, I stomped six batches of cob and we got them all put in. On Tuesday, I made four and a half batches and after three, I knew I needed to stop. (For the first time I was cobbing with clay from site and it works beautifully.) I wrapped unused cobs in a tarp.
On the 27th, I made three batches and figure that's about right for a day to: stomp, put the cobs in the wall, dig more clay, wet (or re-wet) straw annd burlap to keep wall moist, cover with tarps and cleanup. It is a bit much as I finish at 6-ish. This means it's nearly a twelve hour work day and yesterday it got to 104˚ in town! It was 85˚ in the shade of the shed, a little warmer on the building site. The shade is ABSOLUTELY necessary as is drinking a lot of water. I keep ice in case of a scorpion, but I have only seen one this season. Still, I wear gloves when removing moist straw, burlap and tarps.
It is continuous physical work all day, more than most any person these days will do. But again, I want to show that shelter can be built using local materials at low cost resulting in a potential dwelling without a mortgage or reliance on industrial products with all that implies. But the setting is very peaceful and the process very self-affirming and if this building gets done, it is going to be very beautiful.
As I work, it is amazing to me all of the preparation to get to this stage: building of foundation, hauling of sand, water, tools, tarps; building of shade. But everything is in place.
One last note is that we desperately need rain. I've been hauling water in 40-gallon tank that fits in the Subie. Cobbing uses about 15 gallons a day for everything (3-batch days): wetting cob while stomping, soaking straw and burlap to keep cob moist, keeping the dog (and me) cool w/periodic soaking on head and spine, soaking clay for next day, and washing up. I drink about a gallon which is kept in 5-gallon bottles in the shed. So on some days when I don't really need to haul water, I've brought it anyway and filled buckets then given the rest to the big Ponderosa, (all siphoned in a hose). I have no idea if the big tree will survive as many on the hillside are dying, but I find some comfort in trying to help it along.
Day in town: laundry, dishes, watering of gardens front and back, grocery shopping, look for two last windows.
June 29 / July 1, 2013
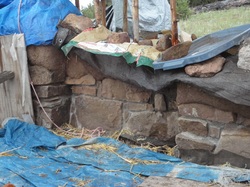
Saturday the 29th I cobbed on the North wall up and over the stone (but forgot the camera in town). Rain was forecast and, as mentioned, I don't like to drive on the meadow road path up to the site if the ground is moist. But sand supply was running low...
So Sunday, June 30th, I rested some then loaded a half ton of sand into the old workhorse GMC and took it up. (300 shovel-fulls is about half a ton but the pickup seemed to think this was too much this time....I'll probably haul less next time. The sand has been stored in the back yard in town left over from the Kiko workshop, but soon I'll have to go to the landscape yard for more).
I had just enough time to unload the it, cover the hole where I'm digging clay (it's easier to work with dry) and cover the timbers that have been set in cob with a bucket...then a gentle rain began to fall...RAIN RAIN RAIN. It was delicious. I adjusted catchment barrels under the big cotton tarp and hung around for a little bit to enjoy it, but not too long for the road path reasons...get that big truck off the hill! Some rain from shade tarps made of bed sheets was dripping on cob platform for bales, so it's a good thing I was there to adjust that also so as to not make cob on wall mushy. (You can see the blue plastic bin lid on the wall in the photo–also goat chow bag slit open.)
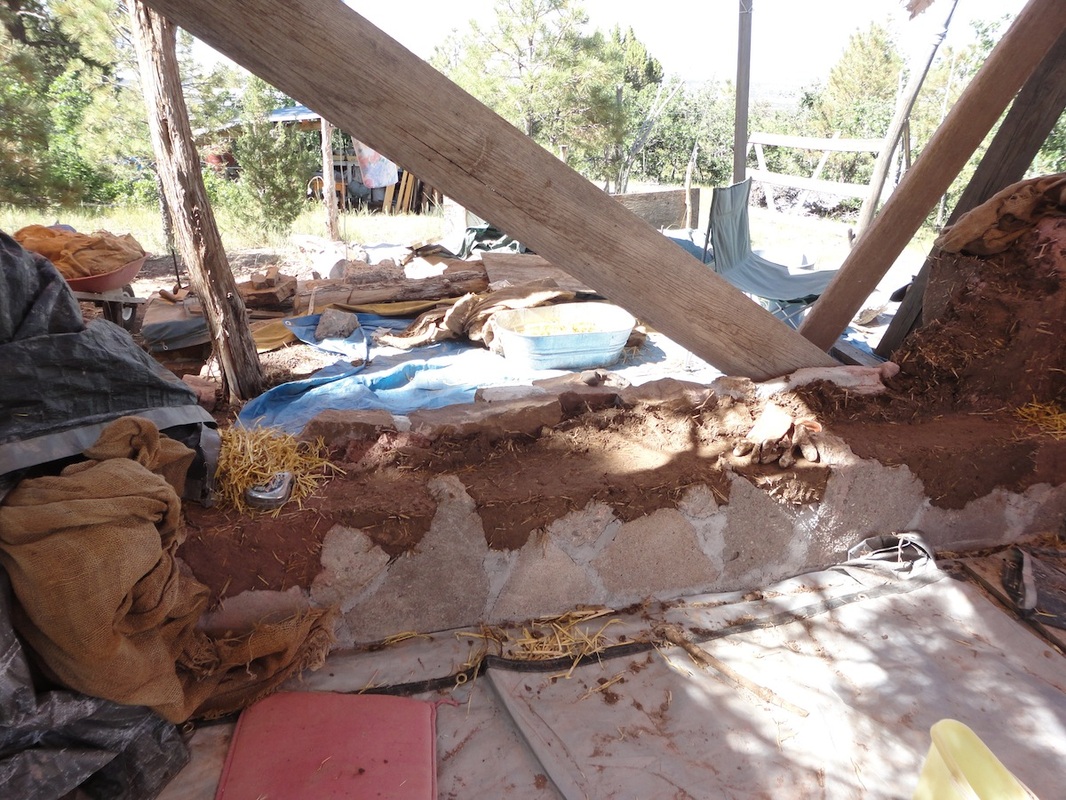
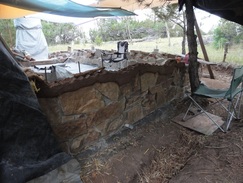
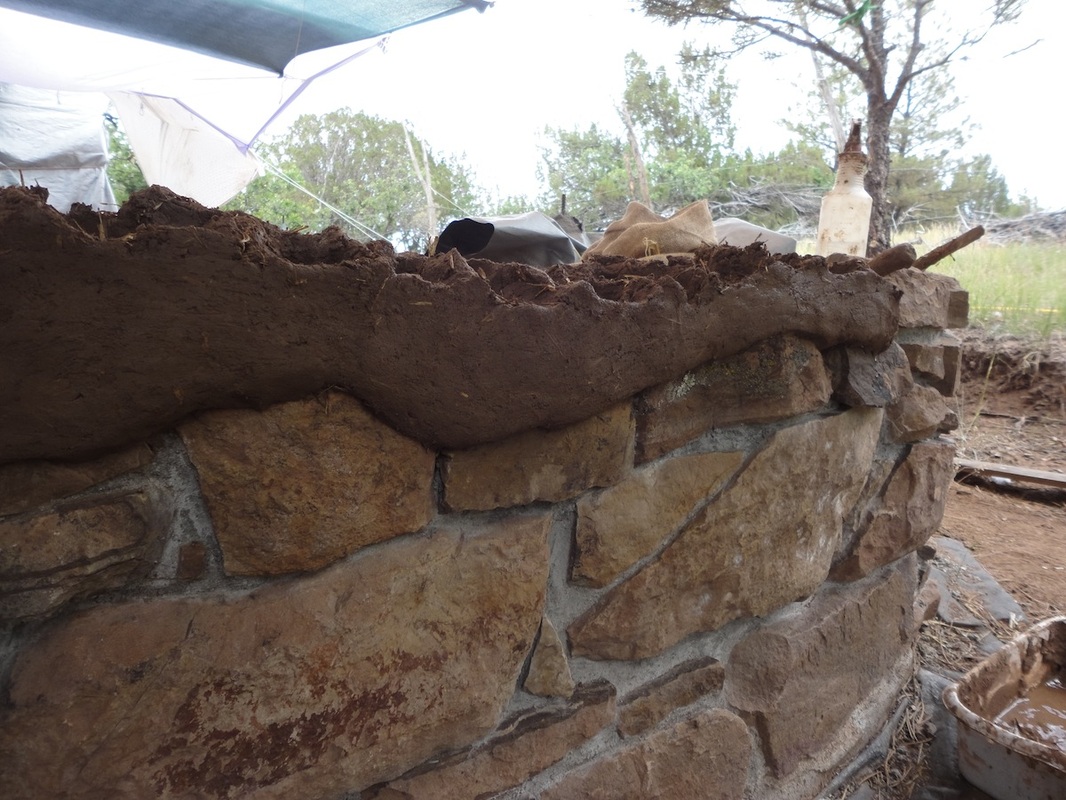
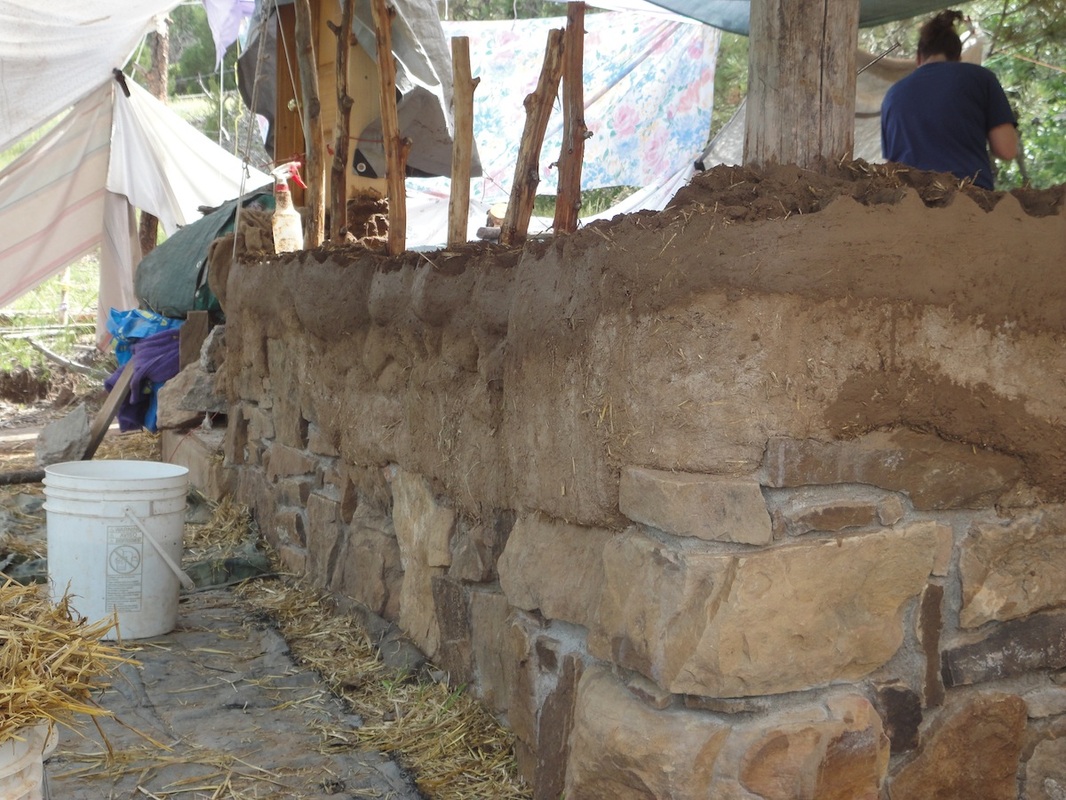
You can also see that forming cobs around stones at the bottom is sculpting (well, as is most cobbing, but this part is pretty important).
BELLY OVER STONE: You want a bit of a belly so that any moisture that might come down does not go between stone and cob. This will be under the porch, but there may be blown snow in the winter.
The bit of meadow in the back actually gives a good idea of the slope of the hill I'm building on.
Pacing each day
Just to give an idea of what happens each day.
– I arrive and usually have to do some site tasks like adjust a tarp, fill water buckets, etc.
– Then I stomp cob. I'm doing 10 shovels of sand to 8 shovels of clay (always more sand than clay). Three batches of about 20 cobs (small bread-loaf-sized lumps) each is about what I can set in a day by myself: sixty cobs...not bad. Cobs are stored under a tarp so as to not dry out.
– About 3 wheel barrels of clay need to be dug each day and put to soak for the next day's cob. I can do this now while the hole is in the shade or later after the day is done. I think earlier is easier. The ground is broken up with the big heavy point crow bar, shoveled into the wheel barrel then dumped in the soaking trough.
– Usually I take lunch after stomping cob.
– Then, cobs are woven into the wall. Tools at hand are: cobber's thumb (stick w/blunt end), slip bucket and brush, spray bottle, chair or pad for knees. The last passage has "spines and ribs" or ridges to give chunky tooth to the wall to accept the new cob once another day begins.
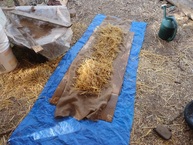
– Then, it takes at least an hour to properly cover the new cob. This is the hardest part of the day for me as I'm usually quite tired by then and would happily be done. But it's very important to keep wall moist enough for new passage. Dunk straw in water, put on wall, dunk burlap in water, put on wall, arrange tarps over it, tucking bottom under burlap if possible to hold dripping water instead of it running away. Put weights on tarps to keep in place. (On a later day, if I can't get to cobbing and need to keep the top wet, the whole shebang can be re-wet by removing tarps and watering the burlap with straw under it with a garden watering can instead of taking it all apart and re-dunking straw and burlap.)
– Lastly, I sweep up and put tools away.
– Then I sit down, rest, and enjoy. This peaceful time in the evening is my favorite. I could stay a long time. But on hot days when I arrive by 7:30 a.m., I need to get home, fed and rested for the next day. When I used to camp on the hill, it was great hanging out in the evening.
– WATER: I've found I go through 15-20 gallons of water between adding a bit to cobbing, about 8 gallons to soak newly dug clay, plus at least five gallons to wet straw and burlap.
That's a day cobbing.
Timing / problem solving
I'm pondering how to proceed around the circumference of the building. Ianto says to work on the whole building at once. But the following issues make this difficult:
– Door frames and timbers need to be set in a fairly large mass of cob and they must be put in to make the wall, so there has to be a concentration of work around them taking several days when cobbing doesn't proceed elsewhere. Working every other day, this will make working on the whole building impossible. This kind of massive area is seen in the NE corner, with massive buttressed thicker cob with embedded timber to support girder (not really necessary as cob is way massive enough, but to satisfy code, the whole point of this hybrid building since standardizing cob is difficult.)
– With the dryness and heat, I don't see how I can possibly keep the entire circumference of wall (North, South, East and West sides) moist and add to it before cob dries out. Cob from the first day stayed moist on the edges for six days, though, covered with wet straw, wet burlap and tarps. The burlap dried out, but the straw underneath stayed just moist enough and the cob remained workable enough for a good bond. I do slip it with clay slurry, though, when adding new material.
So I am pondering working mainly on the North wall and possibly aiming to finish it with the adjoining porch before winter. I wonder if the uneven weight of that mass will be a problem for the foundation. Or I am pondering a workshop. I'm at the perfect point to teach cob with walls ready and waiting. They say you have to redo 40% of what helpers do, and there is so much detail work, I have to figure out where best to have help....probably the west wall. I still need a step-out window for that wall.
We have three cooler days this week (85 in town, 10˚ cooler on the hill, usually). After hauling sand I feel like I still need a bit of rest. I've found I can move real slow and work still gets done. But resting my body is as important as caring for the land and this year, turning 61, I seem to need a bit more rest.
Keeping walls moist
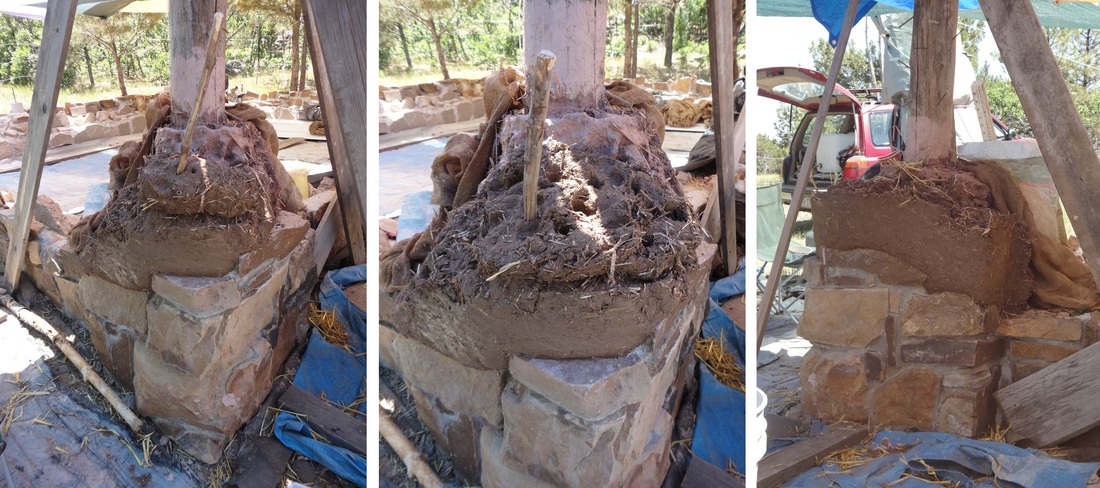
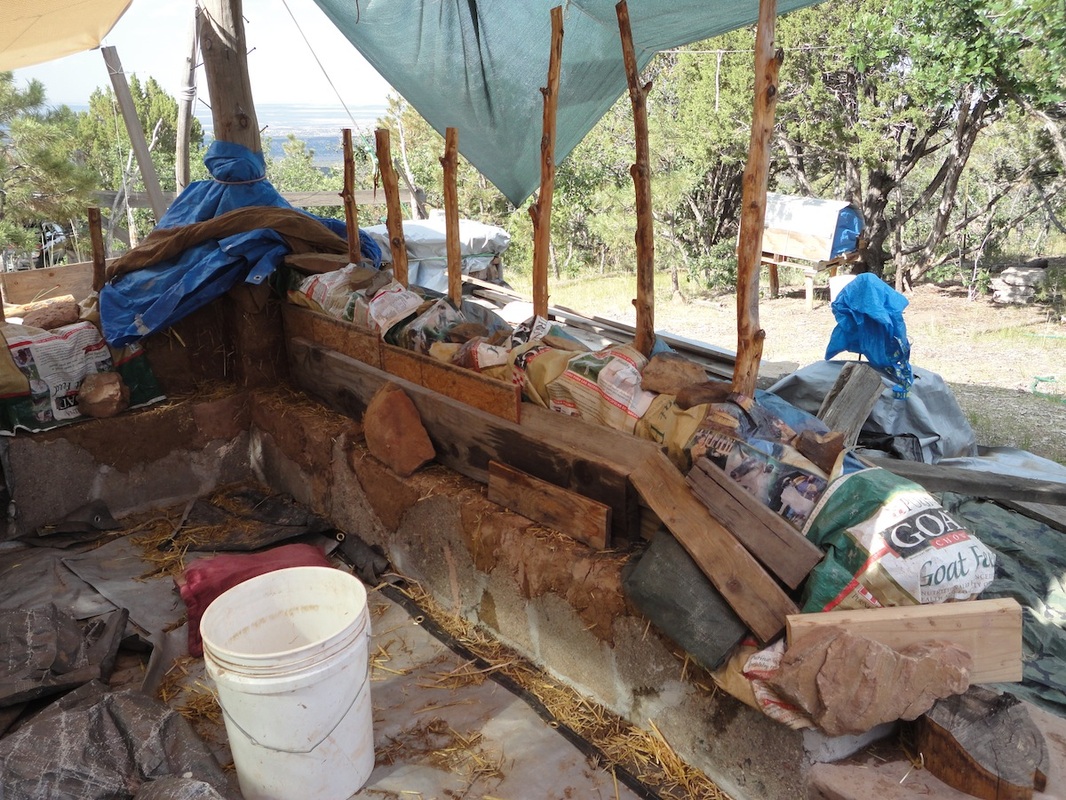
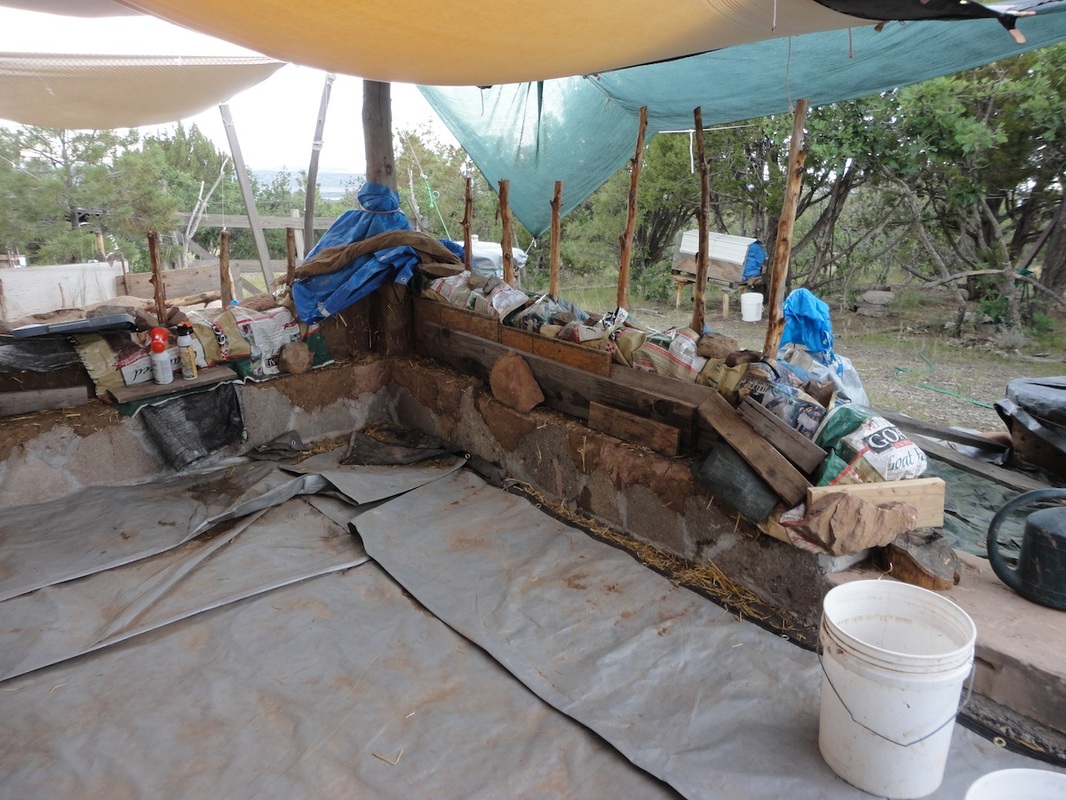
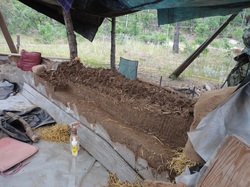
One of the biggest challenges I'm encountering is keeping the walls moist from one workday to the next, particularly if I take a day off as I have been alternating work and rest days (the last two days I worked two in a row). These photos demonstrate how a cob wall in-progress is typically kept wet.
|
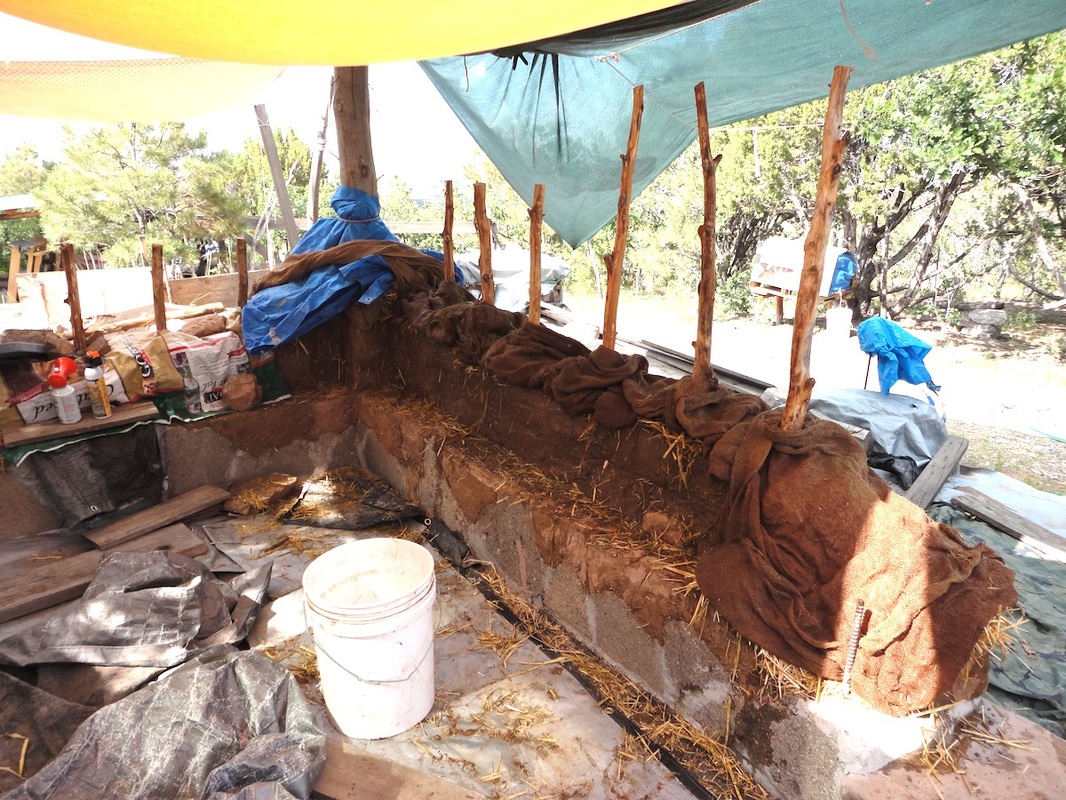
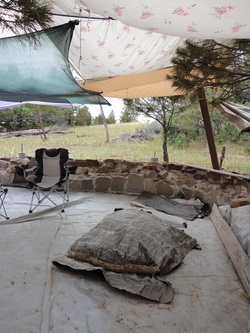
3. Cover the whole shebang with tarps and pin down with stones and boards; try to pin down the edges to keep air from getting under too much and drying everything out...also to keep the wind from uncovering it all.
|
4. Cleanup: All the tarps, scrap wood, buckets and bits of cob here and there can make the work site look chaotic, so it helps me to sweep up at the end of the day. This silver tarp was purchased after the foundation was poured to cover the site over the winter and it has served me well because the clay soil under it is very sticky when wet.
There will be an adobe floor that will rise one foot. |
|
I don't always do this, but this is one way to keep the tarps down on the edges. Tucking the tarp under the edges allows water to be caught and wicked back up into burlap instead of just running off.
|
PATIENCE All of this covering-up takes a lot of time and is not my favorite thing, but it's important. BOARDS I've used the same 2x4's and boards for a variety of things since the project began. There are all sizes around, both thicknesses and lengths. For example, some of them are stacked to make a little ramp for the wheel barrow to get out of the building interior–over the foundation edge. Others hold ground tarps down. I was looking at a scrap of 4x4 the other day and realized it's from a loft bed we bought for my daughter in the 1980's. One piece of 4x4 has served many many purposes over the years. Re-purpose....re-purpose. |
Three North-side embedded timbers in place
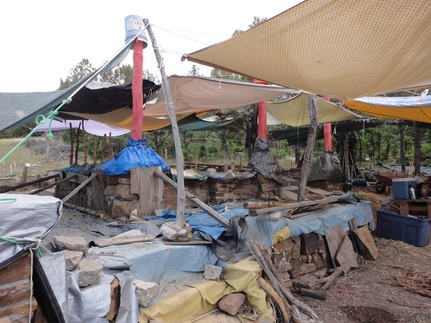
It's really exciting to see the skeleton of the first wall go up. The embedded timbers on the north balecob wall are the key innovation of this hybrid building. A girder will sit on them, though the thicker sections of cob in the wall could easily support the girder.
I've added a filter of red over the timbers so you can see them clearly. This is to satisfy building code, but it's not a bad idea with the thinner cob in balecob walls.
All of the stone work that is covered right now will eventually be under the porch and of course be uncovered, but I'm keeping it protected right now because I have diatomaceous earth in between the stones to discourage habitation by scorpions. I was concerned that once cobbing began, the scorpions would converge because of the moisture and tarps, but so far, I haven't seen a single one.
July 7, 2013
I've been cobbing for two weeks now, have put in eight days and made 25 batches of cob with about 20-25 cobs per batch. I've got my rhythm down and here's how it goes:
- Awaken a little before 6 a.m., feed critters, water garden, pack lunch, make coffee and breakfast and head up to the hills between 7:30 and 8.
- Arrive and dink around a little doing any of the following: siphoning water if it's a water-hauling day (rains have begun, though, and catchment is excellent), or moisten straw and burlap on walls, or adjust tarps, make a tool, mix some slip, etc.
- Then I make three batches of cob . I figured it's about 45 minutes for each batch to stomp, make cobs and move the cobs i wheel barrow to work area putting them in a tarp cover so they don't dry out.
- Eat lunch around noon and rest for a short while or do non-strenuous tasks.
- Then it's time to put cobs in the wall for about three to four hours. The three batches is about 70 cobs. That's less than five minutes per cob which is pretty good I think.
- Clean up is sweeping, putting tools away, rinsing buckets.
- Then it's time to uncover the hole where I'm digging clay soil. I break up the ground with the heavy point crow bar and haul two or three wheel barrows of clay soil to the small trough for the next day's work. Water is poured to cover the soil and the hole is re-covered.
- The day's cobbing must be covered to keep it moist so straw is dunked in water, then that is covered with burlap dunked in clean water and lastly tarps and anchored over the whole shebang.
- When all is done, I'll take everything to the car except my main bag and ometimes I'll relax and enjoy the evening and head home between 6:30 and 7:30 p.m. Today I didn't drive up because I want the soil with moisture to puff up and recover from having cars drive over it. Tomorrow I will aerate.
Detail
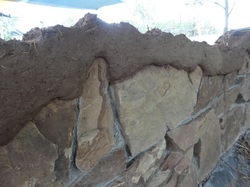
A little belly on the outside of cob where it meets the stone will keep water from going between cob and stone. I hope the belly is big enough.
July 9, 2013
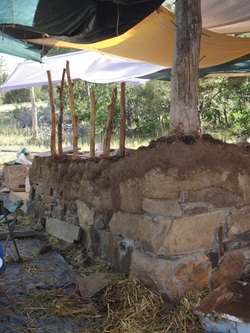
For the second day, Lisa and the boys came to help and play. I made three batches of cob before they arrived and then Lisa made a fourth. She cobbed turning the corner on the SW side (pic to come), a solid cob portion of the wall. I added a passage to the East wall and some to the NE corner (photo to the left with darker top being the newest passage).
The challenge is to keep the walls wet as we progress around. If they do dry, just slip w/clay slurry before adding new cob.
The boys are enthralled with the idea that the clay is dug out of the ground next to the site. Ezra asked an excellent question, "Is there clay under the ground everywhere or just here." There is clay under the topsoil in many many places, but not everywhere. I also could show them the different color of the topsoil and explain in the forest, 1" of topsoil takes 1,000 years to form, but we can turn a compost pile to soil in two weeks.
While I dug clay late in the day, they climbed in the pit with me and filled a little hole with water making clay balls from the soil.
Ezra learned about the composting toilet but opting for a bucket instead of the one in the woods. I set up a curtain on the shed for him for privacy, but the wind blew it while he was sitting there. He squeeled and I laughed sooo hard. He was very pleased with himself for pooping in a bucket.
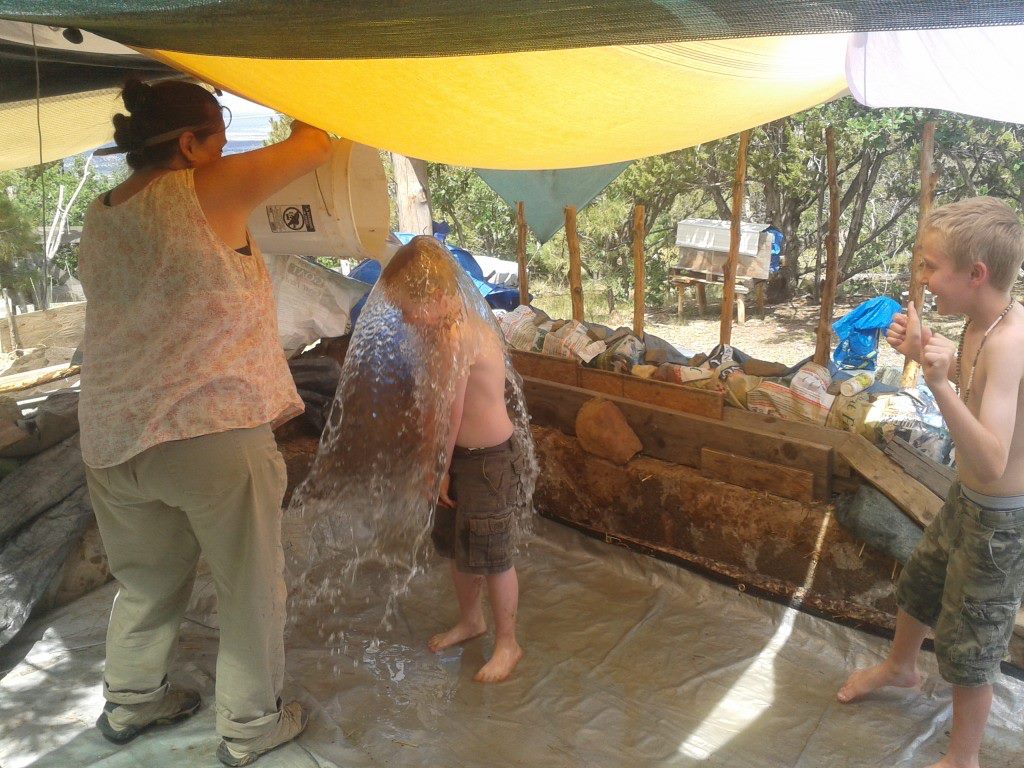
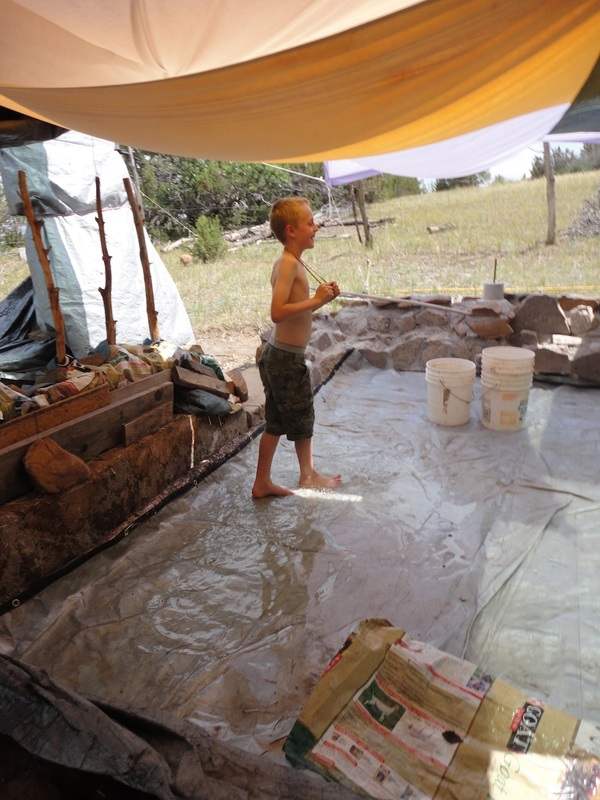
The forecast was for 101˚ in Pueblo (usually a little cooler on the hill). I had let the puddle of rainwater stand on the tarp inside the site so they could play in it. I showed them how to splash water on face, top of head, temples, back of neck and arms to stay cool, but first I bribed Carson to have a bucket of water poured over his head. He asked for more all day. We never got too hot.
|
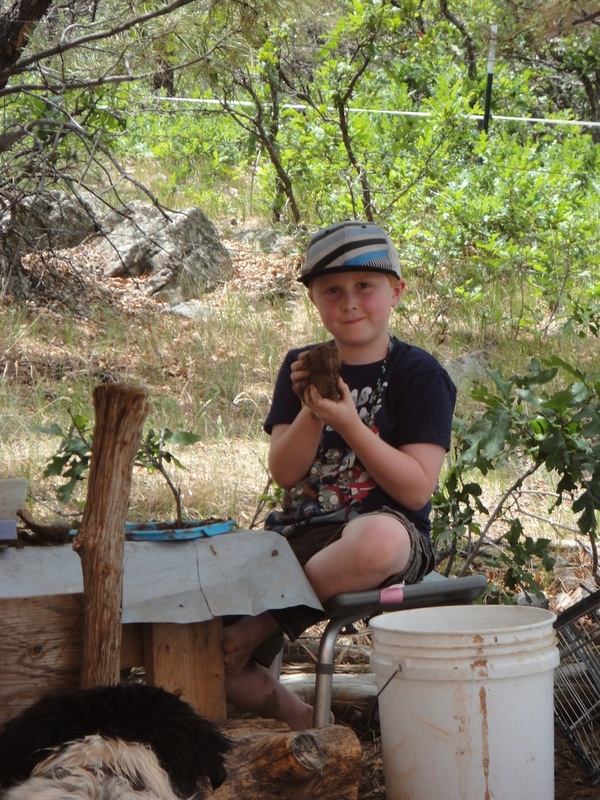
It takes time to do things for and with the boys, but they love it so much and learn so much. The first day they came up Carson said three times "This is the best day of my life." I had set up logs and brought the draw knifes for them. This morning before they came I put up another shade tarp, brought up a bigger table from the shed for all our gear, and moved the small one we'd been using and set it up for them to work with clay. Does this boy look pleased or what?
Lisa is such a great worker and good company. She jumps in to help with any task at hand, and she is the one person who has never asked for a cent. She just loves cobbing. Carson helped Lisa cob some, too. And of course, the boys having something fun to do in the summer is the best. |
July 11 South wall first pass
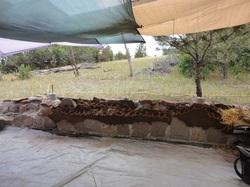
The south side of the building will be solid cob between four big windows for solar gain. Today the first passage of cob went down along most of it. Time to cut timbers for the posts that will support a girder on the south side. Of course, the cob could easily support the girder (load-bearing), but a vertical timber will hopefully help the building satisfy code. As a "shed" this building does not need to, but my interest is in making a model that could do so.
For a little video of the site: http://www.youtube.com/watch?v=ZdDJi9iZca4
For a little video of the site: http://www.youtube.com/watch?v=ZdDJi9iZca4
July 13, 2013
Rain, road, logs
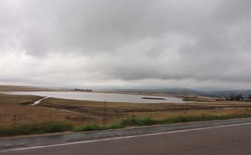
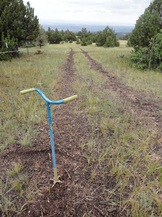
Two of my work days this week were spent aerating the roadpath which needed it very much. I'd been waiting for some rain and when I came up on Tuesday, there clearly had been flash flooding. Previously empty lake on the Beulah highway was full, in another spot, a culvert under the highway got clogged and the backwater line 15-20' deep had flooded out of the arroyo and swamped trees.
Woodchips had washed down rivulets on the roadpath. Good news is all the catchment barrels are full!
And finally this means the soil was getting soft enough to aerate which had been the plan for the day.
I'd avoided driving on the roadpath all week, parking down the hill and walking up for the day's work.
My friend will be picking up the log arch soon, so on another work day, during a few days between rains when things dried out a little, I loaded and delivered a load of sand and hauled a 27' log up from the shed to next to the site, hopefully for a girder. How to get it up on top of the posts is to be considered.
Making a cob building is said to be like making a giant coil pot
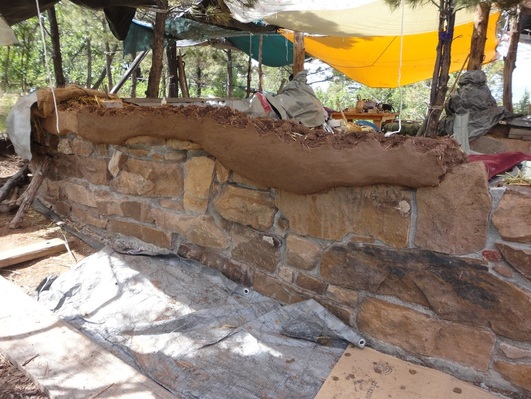
Finally back to cobbing and forming the first shape of the wall with a belly almost all the way around now. The dip will be in the middle of the south side of the building below/between two windows (repurposed sliding glass doors).
This cobbing seems to be going so slowly! ...with just me making three batches every other day, and less in weeks like this with other important chores to be done....but still, that's hundreds of pounds I put on the wall each day I cob.
This cobbing seems to be going so slowly! ...with just me making three batches every other day, and less in weeks like this with other important chores to be done....but still, that's hundreds of pounds I put on the wall each day I cob.
Inside south side:
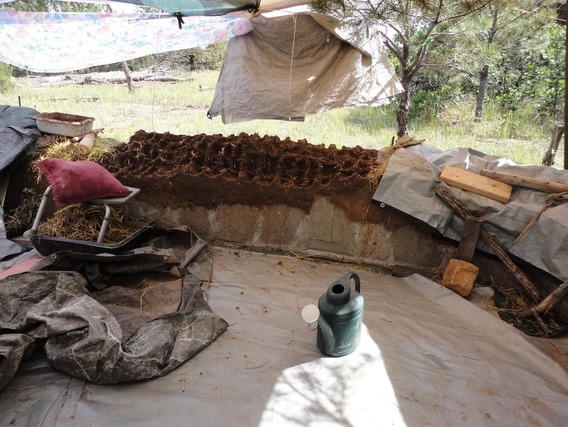
A
"Spines and ribs" give tooth to the wall. Height variation is because of the difference in underlying urbanite and stone. Stone facing out had to go high to protect from backsplash. Using cob on the inside from lower reduces the amount of concret and masonry which has environmental detriment.
Before I left this day, I took a look at the belly I just made (above) and saw some cracking. Too much clay in the mix! Drying too fast?! Remedy:
Fixing cracks
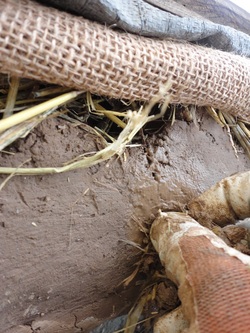
The big bellies were wanting to crack so I've been trying to dry them more slowly by wrapping with straw and tarps which is tricky on a vertical survace.. To fix cracks, spray, slip and work some cob into it before it is totally dry.
Keeping wall moist
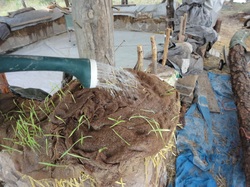
Here on the NE corner, I have removed a tarp that is keeping the wall wet: under it is burlap over straw. I've been wetting both straw and burlap without removing them by using the watering can.
When adding a handle to a piece of pottery, if the pot is "leather-hard" (ie. the clay is very firm but there is still moisture in it) the handle will successfully adhere to the pot by scratching the clay and slipping it. If the pot is dry, it won't. I can't keep the wall pliable, but I can keep parts leather- hard
My dilemma is Ianto says to work on the entire perimeter of the building, ie. not just develop one side. But I can't keep the whole thing continuously moist even though I'm rewetting as much as I can get to it. The straw is sprouting! I'm going to call Ianto to talk about this problem. It occurred to me, a building made by more people is stronger because of this: everything is worked while it is still moist, even pliable.
However, I've had a couple of cracks and hopefully, the almost-drying of one layer before I cover with another will keep the crack from being continuous.
BTW, my clay-digging pit got rain and the clay is much easier to dig.
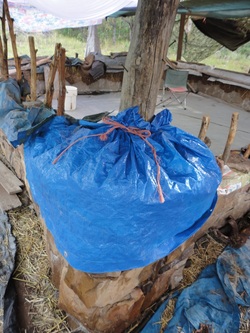
Then it's wrapped back up. Whew!
July 23-31
There were some delays recently: 1. my back went out for two days after pulling nasty "velcro" grass in the garden 2. my daughter came into town for two days 3. there was flooding in a rental I had to buy when I did the tax exchange for this land.
But I completed the cob going around the stone perimeter of the building and yesterday, Lisa and the boys came and we got the single door set.
But I completed the cob going around the stone perimeter of the building and yesterday, Lisa and the boys came and we got the single door set.
Door placed
Yes, it looks messy, but when it's done: cob and stone will be magnificent.
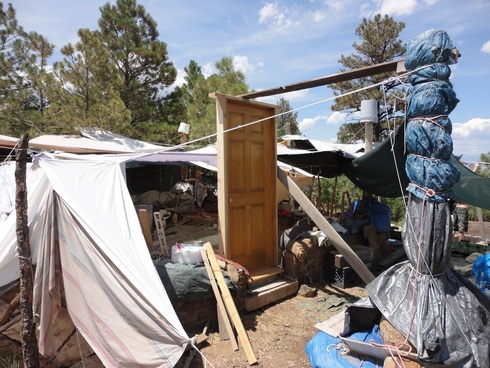
The shade had to be moved and the door anchored to make sure the wind wouldn't shake it while the first layer of cob is drying. Notice the flat plank with a 2x4 screwed to it so it can be anchored to porch/bench post.
I don't have a cordless hammer drill, so I put a plank on the door sill and placed three big chunks of urbanite on it to weigh it down while we cobbed the door in (below).
I don't have a cordless hammer drill, so I put a plank on the door sill and placed three big chunks of urbanite on it to weigh it down while we cobbed the door in (below).
Door cobbed in
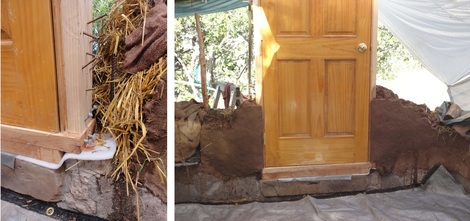
Wood elements in contact with concrete must be protected. They make an inexpensive material for this purpose. You can see it here under the door frame. Notice the bolts and screws to achor the cob to the door. I made the door sill from two pieces of cedar glued and clamped together.
This cob is as thick as in a traditional cob building. I usually don't work this thick, so I'd forgotten about drying holes which I bored with the cobber's thumb after I took this pic.
Oh, and lastly, the "adobe" earthen floor will be one foot thick so it will come up to the level of the door.
What an exciting day!!!
One year, three months: this Austrailian homestead took thirty years to build.
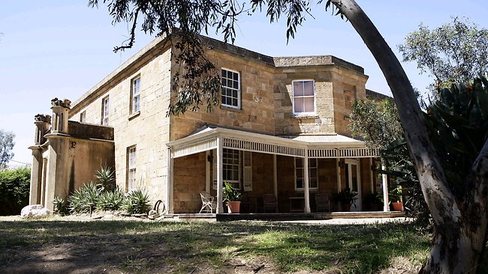
As I've said, it's difficult to work only in the summer. Just when I start getting great rhythm and physicality, I have to go back to teaching. But if you figure the five years I've worked on this for three months at a time, I've put in fifteen months now. I watch stick houses go up in a week or two. But this Austrailian homestead took 30 years to build and is now 150 years old. Think of European buildings of stone or earth. Good buildings take time.
Sketches
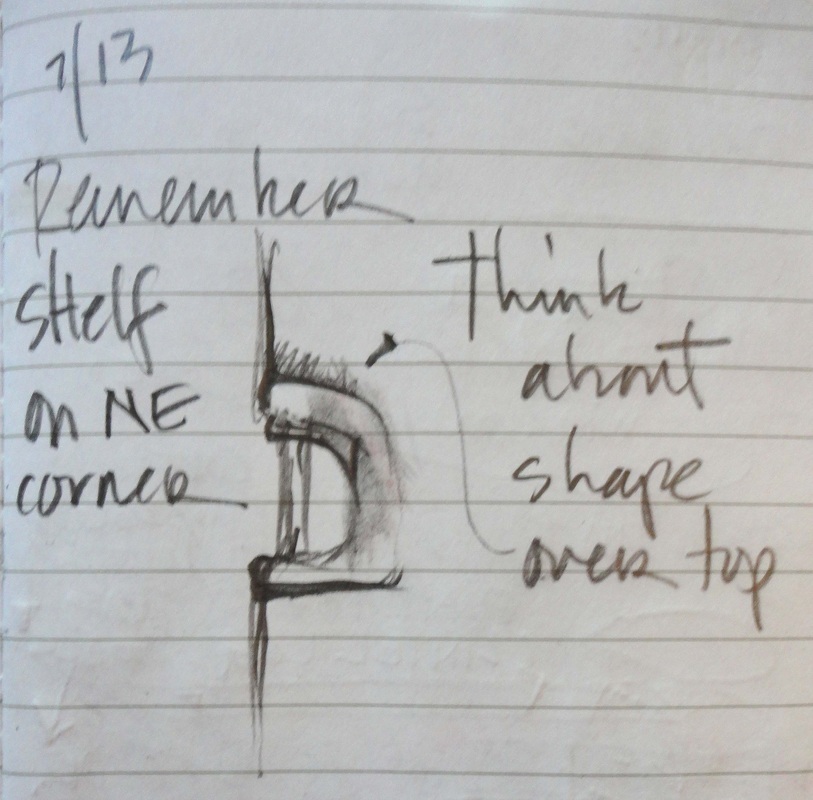
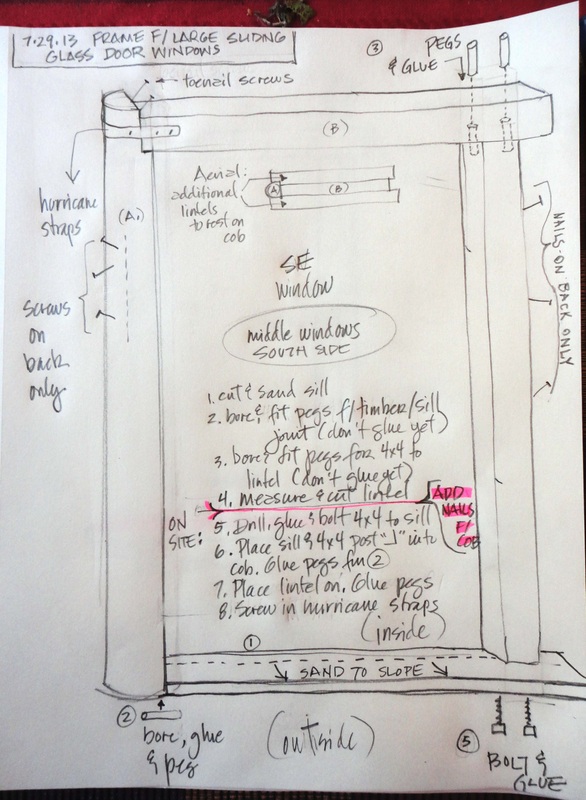
The last thing I do on any given work day is sit down and enjoy myself. I also usually walk around and look at things and this is when I get ideas. I have a little notebook to keep track of what I need to bring up to get a job done, what I need to make, buy, remember... Dating these sketches is a good idea, because sometimes they become outdated with new ideas.
Here are a few sketches. The first two are from the book. The one on the right shows a more developed drawing figuring out the frame for the big middle windows on the south side.
Here are a few sketches. The first two are from the book. The one on the right shows a more developed drawing figuring out the frame for the big middle windows on the south side.
August 2nd
Now that one door is in, it feels like the walls will rise more quickly. Alas, I must count the few days I have left to work before my teaching obligations begin. It was a wonderful day, though, with Lisa and the boys. We do the same amount of cob as I do on a day by myself, but It's so much fun to have the company.
|
On the chicken coop, the vertical poles for pajareque resulted in an exterior that looked like basketry. These walls are thicker, but I decided to sculpt the curves on the the surface anyway.
|
Lisa cobbing on the inside of the wall pictured to the left. It has a platform for half straw bales cut lengthwise; they will be added after the roof is up..
|
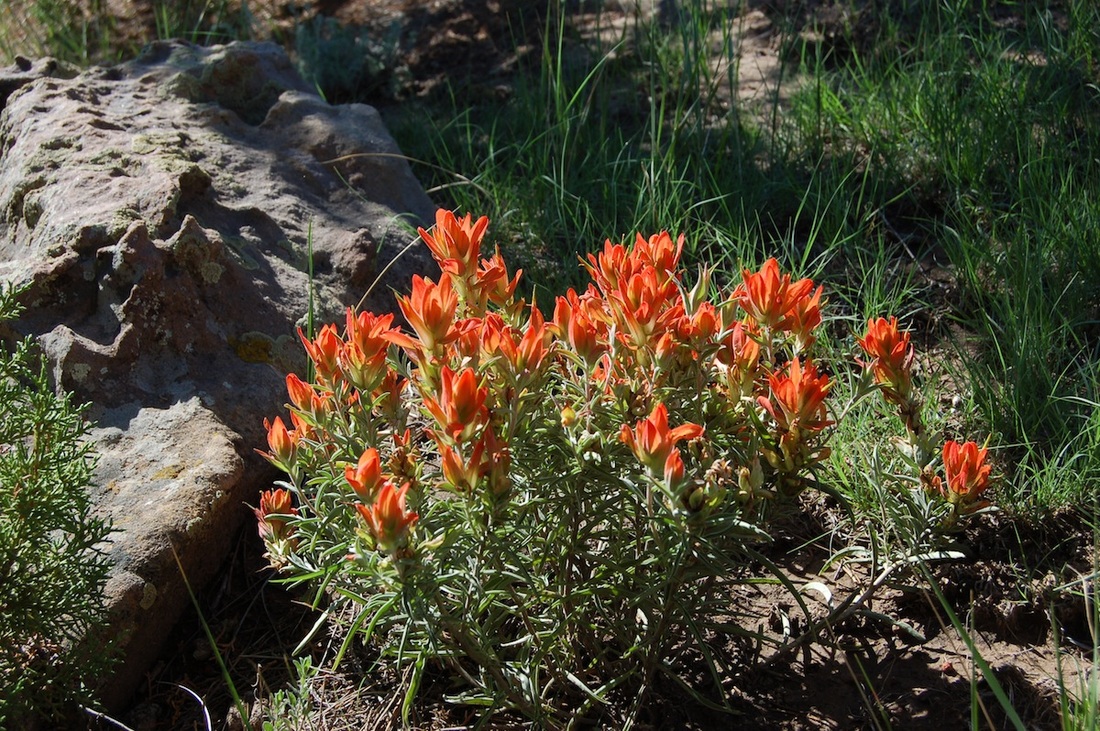
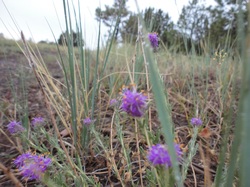
Indian Paintbrush, one of my favorite wildflowers. Finally we've been getting rain and the plants on the hill are looking happier. To see a video of the boys playing in rainwater in the building site, go to :
http://youtu.be/sR7UAo5xbnc |
August 6th, 2013
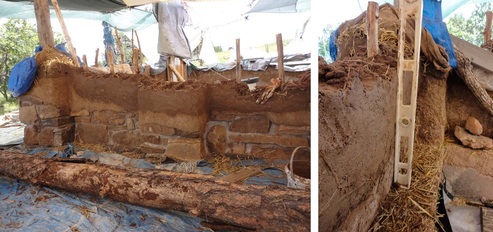
This is the outside and inside of the North wall. It's starting to look like a building, right?! Windows go in at top of sticks.
As mentioned, at the end of the day, the top of the wall needs "spines and ribs" to give the next passage "tooth" to hang on to. Because of the stepped levels (higher at the corners), the areas between the ribs are also stepped.
As the wall get's higher, it's important to use the level to make sure it is indeed going up.
TRIMMING:
If the wall bulges, you can trim it with a saw or a machete. It's really very easy to cut away unwanted material. I prefer the saw because I feel that the fewer dangerous tools that are about, the better off we are. The saw also curves nicely to accommodate angles of the wall.
Take the bits that are trimmed of and you can add a little water and make a new cob.
If you want to add cob to the wall in a vertical place, spray and slip both the wall and the bit of cob you're adding, then use the cobbers thumb as well to stitch it into the wall. lastly, you can smooth it out. This won't work if the wall is completely dry. But I had an area that was "green" that had sloped in too much, so I added a few bits of cob to bring it back out.
BREAD AND BUTTER:
My teaching obligations begin soon as does a friend's wedding, so cobbing is going to slow down. Patience....patience. It's difficult, though, because after years of work on foundation and stone, this is the fun part, the sculpting of walls. I'll also have to figure out how to protect what's been done over the winter. I think I will buy remnants of cotton tarps, put a board between each corner post and drape the tarp over the board. Then make a little tarp cover for each corner.
I can probably work into October on weekends and there may be a couple of students who want to learn, so we're not quite done for the season. I hope you're enjoyed seeing this season's progress. Slow but sure. If I can do it, anybody can.
Cobbing review:
Only a few days left
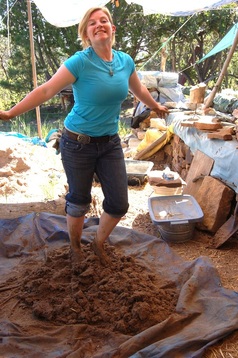
Since teaching has begun, I've only been able to get in one work day, but a student, Carolyn, came to learn and help. Colorado has had a lot of rain in the last couple of weeks since and I need to get up to do some maintenance. Soon, the building season will come to a close and I'll have to cover things to protect it all from winter weather.
In the Northeast corner, the main corner seen upon approach to the building, I'd decided to make a major niche. It will add about 10˚ to the view when sitting on the cob bench and be a nice place for a lantern.
During the last workday, I embedded stones in the cob and a vertical post for the niche, seen below.
