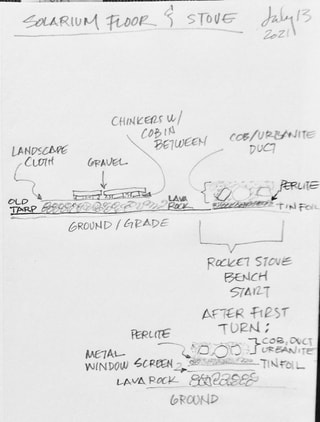
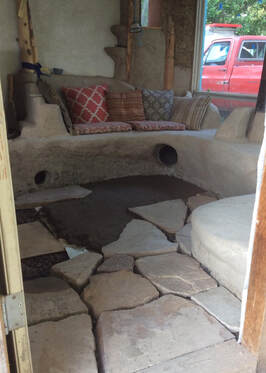
Solarium floor completed July 15, 2021
|
Diagram for my layers under flagstone by the door.
|
|
I have a lot of experience with cob, but this was my first earthen floor. This book was my guide & it went very well. It does say the floor is best at one foot thick, but the cob/adobe on my floor was only 3-4" thick & it has stood up to 3 winters with snowy boots, wood being hauled in for the rocket mass heater, dogs & a rolling office chair.
Just read it carefully. 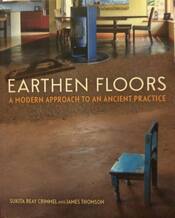
BELOW: I used old tarps laid on the ground & lava rock for insulation. Rock was acquired free on facebook marketplace. I had to shovel it up & haul it, a noisy sweaty awkward job, but free!
Tamp rock with a metal plate tamper. |
|
|
On top of the lava rock I laid sheets of paper (discarded art a friend of mine gave me).
Below: Floor & bench layering diagram.
|
Right: First layer of earthen mix uses all clay from on-site clay pit. I also used course sand left over after sifting sand for plasters.
A typical earthen floor is about a foot thick made up of 5" or so of base material that uses gravel aggregate, then a few inches of second layer & an inch of two of final for a total of a foot thick. For my solarium I am trying much thinner. LEFT: paper Senga Nengudi gave me. Her installation art is now in MOMA, the Tate, the Whitney & more. I should have saved this drawing! It's like that Van Gogh his dentist put in his chicken coop.
|
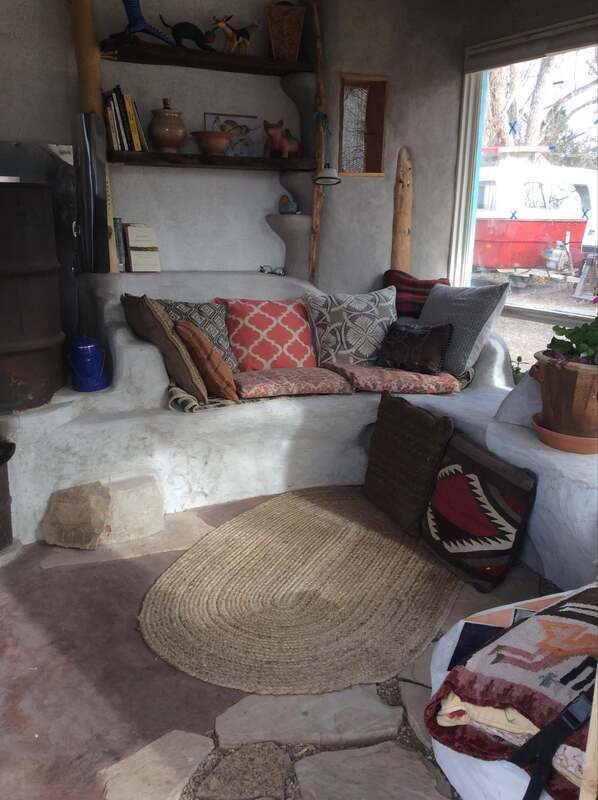
Below: finish layer complete
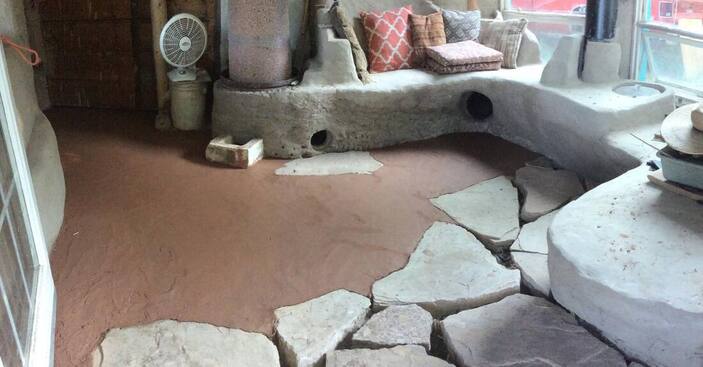
The finish layer varies in thickness from about an inch to half an inch.
I knew I wanted color in the floor (vs. very pale gray of dried clay from the ground which is seen in the bench (& which oddly, is a light orange when I dig it). But all I had was about one full bucket of pottery clay orange & browns. So I mixed them together & my plan for ratios was:
pottery clay 1 : 2 sand So I made mix w/more pottery clay 2: 4 sand
clay fm pit 1: 1 sand clay fm pit 2: 2 sand
Finish mix was:
– colored clay – pit clay
– sifted sand – chopped straw
– some red masonry pigment (as in all finish batches, two capfuls dry
I thought I might run out of colored pottery clay & I'd gotten as much as I could out of the barrel with the shovel, but in laying down finish layer I got to the last corner by the door & ran out of material. I needed enough for the space of about two flagstones.
What to do? Also out of sifted sand & the sifter was up on the mountain. So I used a synthetic screen purchased to repair camper windows & tied it to the top of a bucket. I was able to sift another bucket of sand.
I looked in the colored clay mixing barrel & figured there was enough dredges from colored clay to make a small batch of finish material which I did right in the barrel.
This last batch of material was EXACTLY enough to finish the job. Not one spoonful to spare!
|
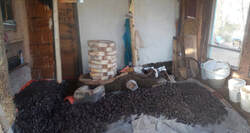
Right: Over the years I've used many dozens of buckets of pottery reclaim (90 for the chicken coop!). It is most useful for plasters as it is so sticky & of course there are clays of many colors. But during the pandemic the university classes were curtailed & it seems many local potters made far fewer pots so much less reclaim has been available.
Therefore, I'd been careful to set aside some colored clay for murals, especially the dark brown used on the cob oven and some white. But for the solarium I wanted a colored floor. I had 4 partial buckets of usable color, orange & browns. I emptied them into the big molasses barrel I use to soak clay & stirred them together with my giant drill. As mentioned above, to make sure there was enough color I added some dried up masonry pigment I've had for over 15 yrs., though this was done by adding to water then tossing it in the cement mixer when making batches of material. |

|
Last thing was three coats of linseed oil painted one after the other until it stopped soaking in, then wiping off excess & letting it dry for many days (instructions in the book recommended above). Then a final layer of Bioshield Carnuba wax. The product seems somewhat expensive but a little goes a very long way.