One way to insulate walls. August 2018
The plan had always been to use rigid insulation on the wall but I wasn't sure how to adhere it to the cob.
Two methods that work great:
1. I discovered screws can be put into cob! (I used 1.5") It crumbles a little for the first half inch or so but then it locks in. I wouldn't use it with something pulling on it straight out, but it worked to put a wire on perpendicular to the screw to hold rigid insulation with baling wire. A final twist on the wire tightens it.
2. We'd discovered light straw clay is great to take up gaps between rigid insulation and cob and it also adheres it to the cob, but using Carol Crews method of dipping burlap in slurry with glue, I used that slurry/glue mix with the light straw clay between rigid insulation and cob to add to it's adherence.
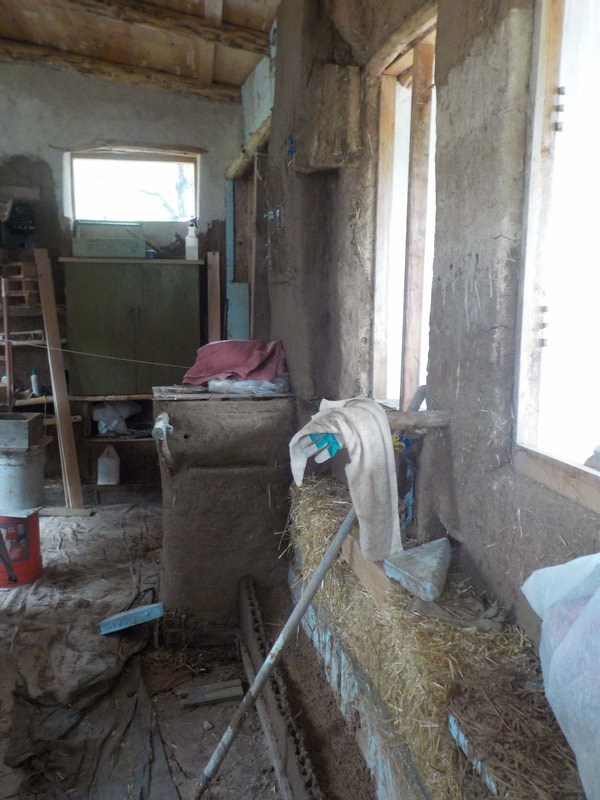
After rigid insulation scraps (from Art building re-roofing) were on the wall, I filled gaps with light straw clay and then I rounded corners with the long thin kitchen knife I also used to cut up insulation (cut deeply then snap apart).
Lastly, burlap dipped in slurry/glue mix pinned to the insulation with large staples I made out of baling wire and BOOM! Wall is ready for earthen stucco. (about 3/4 c. Elmers glue to about 1.5 gallon of slurry...it thickens up a lot, so I add more water but have to stir it frequently as it wants to separate out some of the water).
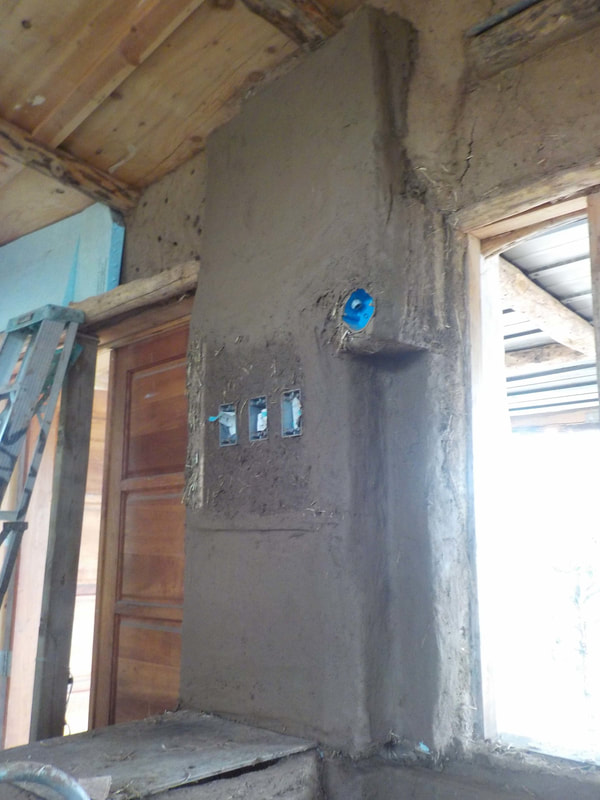
Note: Electrical elements have non-flammable fiberglass insulation around them then a thin layer of cob.
Below left: Looks a bit of a mess, right?
Rigid insulation with gaps filled in with light straw clay. Below right: details.
Two methods that work great:
1. I discovered screws can be put into cob! (I used 1.5") It crumbles a little for the first half inch or so but then it locks in. I wouldn't use it with something pulling on it straight out, but it worked to put a wire on perpendicular to the screw to hold rigid insulation with baling wire. A final twist on the wire tightens it.
2. We'd discovered light straw clay is great to take up gaps between rigid insulation and cob and it also adheres it to the cob, but using Carol Crews method of dipping burlap in slurry with glue, I used that slurry/glue mix with the light straw clay between rigid insulation and cob to add to it's adherence.
After rigid insulation scraps (from Art building re-roofing) were on the wall, I filled gaps with light straw clay and then I rounded corners with the long thin kitchen knife I also used to cut up insulation (cut deeply then snap apart).
Lastly, burlap dipped in slurry/glue mix pinned to the insulation with large staples I made out of baling wire and BOOM! Wall is ready for earthen stucco. (about 3/4 c. Elmers glue to about 1.5 gallon of slurry...it thickens up a lot, so I add more water but have to stir it frequently as it wants to separate out some of the water).
Note: Electrical elements have non-flammable fiberglass insulation around them then a thin layer of cob.
Below left: Looks a bit of a mess, right?
Rigid insulation with gaps filled in with light straw clay. Below right: details.
|

|
How good does this look, even before earthen stucco! I was very pleased with the outcome.
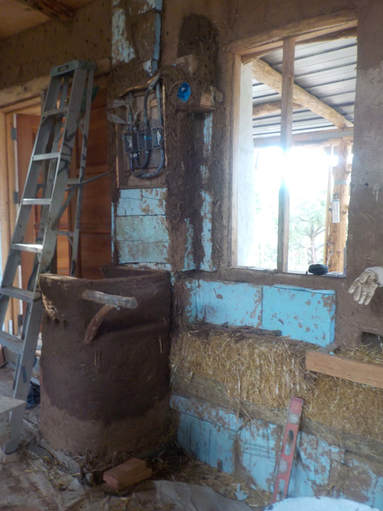
Perlite/vermiculite insulation begins preparing for rocket stove.
My son has returned from Europe and has begun to help with the rocket stove. He's working on dimensions for a six inch system. We are also locating supplies: bricks, stovepipe (not easy to find repurposed), etc. Niko gave me great tip for place to purchase perlite in CO Spgs.
At any rate, Jen D. had made cob, both with and without straw (with for around electrical boxes; without, to hold in perlite insulation next to bales). This wall had originally been designed to hold bales all the way up in a balecob wall but I changed my mind about where the rocket stove will be and it will not be in this NE quarter of the building meaning we need good insulation between it and the rigid insulation and bales. Likely, it would have been sufficient by itself. But then, what above it? So this works. Middle post between windows will have rigid insulation, cob sides to shelves and wood shelves I think.
Here is the tiny cob wall going up with rigid insulation packed between it and the half bales and rigid insulation.
|
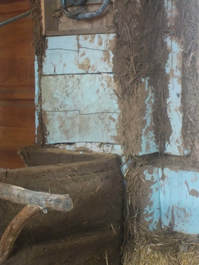
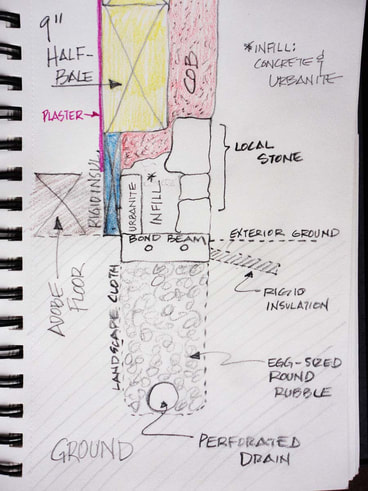
To the right is a reminder/diagram
of the balecob wall design. What you see in the photo above is the blue rigid insulation and the half bale sitting on top, adhered to the wall with clay slurry. Not in the diagram is the perlite packed behind mini cob wall. |
|
