2020 Stay at home project: cob oven, bench, walls & greenhouse
I retired from my teaching position last fall and being an at-risk age for coronavirus, we've been working on a project at home. "We" being me and my friend Jen when she is not working at organic farm east of here.
SUN PORCH CONCEPT: It can get very cold in Colorado in the winter and my front door and adjacent cob bench are on the north side of my home, so they stay very cold! We find ourselves sitting on the south side of my garage-turned-studio in the afternoon low sun, but it is often in snow. So, I've been thinking about a porch there and also a workshop to teach/share what I know, so that's how the project began. After one weekend of workshop the pandemic put a halt to group meetings so Jen and I have continued alone. A greenhouse concept was added to the whole idea with big windows I was given years ago.
SUN PORCH CONCEPT: It can get very cold in Colorado in the winter and my front door and adjacent cob bench are on the north side of my home, so they stay very cold! We find ourselves sitting on the south side of my garage-turned-studio in the afternoon low sun, but it is often in snow. So, I've been thinking about a porch there and also a workshop to teach/share what I know, so that's how the project began. After one weekend of workshop the pandemic put a halt to group meetings so Jen and I have continued alone. A greenhouse concept was added to the whole idea with big windows I was given years ago.
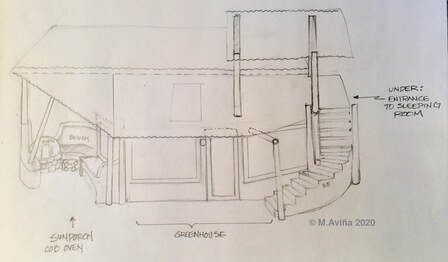
Initial sketch:
This is the drawing I started with. As is often the case, it became an organic process: once the oven was in, the size of the sun porch as seen in this sketch seemed way too small. The porch grew so the greenhouse shrunk making it mostly windows which will eliminate steps and crows nest.
|
|
For materials:
• I used the last of my urbanite pile,
• have gone for three truckloads of sand so far (two one ton, one half ton),
• all the clay so far has been reclaim from local potters (plus a little left over from the mud mural project at school)
• all timber is from my rural land we harvested in fire mitigation and
• so far all roofing is repurposed. As of this writing on July 20th, the last phase of the greenhouse remains to be done as well as a mud mural on adjacent building behind oven & the stucco on the bench as well as flagstone in the sunporch patio flloor.
Phase 1: Site & start of Cob oven.
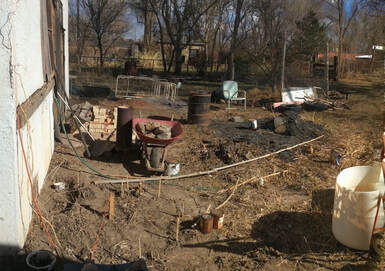
This site was the most distressed area on my half acre property with tall weeds, burn pile & assorted materials detritus.
|
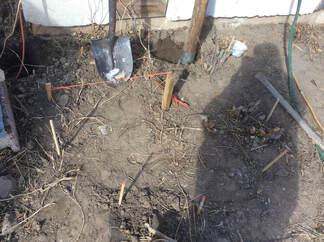
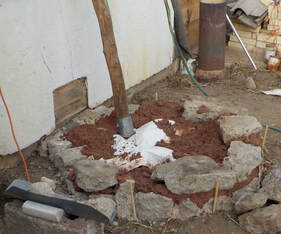
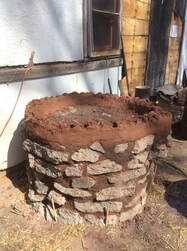
Step 1 Oven footprint: I started by marking the 48" footprint with a center post and a 24" string compass to mark the perimeter.
|
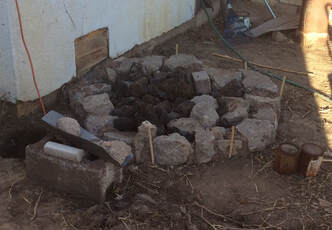
FOUNDATION: I have done a cob oven with a 20" deep foundation in ground, but for this one which will be covered by a porch I decided if the soil mounds up under it and there is good drainage, I can forego a deep foundation. However, on the very unlikely possibility that water would every get under it & freeze, I put interior rubble down in such a way that freezing water would have a place to expand; ie. not flat. On top of that I put feedbags so subsequent earthen mortar put on top would not fall into those gaps at ground level. All mortar & earth put into the base was tamped.
Mortar between urbanite perimeter is simply a sand/clay mixture about 2:1.
Mortar between urbanite perimeter is simply a sand/clay mixture about 2:1.
|
|
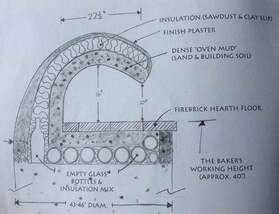
Kiko Denzer's book "Build Your Own Earth Oven" is the guide for the oven. To the left is his diagram illustrating the side cut of the layers in the oven. In order to pay heed to all details you need to purchase his book to get it right.
BELOW: The sequence in photos following his guidelines.
BELOW: The sequence in photos following his guidelines.
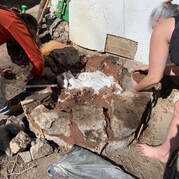
The left & center image shows how far we got in the first workshop before the shelter at home began. The image on the far right begins what has been solo or with help from Jen D.
|
Notice the right side of the whole base is cantilevered at the top. This allows a bucket to be put under the exterior of the oven door for sweeping ashes & coals out of the oven before baking.
|
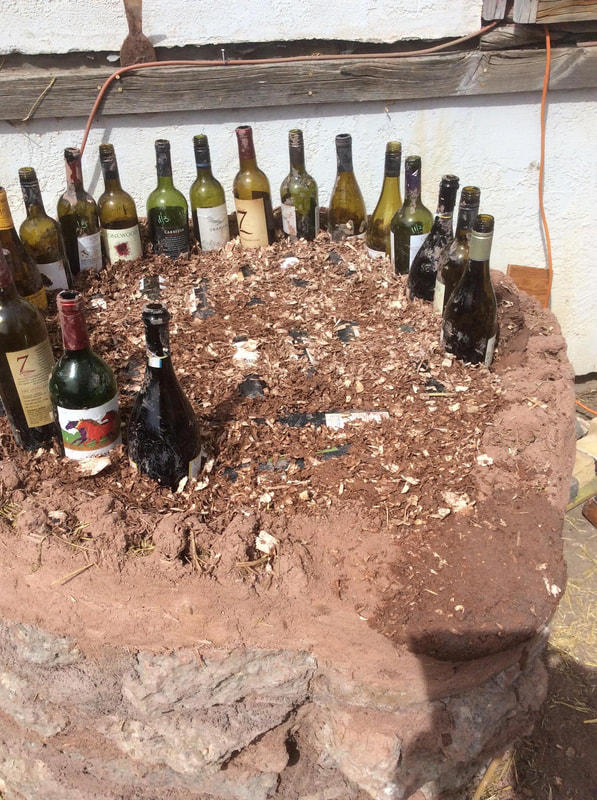
ABOVE: Lip is built up to receive insulation.
|
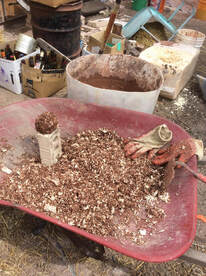
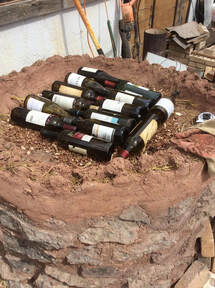
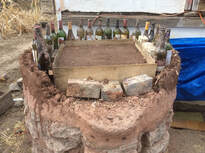
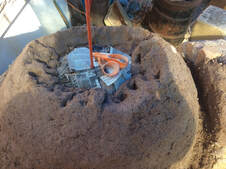
BELOW: Left/Insulation made by mixing clay slurry plus wood shavings (from feed store) so a compressed ball neither falls apart nor drips slurry when squeezed. Center/bed of wine bottles for insulation. Right/circle of wine bottles & insulation packed around all.
|
|
|
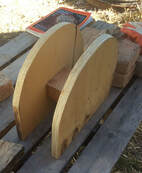
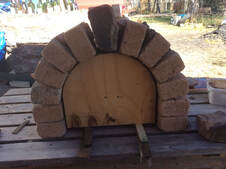
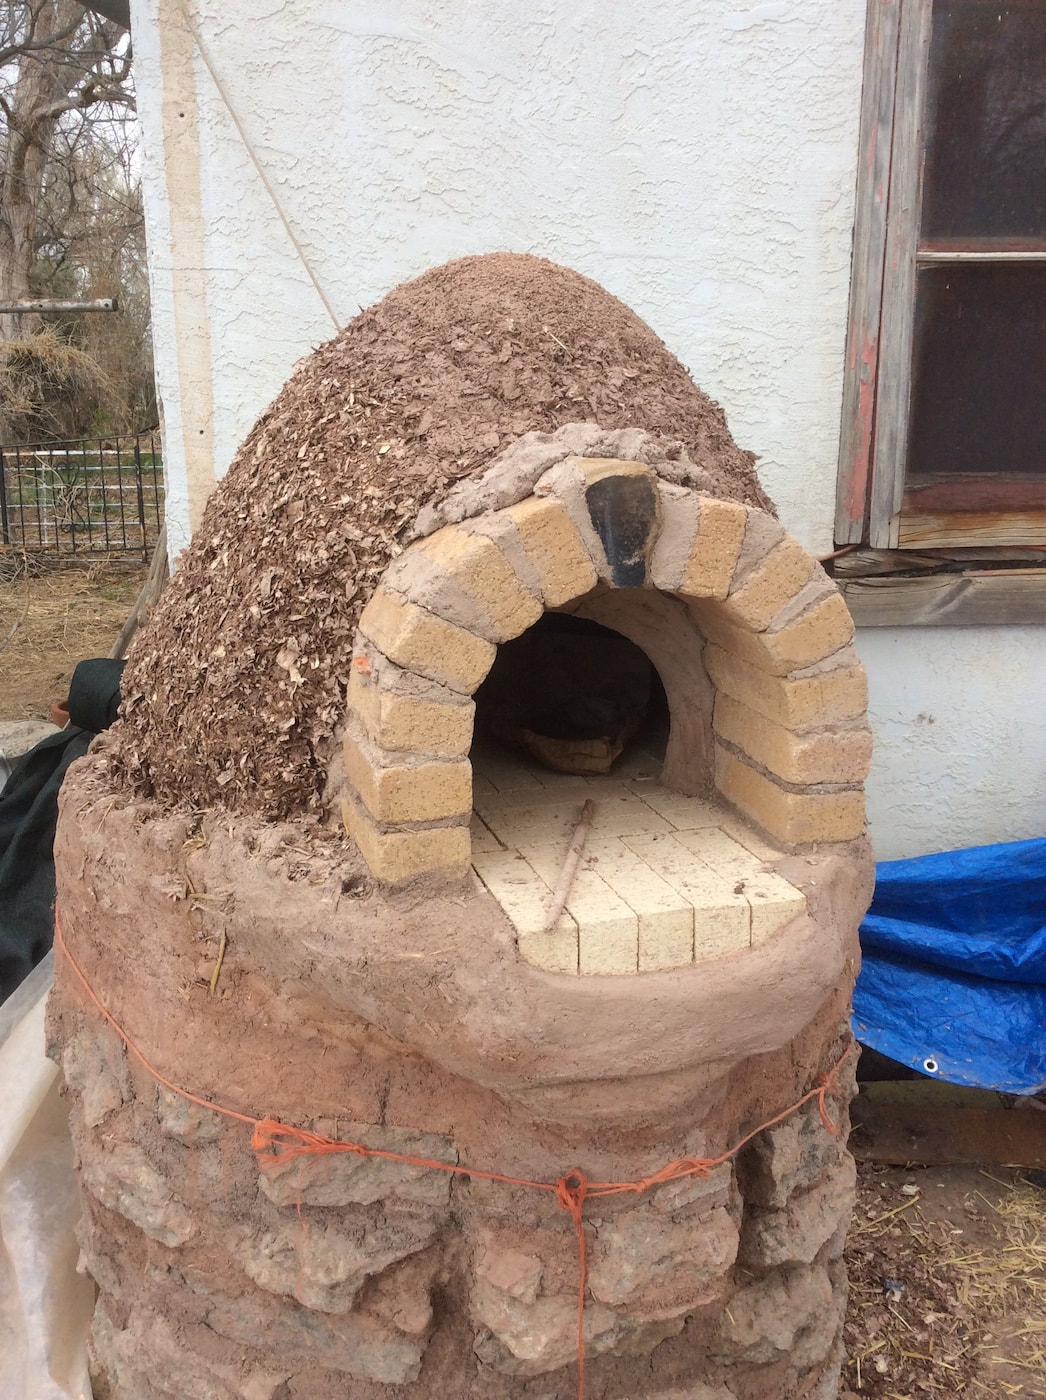
BELOW: Making the arch. Left/the form. Middle/note the shims under the form to facilitate form removal. Right: Walah! She stands. I'd tried an arch on my first cob oven but it didn't work. Maybe I neglected the little stones between bricks to hold their place. They are essential embedded between mortar in the finished arch.
|
|

|
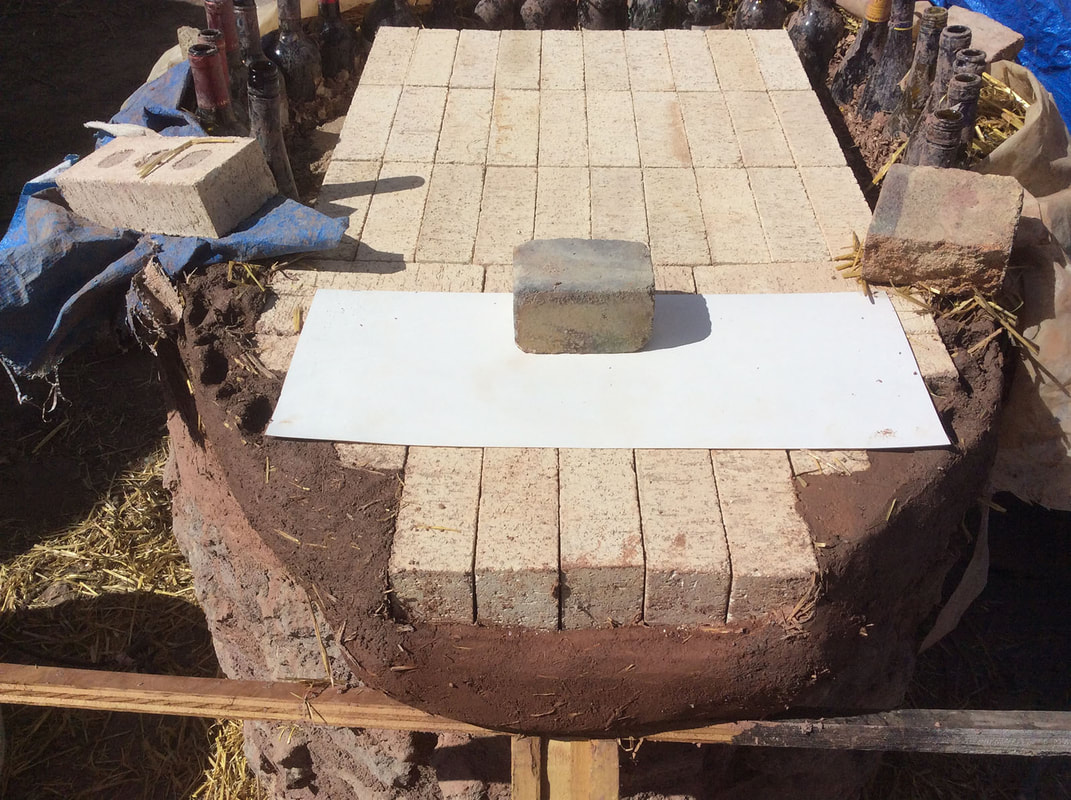
BELOW: Next, Left/make a sand & clay bed for the oven which along with walls heats up to do the baking. Center/after packing more insulation between bottles & oven bed, a bit of sand is put down so laid bricks' height can be adjusted. Right/bricks are all laid & made level. Location of arch is planned with sheet of paper.
|
|
|
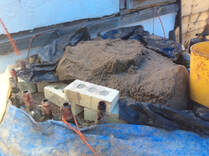
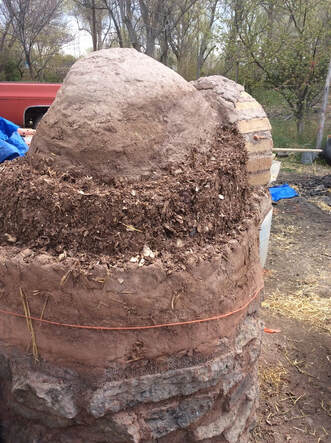
BELOW: Left/this is the beginning of a dome of sand. It is NOT THE SAME AS THE MIDDLE IMAGE. It was impossible to photograph the finished dome because I covered it with thin strips of plastic & newspaper in order to hold moisture in our arid climate & not collapse, & also so that when the sand was removed none of it adhered to the walls.
Middle: ON TOP OF THE SAND DOME (under paper) is a thick layer of oven mud (sand & clay). Right: Completed inner oven. After the oven dries or is nearly dry, the sand is removed from within.
Middle: ON TOP OF THE SAND DOME (under paper) is a thick layer of oven mud (sand & clay). Right: Completed inner oven. After the oven dries or is nearly dry, the sand is removed from within.
|
|

|
|
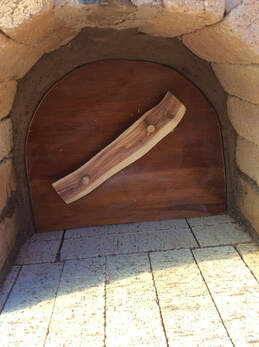
Right: The oven mud is sculpted around your door which was made prior. The back of the door is beveled inward on all sides. (Door is soaked in water while firing oven.) Below: On top of the earthen oven goes several more inches of insulation seen on the left in progress & on the right complete. |
|
|
|
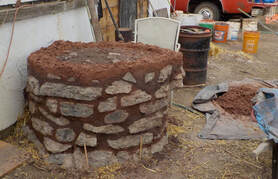
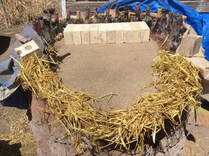
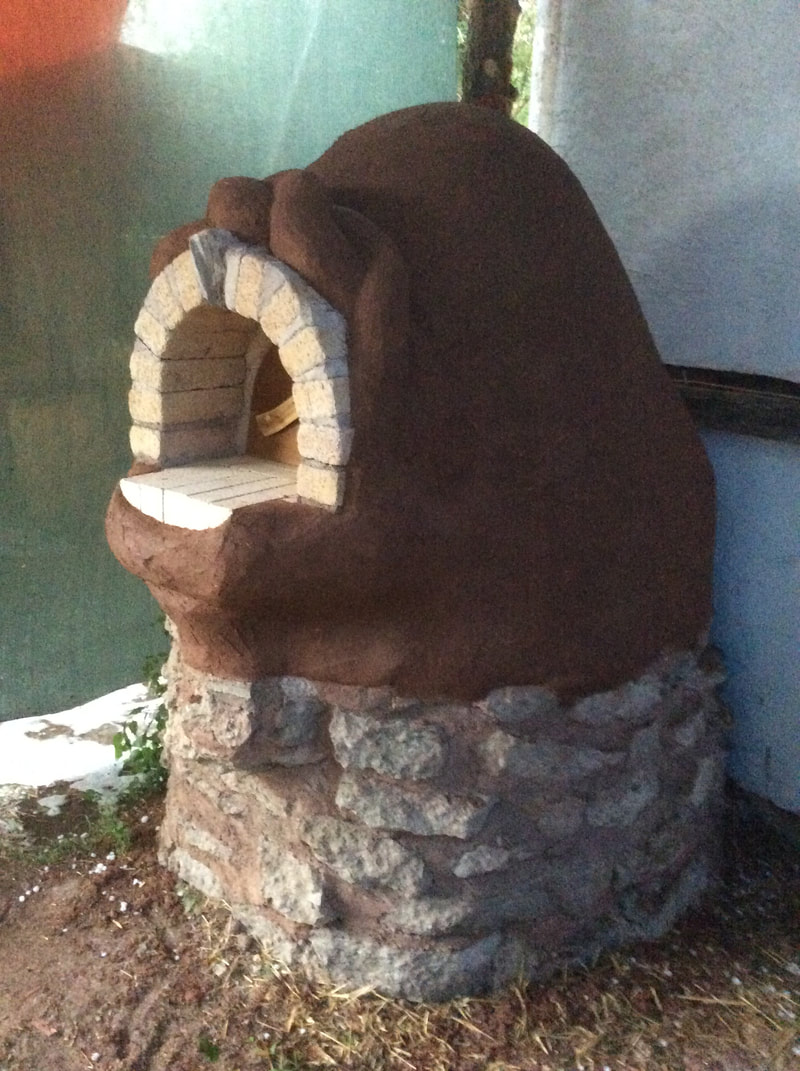
BELOW: Left/Final layer of mud stucco with finely chopped straw begins, put on top of insulation. I also wove together cob corbels to structurally enhance the arch.
Right: I loved the color of the clay when it was wet so I gave the oven a final coat with a chocolate-colored clay..
Right: I loved the color of the clay when it was wet so I gave the oven a final coat with a chocolate-colored clay..

|
|
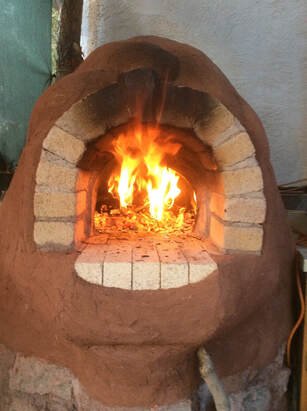
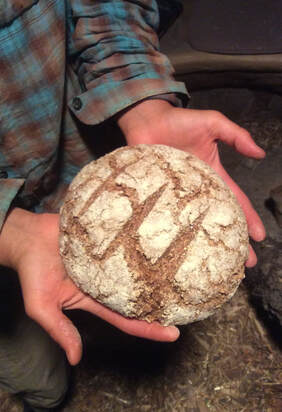
BELOW: We learned with our first firing to keep the wood near the oven door where the oxygen is, otherwise unburnt wood falls to the back of the oven acting as insulation probably keeping the whole thing from maximum heating potential.
Other than that, it worked! And it's a lot of fun!
Other than that, it worked! And it's a lot of fun!
|
|
